Lesson MINI

Britannica School logo in navy blue and green text

LESSON MINI

Jumping and Splashing with Amphibians

Grade:

K-2

Topic:

Animals

Unit:

Animal Traits
Eye icon in white on red background

Overview

Pale pink axolotl with feathery external gills on rocky surface.
© Paul Starosta—Stone/Getty Images

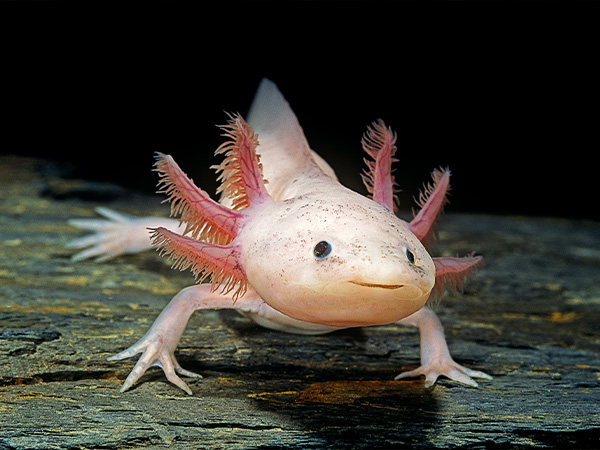
In this lesson mini, students explore amphibians and their unique traits, such as specialized tongues and camouflage. Students engage in a variety of activities, including sorting exercises, craft projects, and camouflage games, designed to enhance their vocabulary, observational skills, and content knowledge.

Ideas for Implementation
Science
Literacy
Library media
Learning centers
Intervention or enrichment
Interdisciplinary collaboration
Key Vocabulary & Definitions
amphibian (noun): a type of animal that can live both on land and in water, such as frogs and salamanders
caecilian (noun): a kind of legless amphibian that burrows in the ground and lives in tropical places
camouflage (noun): an animal’s use of body colors to match its surroundings in order to help it hide
salamander (noun): a kind of amphibian that has smooth, wet skin and looks like a lizard
trait (noun): a quality or characteristic that makes something special, like its body parts, color, shape, behavior, or size
Authentic Learning Extensions
Authentic learning opportunities for studying amphibians involve real-world experiences and practical applications that help students understand biology meaningfully. Here are some examples:
Amphibian Art and Awareness Campaign: Have students create posters, artwork, or digital presentations about the importance of amphibians in the ecosystem and ways to protect them. Display their work in the school or community to raise awareness.
Amphibian Sounds Study: Record and analyze the calls of different amphibian species. Students can learn to identify species by their calls and understand the role of vocalizations in amphibian behavior and reproduction.
Hands-On Amphibian Skin Experiment: To explore amphibian skin properties, use an unpeeled hard-boiled egg, a peeled hard-boiled egg, two cups of vinegar labeled “amphibian” and “other animal,” and food coloring. Have students read the “Features of Amphibians” section of the Amphibian article, focusing on how many amphibians have moist skin that they breathe air through. Add a drop of food coloring to each cup to represent air. Place the peeled egg in the “amphibian” cup and the unpeeled egg in the “other animal” cup. Explain that the peeled egg represents an amphibian that can breathe through its skin, while the unpeeled egg represents an animal that cannot. After letting the eggs sit for at least 24 hours, cut the peeled egg to show how the food coloring (air) permeated its “skin.” Then peel and cut the unpeeled egg to demonstrate that the food coloring did not penetrate, reinforcing the concept of amphibian respiration through their skin.
Interactive Guest Speaker Sessions: Invite herpetologists or conservationists to speak to the class about their work with amphibians. Students can prepare questions in advance and engage in a Q&A session to deepen their understanding of amphibian biology and conservation.
Pond Ecosystem Study: Take students on a field trip to a local pond or wetland. Have them observe and document the various amphibian species they find, noting their habitats, behaviors, and interactions with the environment. Students can create a field journal with sketches and notes from their observations.
School and Community Toad Abodes: Have students create homes for toads and frogs by decorating small plant pots. Remind them that frogs and toads, like many amphibians, prefer to live near water because it keeps their skin moist and helps them find food. Have students tip their pots on their sides and place them outside near a water source on school grounds or around the community. If no water source is nearby, instruct students to place the pots in shaded areas, as shade retains moisture better than sunny spots. Encourage students to periodically check their pots for any toad or frog inhabitants, integrating real-world observation with their learning.
Water Quality Testing: Conduct water quality tests in local ponds or streams where amphibians live. Students can learn about the impact of pollution on amphibian habitats and write reports or create presentations on their findings.

Choose Activity

4
Jumping and Splashing with Amphibians

Activity

1:

Sorting Amphibians

By the end of the activity, students will be able to define key vocabulary words related to amphibians and use them in a sentence.

20-30

Minutes

Materials

Natural objects and landform images (e.g., trees, flowers, rocks, beaches, waterfalls, and mountains)
Whiteboard and display

Resources

1
Tell students that during today’s activity they will sort and discuss amphibian picture cards based on shared traits and characteristics.
2
Gather students in a circle, and have them sit on the floor. Tell students that they’ll start the activity with a game.
3
Show students a few images of natural objects and landforms from ImageQuest Jr., Britannica School or another royalty-free source. Choose images that could be grouped in different ways, like size, color, and location. For example, you might include a palm tree, a beach, a wildflower, and a meadow. Point to each image, and have students name or describe it. Invite students to identify similarities between the images with questions like:
What does that picture show?
What other pictures show something in a forest?
I see a few more animals. Do you?
4
Congratulate students on their sorting. Summarize each group’s work. Point out that there are multiple ways to sort the pictures.
5
Tell or remind students that they’re learning about a group of animals called amphibians, a type of animal that can live both on land and in water, such as frogs and salamanders.
6
Display the Amphibian Sorting Cards for the whole class to see, explaining that all the picture cards show amphibians. Working in groups, students sort the pictures into what they think are “like” groups—those in which all the animals are alike in some way. Tell students that there is no one correct answer and that they should discuss the cards as a group and sort the cards in a way that makes sense to them.
7
Separate students into groups or pairs. Display the following sentence frames in a visible location for all students, and distribute a set of picture cards to each group:
Both of these pictures show ___.
All of these pictures show ___.
These pictures are different. This picture shows ___. This other picture shows ___.
8
Give students time to sort their cards. Visit each group, and encourage students to use the sentence frames card to describe their pictures. Ask them about their grouping choices, and encourage them to explain their reasoning for how they sorted their groups. You might ask questions such as these:
What animal is this?
What traits do you see?
9
After students complete the sorting activity, ask groups to share and explain their sorts. Point out when groups have sorted their images differently to show and discuss their thinking as a class. You might ask questions such as these:
Why did you put these pictures together?
What traits do you see in these pictures?
What could we call this group of pictures?
How is the caecilian like the other animals in this group? How is it different?
What do all of these amphibians have in common?
What’s another way you could sort these pictures?
10
Emphasize that there are a few different ways students might have grouped these pictures: by kind of animal, body parts, actions, or other specific traits, such as color, and that these are all great choices.
11
Tell students which picture is your favorite, and why. Ask students what their favorite picture is, and why. Summarize their answers with vocabulary words when possible.
Guiding Questions and Sorting Criteria: Provide each group with a list of guiding questions, including those with sorting criteria to help them think about how to categorize the pictures. Examples of such questions include the following:
What do these pictures show?
What body parts does this animal have? Does this other animal have any of those body parts?
What are these animals doing? What other animals do those things?
Where do these animals live? What about these animals?
This supports students by giving them a clear framework to organize their thoughts and approach the task systematically.
Venn Diagram: To enhance this activity, ask students to create and present a Venn diagram to compare and contrast the characteristics of different amphibians. This requires that students use critical thinking skills to analyze and synthesize information, deepening their understanding of the similarities and differences between various amphibians.
Classifications: Introduce a chart or table for students to classify the characteristics of each amphibian. Possible chart characteristics may include the following:
Name of the Amphibian
Habitat (land, water, both)
Color
Size
Distinctive Features (e.g., webbed feet, smooth skin)
Diet
Behavior (e.g., jumping, swimming)
Team Teaching: For collaborative teaching and learning environments, this learning activity is well suited to a Team Teaching strategy. In this model, both teachers deliver instruction together, often alternating or integrating their teaching styles seamlessly, sometimes referred to as “tag team teaching.” This collaborative approach provides students with multiple perspectives and teaching styles, enriching their learning experience. By modeling effective teamwork and communication, this approach demonstrates how different viewpoints can enhance understanding and create a dynamic and interactive classroom environment. Evidence indicates that team teaching can enhance student engagement and provide a richer, more diverse educational experience.
Sorting Activity: Teacher A asks guiding questions and interacts with students as they sort the pictures into groups, while Teacher B assists by providing additional support and encouragement to ensure all students participate.
Discussion and Summary: Both teachers congratulate students on their sorting, summarize each group, and emphasize the multiple ways to sort pictures.
Introduction to Amphibians: Teacher A explains the concept of amphibians, using picture cards to illustrate, while Teacher B assists with showing the cards and ensuring students understand.
Group Work: Divide students into groups or pairs, with each teacher facilitating different groups. Both distribute picture cards and guide students as they sort the cards into like groups, encouraging discussion and reasoning.
Monitoring and Support: Both teachers visit groups, asking questions about grouping choices and prompting students to explain their reasoning.
Sharing and Reflection: Refocus students’ attention, and have groups share their sorts. Teacher A leads the discussion on different sorting methods while Teacher B points out and discusses different groupings, emphasizing the validity of various sorting methods.
Personal Favorites and Vocabulary: Both teachers share their favorite pictures and ask students to do the same, summarizing students’ answers with relevant vocabulary.
Jumping and Splashing with Amphibians

Activity

2:

Naming Amphibians

By the end of the activity, students will be able to identify and describe traits of various amphibians based on information from texts or videos.

20-30

Minutes

Materials

Amphibian images (e.g., frogs, toads, salamanders, axolotls, and caecilians)
Markers or crayons
Sticky notes (one pack)
Whiteboard and display

Resources

1
Tell students that during today’s activity they will observe and describe various amphibians’ traits, like body parts, color, and size, in a sticky-note activity. Specifically, they will explore animal traits of amphibians, animals that can live both in water and on land, such as frogs, toads, and salamanders.
2
Remind students that traits are qualities or characteristics that make something special, like its body parts, color, shape, behavior, or size.
3
Ask students to name a few traits. Affirm and discuss their ideas.
4
Display the chosen amphibian images for students. Tell students that all of these animals are amphibians. Remind students that amphibians are a type of animal that can live both on land and in water, such as frogs and salamanders.
5
Have students point out animals they recognize. Ask questions such as the following:
What can you tell me about this animal?
What traits do you see?
What color is this animal?
Is this animal small, medium, or large?
Can you name this animal’s body parts?
6
Affirm students’ answers and observations. Name and label each amphibian. Have students practice saying caecilian (suh-si-lee-uhn). Tell students that caecilians are amphibians with no legs and that they are found in warm tropical places.
7
Tell students that they will complete an activity to fill the display with observations about the traits of each of these animals.
8
As a class, complete the activity for the frog picture. Read or use the read-aloud feature for the “More About a Frog’s Body” section of the Frog article. Then ask the class to name two frog traits. Write or have students write each trait on a sticky note. Stick the notes around the frog picture.
9
Divide the students into pairs or small groups. Assign each group an animal from the list below. Have each group read or listen to the article about their assigned amphibian.
Toad: Read or use the read-aloud feature for the “More About a Toad’s Body” section of the Toad article.
Salamander: Read or use the read-aloud feature for the “What Salamanders Look Like” section of the Salamander article.
Axolotl salamander: Read or use the read-aloud feature for the “Body of an Axolotl” section of the Axolotl article.
Caecilian: Watch the Caecilian video.
10
Ask each group to write on sticky notes two traits they learned about their amphibian. You may need to help younger children write their traits. You can prompt them by asking questions such as the following:
Do salamanders have legs? Where are your salamander’s legs?
What do your frog’s eyes look like?
What color is your animal?
11
One by one, each group should point out its animal’s traits (e.g., “Our salamander has a long tail.”) and stick its notes next to its animal’s image displayed earlier in the activity.
12
After all groups have added their traits, review them together, prompting a discussion of how these amphibians are the same and different. Tell students that, like animals, each of them has special traits that make them unique.
Visual and Verbal Cue Cards: Use cue cards featuring images and words that describe various traits, such as “long tail,” “no legs,” “smooth skin,” “bumpy skin,” and “green.” These cards aid learning by offering concrete examples, supporting diverse learning styles, and making abstract concepts like animal traits more accessible and understandable for young students.
Compare and Contrast: Have students compare and contrast the traits of two different animals to pinpoint similarities and differences. This method enhances their grasp of biological traits and adaptation, fosters critical thinking, and boosts collaborative learning by involving students in discussions and presentations.
Role-Playing Game: Drawing from a hat, students select traits associated with various animals and act them out while their classmates guess the animals based on the traits demonstrated. The selected traits can be presented with images or text depending on the age of the students. Examples of behavior traits that could be used include leaping like a frog, croaking like a frog, and swimming like an axolotl. This activity supports kinesthetic learners by making the learning process interactive and memorable.
Digital Animal Trait Collage: Students use tablets or computers to create a digital collage of images that represent traits of their assigned animals. They then present these collages to the class. This tech-integrated method boosts visual learning and digital literacy, offering a creative way to explore animal traits.
Station Teaching: For collaborative teaching and learning environments, this learning activity is well suited to a Station Teaching strategy. In this model, students rotate among different stations, each managed by a teacher who teaches a specific part of the content. This keeps students engaged through varied activities and teaching methods. It also allows teachers to focus on their strengths and teach content in a more in-depth and specialized manner. This approach ensures that students receive a comprehensive and dynamic education by catering to different learning styles. Research supports that multifaceted teaching strategies cater to diverse learning styles, enhancing students’ comprehension and retention.
Interactive Discussion: Teacher A leads a discussion about familiar animal traits, and Teacher B labels the amphibians on the poster and helps with pronunciation practice.
Class Activity: Teacher A guides the class in identifying frog traits and writing them on sticky notes, with Teacher B supporting students and ensuring engagement.
Station Work: Divide students into groups; Teacher A manages one station, helping with reading/listening and identifying traits, while Teacher B manages another station, assisting with writing and understanding traits.
Group Presentation: Groups present their findings and add sticky notes to the display, facilitated by both Teacher A and Teacher B.
Review and Discussion: Teacher A leads a review of the traits, discussing similarities and differences among amphibians, with Teacher B ensuring all students participate and understand.
Jumping and Splashing with Amphibians

Activity

3:

Bug Catchers

By the end of the activity, students will be able to explain how a frog’s tongue helps it catch its prey.

20-30

Minutes

Materials

Craft and coloring supplies
Felt, cut into small bug shapes or pieces
Frog images
Green paper with a 6-inch circle drawn on it (one per student)
Hook-and-loop fasteners (one per student)
Party blower (one per student)
Pre-made frog mask (one pre-prepared teacher example)
Safety scissors (one per student)
Whiteboard and display

Resources

1
Tell students that during today’s activity, they will research how a frog’s sticky tongue helps it catch its prey and create a working frog mask. Begin by asking students:
How do frogs eat?
2
Display a frog image from ImageQuest Jr., Britannica School or another royalty-free source. Familiarize yourself with the K-W-L instructional strategy and procedure and display the accompanying graphic organizer.
Ask students what they know about frogs. As students share their thoughts, listen and affirm their ideas while also scribing them in the K column of the chart.
Ask students what they want to know about frogs, and record their thoughts in the W column. Tell students that they’ll fill out the last column at the end of the activity.
3
Tell students that to answer this question, they’ll watch the Frog video Suggest that as they watch, they should pay close attention to how frogs eat.
4
Following the video, lead students in a partner discussion in which they share the details of what they learned from the video regarding how frogs eat.
5
Display an image of a frog from the Frog video, ImageQuest Jr.. or another royalty-free source.
6
Read the Frog article, or ask for a student volunteer to read the passage aloud to the class. Encourage students to pay close attention to any clues they hear about how frogs eat.
7
Following the reading, ask for volunteers to share any details they heard from the reading about what or how frogs eat. As needed, guide students to mention the frog’s long tongue. If possible, underline or highlight specific details in the text to support students as they share.
8
Summarize that frogs have long, sticky tongues. Reinforce that a long tongue is a trait that helps frogs catch bugs to eat.
9
Show students your pre-made frog mask. Tell them that today they’ll make a frog mask that has a long tongue that they will use to try to catch bugs, just like a frog! Demonstrate the long tongue by blowing out the party blower on your frog mask.
10
Distribute green paper, safety scissors, craft and coloring supplies, party blowers, and hook-and-loop fasteners to each student.
11
Model the process below, step-by-step, to show students how to make their frog masks. Allow time after each step for the students to complete it.
a)
Cut the large circle out of the green paper.
b)
Fold the circle in half.
c)
Cut a small V into the center of the fold so that the point of the V is touching the fold.
d)
Open the circle. Pull the party blower out straight and stick it through the X in the middle of the circle. Pull the party blower forward until the base of the blower is touching the back of the paper.
e)
Stick a hook-and-loop fastener onto the bottom of the end of the party blower tongue.
f)
Decorate your frog!
12
After students have created their frog masks, have them try blowing out their frog tongues. Ask students about the tongues. Then listen to and affirm students’ responses. Remind students that frog tongues are long and sticky to catch bugs.
What do frog tongues look like?
Why do you think they’re so long?
Why do you think they’re sticky?
13
Tell students that it’s time to try out their frog tongues. Demonstrate blowing out the tongue on your frog mask to “catch” a felt bug.
14
Separate students into pairs or small groups. Have each pair or group sit facing each other. Put a few felt bugs on the ground between them. Encourage them to try to catch bugs, too.
15
After a few minutes, gather students back to their seats. Ask guiding questions to prompt critical thinking about the function and effectiveness of frog tongues:
How many bugs did you catch?
How did you catch the bugs?
Do you think it would have been easier or harder to catch bugs with a short tongue? Why?
16
Conclude by asking students what they learned about how frogs eat. Record their answers in the L column of the K-W-L chart. Emphasize that a frog’s long, sticky tongue is an animal trait that helps it catch its food and survive in the wild.
Front-load the Topic: Generating questions can be difficult when a student has limited background knowledge about a topic. Consider meeting with a small group of students prior to the activity to build background knowledge, making connections to previous learning. This will help students generate relevant questions to guide and focus their reading.
Inquiry/Research Plan: Invite students to review the questions they still have and create a research plan for finding answers. This can facilitate further inquiry and learning, providing students with choice and ownership.
Additional Columns: There are many ways to adapt the K-W-L strategy to cultivate deeper thinking, make student thinking visible, and provide greater opportunities for reflection and synthesis. Additional columns and question stems can be added based on the activity objectives and standards. Below are a few possible columns:
H-How: How do I find out?
A-Action: What action will I take and why?
Q-Questions: What questions do I now have, and how will I answer them?
A-Assistance: What assistance or support do I need to understand the topic or answer my questions?
Team Teaching: For collaborative teaching and learning environments, this learning activity is well suited to a Team Teaching strategy. In this model, both teachers deliver instruction together, often alternating or integrating their teaching styles seamlessly, sometimes referred to as “tag team teaching.” This collaborative approach provides students with multiple perspectives and teaching styles, enriching their learning experience. By modeling effective teamwork and communication, this approach demonstrates how different viewpoints can enhance understanding and create a dynamic and interactive classroom environment. Evidence indicates that team teaching can enhance student engagement and provide a richer, more diverse educational experience.
Introduction to Frog Traits: Teacher A explains that students will learn about a trait that helps frogs eat, defining traits and showing the Frog video. Teacher B ensures students are paying attention during the video.
Partner Discussion: Following the video, Teacher A leads a partner discussion activity to discuss how frogs eat, while Teacher B circulates to listen and support discussions.
Reading and Discussion: Teacher A reads the “A Frog’s Life” section from the Frog article or asks a student volunteer to read, while Teacher B guides students to identify details about frogs’ eating habits and underlines specific details in the text.
Craft Demonstration: Teacher A shows a pre-made frog mask and demonstrates how to make it while Teacher B distributes supplies and assists students with the crafting process.
Interactive Craft Activity: Both teachers circulate to help students create their frog masks, ensuring safety and providing guidance as needed.
Frog Tongue Demonstration: Teacher A demonstrates using the frog mask to catch bugs, while Teacher B supports students in trying out their frog tongues and asks guiding questions about their observations.
Group Activity: Teacher A facilitates the bug-catching game while Teacher B ensures students are engaged and provides support.
Critical Thinking Questions: Teacher A asks guiding questions to prompt critical thinking about frog tongues, while Teacher B listens to and affirms students’ responses.
Conclusion: Teacher A summarizes the importance of animal traits in survival, focusing on what students learned about frogs, while Teacher B reinforces key points and ensures student understanding.
Jumping and Splashing with Amphibians

Activity

4:

Amphibian Hide-and-Seek

By the end of the activity, students will be able to define camouflage and design an animal that can camouflage in their classroom.

20-30

Minutes

1
Prior to the activity, cut and color one amphibian shape from the Amphibian Shape handout so that it can blend in somewhere in your classroom.
2
Tell students that during today’s activity, they will explore how amphibians use camouflage to hide from predators and prey. Then they will camouflage an amphibian craft in the classroom.
3
Display and play the Frog video, encouraging students to pay special attention to why frogs are different colors.
4
Ask students how frogs use their colors. If needed, play the video again from 0:53 to 1:05. Listen to and affirm students’ ideas.
5
Summarize that some brightly colored frogs use their colors to tell other animals that they are poisonous or not good to eat. Other frogs use their colors for camouflage. Explain to students that the word camouflage is a noun that means “an animal’s use of body colors to match its surroundings in order to help it hide.”
6
Display images that show camouflage from ImageQuest Jr., Britannica School or another royalty-free source. Have students find animals in the pictures and point out the animals they recognize.
7
Tell students that sometimes animals use camouflage to hide from other animals that want to eat them. Sometimes they use camouflage to sneak up on animals that they want to eat. Amphibians can use camouflage for both of these reasons.
8
Tell students that they’re going to color an amphibian so that it can be camouflaged in the classroom. Show them your example, and hold it up to the place in your classroom where it can be camouflaged.
9
Have students walk around the classroom looking for places to camouflage their amphibians. Remind them not to tell anyone where they choose.
10
Distribute coloring supplies and an Amphibian Shape handout to each student. Encourage students to decorate their amphibians so that they blend into their chosen space
11
When students have finished coloring, have them cut out their amphibians.
12
Tell students that it’s time to test out their camouflage! Separate the class into two groups. Have group one cover their eyes. Then have group two tape their amphibians to the places in the classroom where they’re best camouflaged. Make sure that the amphibians are in plain sight, not hidden under or behind objects.
13
Invite group one to act as predators and try to spot the hidden amphibians.
14
When all amphibians have been found, repeat the activity with group one hiding their amphibians and group two looking for them.
15
When all amphibians have been found, gather students. Ask the following questions and listen to and affirm students’ ideas.
What colors did you use to camouflage your animals? Why?
Why do animals use camouflage?
Fine Motor Support: To support the fine motor skills needed for the craft, such as cutting paper or rolling tape, visit students to provide assistance as they work, or assign them a partner to help. If you assign partners, remind students to assist without taking over, ensuring that they help only with tasks their partner requests help with.
Coloration Station: Set up a station with coloring supplies and nature pictures where students can color amphibians to either blend in or stand out as poisonous. Have students tape their finished amphibians onto the pictures and discuss their choices. This enhances learning by allowing students to apply their understanding of camouflage and warning coloration through creative expression, reinforcing the concepts through hands-on engagement and critical thinking.
Camouflaged Class: Have students find spots where their clothes help them camouflage in various areas of the school, such as the classroom, gym, cafeteria, or playground. This provides multiple practical opportunities for students to apply and reinforce their understanding of camouflage in diverse environments, thereby improving retention and comprehension of the concept.
Predator Peers: Instead of splitting the class into two groups to hide and find the amphibians, invite all students to hide their amphibians. Then invite another class of students, faculty member, or staff member to visit your class. Have them act as predators and try to find as many amphibians as they can.
One Teaching, One Assisting: For collaborative teaching and learning environments, this learning activity is well suited to a One Teaching, One Assisting strategy. In this model, one teacher leads the activity while the other circulates, assisting individual students as needed. This ensures that when students encounter difficulties, they receive immediate help in the form of personalized support and answers to their questions. By addressing students’ unique needs and keeping them on track, this approach enhances individual learning experiences and fosters a supportive classroom environment. Studies indicate that immediate feedback and individualized attention can significantly enhance student understanding and retention of material.
Video Viewing and Discussion: Teacher A plays the video and asks students how frogs use their colors, playing the relevant part again if needed. Teacher B listens to and affirms students’ ideas, providing additional support.
Color Explanation and Camouflage: Teacher A shows the images of camouflage and summarizes the use of colors for warning and camouflage. Teacher B supports students in finding and recognizing camouflaged animals in the images displayed.
Explanation of Camouflage: Teacher A explains how amphibians use camouflage to hide or sneak up on prey, while Teacher B supports students’ understanding by providing examples and additional explanations.
Camouflage Activity Setup: Teacher A demonstrates how to color an amphibian for camouflage in the classroom and shows an example. Teacher B assists students in choosing a spot in the classroom for their amphibians.
Activity Execution: Teacher A distributes coloring supplies and handouts, encouraging students to decorate their amphibians for camouflage. Teacher B provides one-on-one assistance as needed.
Placement and Camouflage Test: Teacher A has students tape their finished amphibians in plain sight in the classroom. Teacher B ensures they are not hidden behind objects.
Camouflage Testing: Teacher A organizes the class into two groups, explains the camouflage activity, and guides one group (hiders) to place their amphibians in plain sight around the classroom to test camouflage effectiveness. Teacher B assists in organizing students and supports the other group (predators) by helping them observe and identify camouflaged amphibians, providing explanations as needed.
Discussion and Reflection: Teacher A asks guiding questions about the colors used and the purpose of camouflage. Teacher B listens to and affirms students’ ideas, ensuring all students have an opportunity to share.
© Encyclopædia Britannica, Inc. All rights reserved.