Lesson MINI

Britannica School logo in navy blue and green text

LESSON MINI

Bringing History to Life with Biographies

Grade:

3-5

Topic:

Biography

Unit:

Biographies Explored
Eye icon in white on red background

Overview

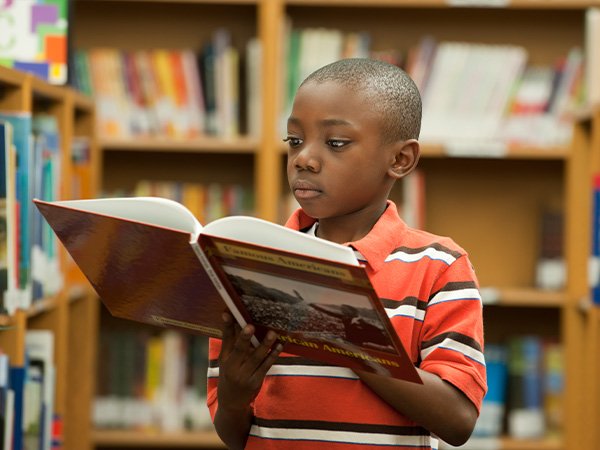
Young boy reading book in library with bookshelves in background.
© Thomas-Soellner—iStock/Getty Images Plus/Getty Images

In this lesson mini, students will research and create biographical presentations about important historical figures, such as explorers, constitutional contributors, state pioneers, or other significant individuals, depending on the curriculum needs. They will use informational texts and primary sources from Britannica School to collect information about their chosen subjects. Students will compare and contrast information from various sources, evaluate the reliability and perspective of these sources, and present their findings in diverse formats including posters, slideshows, mini biographies, and time capsules. Additionally, they will write short informative texts about their biographical subjects and engage in discussions about the historical figures’ contributions to society.

Ideas for Implementation
Science or Social Studies
Literacy
Library media
Learning centers
Intervention or enrichment
Interdisciplinary collaboration
Key Vocabulary & Definitions
biography (noun): a written story about a real person’s life, written by someone other than that person
chronological order (noun): the arrangement of events in the order that they happened in time, from first to last
explorer (noun): someone who travels to new places, such as unknown lands, oceans, or outer space, to learn about those places
primary source (noun): a firsthand account or original item, such as a diary or photograph, that gives direct evidence about a topic
secondary source (noun): a report, description, or discussion that is based on primary sources but is not itself a firsthand account; includes textbooks and newspaper articles
source (noun): a place where information comes from, such as a book, a person, a website, or a documentary
third-person point of view (noun phrase): the perspective of someone who is usually not involved in the story, told using words such as he, she, and they
Authentic Learning Extensions
Authentic learning opportunities for studying biography involve real-world experiences and practical applications that help students understand and make connections with biographical concepts in a meaningful way. Here are some examples:
Citizen Engagement Projects: Engage the class in civic activities that reflect the impact of studied historical figures. Students can participate in community cleanups, mentor younger students, exchange letters with local seniors, collect donations for causes, or write to local officials about community issues. These experiences help students understand how individuals can make a difference, mirroring the actions of the historical figures they’ve studied.
Field Trips: Organize visits to relevant historical sites or museums where students can interact with experts about their chosen biographical figures. National landmarks, state museums with exhibits on local historical personalities, or community historical sites can provide tangible connections to the lives and contexts of these figures, making history more accessible and engaging for students.
Guest Speakers: Invite local figures such as elected officials, community activists, or state agency representatives to share their experiences and insights. Ask speakers to discuss their roles, how they effect change, and why they chose the job they have. Have students draw parallels between the guest speaker’s work and the historical figures students have studied. This provides real-world examples of civic engagement and leadership, helping students connect historical biographies to contemporary figures and understand the ongoing relevance of civic participation.

Choose Activity

5
Bringing History to Life with Biographies

Activity

1:

Historical Figure Biographies

By the end of the activity, students will be able to synthesize biographical information to create and present a concise biography of a historical figure.

>40

Minutes

Materials

Preselected list of biographies of historical figures
Whiteboard or display
1
Prior to the activity, write on the board or otherwise display the vocabulary terms for this lesson mini, including their definitions.
2
Tell students that during today’s activity they will select and research the life of a historical figure. Begin by sharing a preselected list of biographies for students to choose from.
3
Start by asking students what they think a biography is. To prompt thinking, describe a simple definition of the word biography with the class, explaining that a biography is a true story about someone’s life written by someone else. Invite the class to work together to create a list of information about what they know related to the term biographies. To do this, consider guiding the class using the following prompts, and ask students to provide examples of biographies they’ve read or heard about to connect with prior knowledge:
What kind of information do biographies usually include about a person?
Can you name three types of things a biography might tell us about someone’s life?
How are most biographies organized? Do they jump around in time or follow a specific order?
In a biography, does an author write about the person using words like “I” and “me,” or does the author use the person’s name instead? What’s this called?
If you were writing a biography about someone, would you start with their recent accomplishments or begin with their childhood? Why?
4
After this discussion, have students read the Biography article individually or as a class. Allow time for students to absorb the information and ask any questions they may have about the article’s content.
5
Present the preselected list of biographies to the class. Review the list with the students, providing a brief introduction to each person on the list and additional brief context to support students in selecting a person that interests them.
6
Have students participate in a short turn-and-talk with a classmate to share the names of one or two historical figures that they would like to learn more about and why.
7
After students have chosen their person, give them the opportunity to search an appropriate biography to read about this person using the Britannica School database or other preapproved sites. Assist students in finding a reliable informational text on their selected person.
8
Distribute a Mini Biography graphic organizer to each student and tell them that as they read, their task is to gather additional biographical information, considering the following questions to guide them in completing their organizers:
What were the key events in this person’s life?
How did this person contribute to society and history?
What is this person most known for?
What personal qualities or character traits made this person notable?
Give students time to complete their Mini Biography graphic organizers.
9
Once students have completed their research and filled out their Mini Biography graphic organizers, invite them to work with a partner or in a small group to share information about their person.
10
After the group sharing, guide students in creating a short presentation based on the information in their Mini Biography graphic organizers. Model a think-aloud on how to create this presentation while including the following:
Use an attention-grabbing hook in their introduction to capture the reader’s attention.
Use the sequenced key events and facts from the graphic organizer to write the body of the paragraph.
Explain their historical figure’s contributions to society and history in the conclusion.
Demonstrate how to cite sources and emphasize the importance of crediting information.
11
Provide students with time to practice their presentations in pairs or small groups before presenting to the whole class.
12
Allow students time to present their short presentations to the class. Consider providing time following each presentation to allow classmates to offer positive peer feedback focusing on positive aspects and one area for improvement.
13
To wrap up the activity, lead a discussion about how the contributions of historical people have shaped our world. Ask students to reflect on and share what they learned about researching and presenting biographical information. Have students write a brief reflection on what they learned about their historical figures and the biography-writing process.
Text Templates: Provide a fill-in-the-blank paragraph structure for students to organize their writing. This supports learning by giving students a clear framework to structure their thoughts and ideas.
Extended Biographies: For older or advanced students, ask them to write about two or three of their subject’s life events in more detail, using transition words. This enhances learning by encouraging deeper analysis and improving writing skills.
Art Extension: Have students create covers for their biographies. This supports learning by allowing students to express their understanding creatively and consider how to visually represent their subjects.
Library Exploration: Visit the library to find more biography resources. This enhances research skills and exposes students to a wider range of information sources.
Technology Extension: Have students write their first draft by hand, get peer edits, then create a final digital version. This supports learning by combining traditional writing skills with digital literacy and peer feedback.
Team Teaching: For collaborative teaching and learning environments, this learning activity is well suited to a Team Teaching strategy. In this model, both teachers deliver instruction together, often alternating or integrating their teaching styles seamlessly, sometimes called “tag team teaching.” This collaborative approach provides students with multiple perspectives and teaching styles, enriching their learning experience. By modeling effective teamwork and communication, this approach demonstrates how different viewpoints can enhance understanding and create a dynamic and interactive classroom environment. Evidence indicates that team teaching can enhance student engagement and provide a richer, more diverse educational experience.
Activity Introduction and Defining Biographies: Teacher A introduces the activity objectives, while Teacher B prompts students to share what they think a biography is. They alternate in guiding the class discussion about biographies, with one teacher leading the conversation and the other recording student responses.
Reading the Biography Article: Teacher A displays the article and sets up the reading activity. If reading aloud, teachers can alternate paragraphs. If students are reading individually, both teachers circulate to assist with comprehension and monitor progress.
Presenting Historical Figures: Teacher A presents the preselected list of biographies, providing brief introductions to each historical figure. Teacher B facilitates the turn-and-talk activity in which students share their interests with classmates.
Research Guidance: Teacher A demonstrates how to use the Britannica School database, while Teacher B provides guidance on identifying other reliable sources. Both teachers assist students in finding appropriate biographies for their chosen historical figures.
Graphic Organizer Work: Teacher A explains how to fill out the Mini Biography graphic organizer. Teacher B provides additional support to students who may need extra assistance, ensuring all students understand the task.
Partner/Group Sharing: Both teachers circulate during the sharing session, listening to discussions and providing guidance. They ensure all students are actively participating and sharing information about their chosen historical figures.
Modeling Presentation Creation: Teacher A models the think-aloud process for creating a short presentation based on the mini biography. Teacher B highlights key points and adds tips as Teacher A demonstrates the process.
Presentation Practice: Both teachers circulate as students practice their presentations in pairs or small groups, offering feedback and support.
Student Presentations: Teacher A manages the presentation schedule, while Teacher B facilitates peer feedback discussions following each presentation. Both teachers listen to presentations and provide feedback.
Wrap-Up Discussion and Reflection: Teacher A leads the discussion on historical figures’ contributions, while Teacher B guides students through the reflection writing process, ensuring that students consider both what they learned about their historical figures and the biography-writing process.
Bringing History to Life with Biographies

Activity

2:

Explorer Biographies

By the end of the activity, students will be able to distinguish between primary and secondary sources while researching and presenting information about an explorer.

>40

Minutes

Materials

Coloring supplies, such as crayons or markers
Glue, tape, or staplers
Poster board (one per student) or digital poster tool
Preselected list of explorer biographies
Whiteboard and display

Resources

1
Tell students that during today’s activity they will learn about and research famous explorers. They will research their chosen explorers by using primary and secondary sources, create informative posters, and present their findings to the class.
2
Begin by posing this question to the class:
Who can tell me what an explorer is?
After collecting a few student responses, share what the term explorer means and how explorers are usually thought of as the people who make discoveries. Explain that there are many other types of explorers, like those who explore space or the ocean. Write or display the definition:
explorer (noun): someone who travels to new places, such as unknown lands, oceans, or outer space, to learn about those places
3
List a few examples of explorers from the preselected list of explorer biographies connecting these to student responses where possible. Encourage students to think about modern-day explorers and lesser-known fields of exploration, broadening their perspective beyond historical figures. Have students brainstorm in pairs and share their ideas with the class.
4
Display the Buzz Aldrin article. Give students time to read the article individually or as a class. After reading, discuss how we can gather reliable information about explorers from different sources, particularly primary and secondary sources. If students are unfamiliar with these terms, briefly define them:
primary source (noun): a firsthand account or original item, such as a diary or photograph, that gives direct evidence about a topic
secondary source (noun): a report, description, or discussion that is based on primary sources but is not itself a firsthand account; includes textbooks and newspaper articles
5
Use the Buzz Aldrin article to show students examples of primary sources (e.g., photographs) and secondary sources (the article text). Guide a discussion about the similarities and differences in the information from both types of sources.
6
Introduce the Explorers Through Time Note Catcher and distribute a copy to each student. Explain what information students should look for and include on the note catcher. Model how to fill it out using information from the Buzz Aldrin article.
7
Invite students to choose an additional explorer to research and collect biographical information about. Remind students to consider multiple sources of information. Have students practice using the note catcher with a partner before allowing them to have independent research time.
8
When students finish their research, facilitate a class discussion on how using multiple sources provides a more comprehensive understanding of an explorer’s life and contributions. Ask volunteers to share how they now better understand the explorers they researched after reviewing various sources.
9
Introduce the poster-making project. Model how to use the completed Explorers Through Time Note Catcher to organize information for a poster. Demonstrate a quick sketch of a poster layout, showing where to place key information.
10
Provide time for students to draft the content for their posters. Encourage them to focus on clear, concise sentences that highlight the most important aspects of their explorers’ lives and achievements.
11
Organize a peer feedback session halfway through the poster-making process. Have students pair up to share their progress and offer constructive suggestions.
12
Allow time for students to complete their posters, incorporate the feedback received, and make the presentations visually appealing.
13
Have students take turns presenting their posters to the class, detailing the lives and contributions of their chosen explorers.
14
Conclude the activity with a reflective discussion: How can exploring the lives of historical explorers help us understand the world and inspire future journeys? Follow up with a brief writing exercise in which students reflect on how this project has expanded their understanding of exploration.
Visual Vocabulary Support: Provide a visual vocabulary chart with key terms (e.g., explorer, primary source, secondary source) accompanied by simple images or icons representing each concept. This scaffold helps students to better understand and remember key vocabulary, enhancing their comprehension of the activity content.
Comparative Explorer Analysis: Challenge students to compare and contrast two explorers from different time periods or fields of exploration, analyzing how their methods, motivations, and impacts differ. This encourages higher-order thinking skills by requiring students to synthesize information, draw connections, and analyze historical context, deepening their understanding of exploration across different eras and domains.
Multimodal Explorer Presentation: Instead of having students create a traditional poster, allow them to choose from a variety of presentation formats to showcase their chosen explorers. Options could include the following: digital slideshow presentation, video documentary, podcast episode, illustrated timeline, comic strip or graphic novel page, 3D model or diorama, role-play or dramatic monologue, interactive digital map, newspaper article or magazine spread, or scrapbook or journal entries. This approach caters to different learning styles (visual, auditory, kinesthetic) and allows students to leverage their individual strengths and interests. It encourages creativity and engagement while still meeting the core objectives of researching and presenting information about an explorer. This variation also provides opportunities for students to develop various skills such as digital literacy, public speaking, or artistic expression, depending on the chosen format.
Team Teaching: For collaborative teaching and learning environments, this learning activity is well suited to a Team Teaching strategy. In this model, both teachers deliver instruction together, often alternating or integrating their teaching styles seamlessly, sometimes referred to as “tag team teaching.” This collaborative approach provides students with multiple perspectives and teaching styles, enriching their learning experience. By modeling effective teamwork and communication, this approach demonstrates how different viewpoints can enhance understanding, inspire higher-level thinking, and create a dynamic and interactive classroom environment. Evidence indicates that team teaching can enhance student engagement and provide a richer, more diverse educational experience.
Introduction and Explorer Definition: Teacher A poses the opening question about explorers and facilitates initial student responses. Teacher B introduces the term explorer and writes the definition.
Brainstorming and Pair Sharing: Teacher A explains the brainstorming activity about modern-day explorers, while Teacher B monitors time and facilitates the sharing process. Both teachers circulate during pair discussions, offering guidance.
Buzz Aldrin Article and Source Types: Teacher A displays the Buzz Aldrin article and introduces primary and secondary sources. Teacher B leads the class reading. They jointly facilitate the discussion on information gathered from different source types.
Explorers Through Time Note Catcher: Teacher A introduces the note catcher, while Teacher B distributes copies. They alternate in modeling how to fill it out using the Buzz Aldrin article information.
Independent Research: Both teachers circulate during research time, with Teacher A focusing on content-related questions and Teacher B assisting with finding and using multiple sources of information.
Class Discussion on Multiple Sources: Teacher A leads the discussion on how multiple sources provide a comprehensive understanding, while Teacher B encourages volunteers to share their insights.
Poster Project Introduction: Teacher A introduces the poster-making project while Teacher B demonstrates the quick sketch layout. They alternately explain different aspects of the project requirements.
Poster Creation and Peer Feedback: Both teachers circulate during poster creation, offering support. They jointly facilitate the peer feedback session, each monitoring different groups.
Presentations: Teacher A manages the presentation order, while Teacher B provides feedback. They switch roles halfway through to ensure balanced assessment.
Reflective Discussion and Writing: Teacher A poses the reflective question and moderates the discussion, while Teacher B guides the brief writing exercise.
Bringing History to Life with Biographies

Activity

3:

Constitutional Contributor Biographies Presentation

By the end of the activity, students will learn about a contributor to the U.S. Constitution and present their biography to their classmates as a slideshow.

>40

Minutes

1
Tell students that during today’s activity they will research and create digital presentations about contributors to the U.S. Constitution, and present their findings to their classmates.
2
Begin by briefly introducing the concept of the U.S. Constitution and its importance. Ask students to work in pairs and list three ways to create an engaging slideshow presentation. Compile these ideas on chart paper or a smartboard for reference. (Note: Consider providing students with specific criteria and a rubric aligned to your desired learning outcomes to guide this process.)
For the slideshow, emphasize using bullet points for concise information. Encourage students to incorporate images, slide transitions, larger fonts, and other text features to make their presentations more visually appealing.
For the presentation itself, stress using a strong and clear speaking voice, speaking conversationally, and including interesting information to engage the audience. Model these presentation skills for the class.
3
Create a class list of key figures who contributed to the U.S. Constitution. Examples may include the following:
George Washington, James Madison, Alexander Hamilton, Benjamin Franklin, Thomas Jefferson, John Adams, Abigail Adams, and John Jay. Briefly explain each figure’s role in creating the Constitution.
4
Display the Founding Fathers article and read it aloud, or invite students to read sections along with you. Following the reading, show students some of the additional embedded resources, modeling how these resources can provide additional information to the article. Guide a brief class discussion about what they learned from the article.
5
Have students choose or assign people to research. Then, invite them to gather and organize relevant information about their person using the Mini Biography graphic organizer.
6
Distribute a Mini Biography graphic organizer to each student. Explain that this tool will serve as both their research organizer and presentation outline. Walk them through each part of the organizer. Model filling out the organizer using a well-known figure presented in the Founding Fathers article, or another article of your choosing. Provide time for students to ask questions about the organizer.
7
Once students have completed their research and filled out their organizers, introduce the slideshow-creation tool they will be using (e.g., PowerPoint, Google Slides), and demonstrate basic functions. Provide time for them to create their slideshows.
8
Tell students that their slideshows should have appropriate facts and relevant descriptive details that teach their classmates about their person. Emphasize that if an important detail is left out, it can confuse the audience. Direct students to work on their slideshows using their graphic organizers as a guide for specific information to include in their presentations. Remind students to include a bibliography on the last slide of the presentation.
9
Once slideshows are complete, provide time for students to practice their presentations in pairs or small groups. Classmates should offer constructive feedback based on the presentation techniques discussed earlier.
10
Review the elements that make for an impressive oral presentation. Then, discuss appropriate behavior for students serving as the audience. An example of this may include “Don’t talk during a presentation, and keep your eyes on the speaker.” Invite students to present their slideshows one at a time in small groups of four to six students. Consider having a few volunteers present to the whole class.
11
To wrap up, lead a discussion on how these historical figures inspired civic engagement. Emphasize how their actions relate to modern citizenship, highlighting the various ways to participate in government at local and federal levels (e.g., voting, running for office). Have students write or share a brief reflection on how they can apply activities from these historical figures to their own lives.
Technology Scaffold: To support students with limited technological experience, create a slideshow template that mirrors the structure of the graphic organizer. Include placeholders for key information, primary-source images, and a bibliography slide. Demonstrate how to input information into the template, focusing on content rather than design. Encourage students to concentrate on biographical content, minimizing technology-related stress. As students gain confidence, gradually introduce basic design elements they can easily incorporate. This scaffold allows all students to participate fully in the project, regardless of their initial tech proficiency, while still developing essential digital skills.
Enlightenment Influence on the U.S. Constitution: To challenge students further, expand beyond the Founding Fathers and include Enlightenment political philosophers that heavily influenced constitutional thought. These philosophers can include John Locke (natural rights); Baron de Montesquieu (separation of powers, checks and balances); Jean-Jacques Rousseau (direct democracy), Voltaire (freedom of speech and religion); and Thomas Hobbes (social contract). Exploring historical figures such as these will show students that the ideas of others heavily influenced the Founding Fathers and they used these ideas to create what they believed was the optimal combination of these philosophies.
Presentation Alternatives: The following presentation alternatives are meant to accommodate different learning styles and class sizes. Consider these presentation variations to offer flexibility in presentation format and assessment methods.
Digital Presentations: Instead of in-person delivery, students should be allowed to create narrated slideshows or video presentations. This enables teachers to assess presentations outside of class time and provides students with opportunities to refine their work.
Pair Projects: Have students work in pairs for larger classes or more in-depth research. This allows for more comprehensive presentations on fewer historical figures. Guide students in equitably dividing research and presentation responsibilities.
Gallery Walk: Set up presentation stations around the classroom. Students rotate in small groups viewing each other’s work and providing structured feedback.
Virtual Showcase: Create an online exhibition of student work using a digital platform, allowing for peer review and extended viewing time.
One Teaching, One Assisting: For collaborative teaching and learning environments, this learning activity is well suited to a One Teaching, One Assisting strategy. In this model, one teacher leads the activity while the other circulates, providing assistance to individual students as needed. This ensures that when students encounter difficulties, they receive immediate help in the form of personalized support. By addressing students’ unique needs and keeping them on track, this approach enhances individual learning experiences and fosters a supportive classroom environment. Studies indicate that immediate feedback and individualized attention can significantly enhance student understanding and retention of material.
Introduction and Constitution Overview: Teacher A introduces the activity and provides a brief overview of the U.S. Constitution’s importance. Teacher B circulates, helping pairs of students as they list ways to create engaging slideshows.
Founding Fathers Discussion: Teacher A leads the class in creating a list of key Constitution contributors and explains their roles. Teacher B assists students who need additional clarification or support.
Article Reading and Discussion: Teacher A displays and reads the Founding Fathers article, demonstrating how to use embedded resources. Teacher B supports students during the follow-up class discussion, encouraging participation from all students.
Research and Graphic Organizer: Teacher A explains the Mini Biography graphic organizer and models its use. Teacher B circulates, assisting students as they choose people to research and how to use Britannica School effectively.
Slideshow Creation: Teacher A introduces the slideshow tool and demonstrates its basic functions. Teacher B provides one-on-one support to students who need extra help with the technology or organizing their information.
Presentation Practice: Teacher A oversees the general practice session, reviewing key presentation skills. Teacher B circulates, offering specific feedback on content delivery and presentation techniques.
Presentations: Both teachers circulate as students present in small groups, providing support and encouragement as needed.
Activity Wrap-Up: Teacher A leads the discussion on civic engagement and modern citizenship. Teacher B facilitates the reflection activity, ensuring all students participate and understand the connections to their own lives.
Bringing History to Life with Biographies

Activity

4:

State Pioneer Biographies

By the end of the activity, students will research a state pioneer using reliable sources to construct a presentation for their classmates.

>40

Minutes

1
Tell students that during today’s activity they will research state pioneers, create biographies in various formats, and present findings emphasizing state history.
2
Begin by defining state pioneer and explaining its importance in state history. Introduce the activity by explaining that students will use the Britannica School database to research and create a biography about a state pioneer and present their findings in one of four formats: a biographical poem, a visual timeline, a biographical booklet, or an interview. Show grade-appropriate examples of each format.
3
Create a web diagram with “state pioneer” at the center on the board. Discuss what a state pioneer might have done to make a significant impact on their state. Brainstorm synonyms such as “trailblazer,” “innovator,” or “important historical figure.” Have students share examples of pioneers they may already know about.
4
Demonstrate how to use Britannica School to find state pioneers. Search for “[your state] at a glance” and locate the “Important People” section. Model how to navigate the database and locate relevant information.
5
Introduce the Mini Biography graphic organizer. Model how to fill it out using one of the people from the “Important People” list. Provide time for students to ask questions about the organizer.
6
Briefly review primary and secondary sources, showing how to identify them on Britannica School pages. Use the following definitions and provide examples of each:
primary source (noun): a firsthand account or original item, such as a diary or photograph, that gives direct evidence about a topic
secondary source (noun): a report, description, or discussion that is based on primary sources but is not itself a firsthand account; includes textbooks and newspaper articles
7
Guide students in choosing a person to research. Encourage them to explore related links to understand their chosen pioneer’s life experiences better. Provide a list of suggested pioneers if students struggle to choose.
8
Allow time for students to conduct their research and complete their Mini Biography graphic organizers. Circulate to provide assistance as needed.
9
Once the research is complete, review the four presentation options (a biographical poem, a visual timeline, a biographical booklet, or an interview) in detail, discussing what each should include. Provide a checklist for each presentation format to guide students.
10
Conduct a brief discussion on effective presentation techniques, emphasizing the use of relevant facts and descriptive details to engage the audience. Model good presentation skills for the class (use a strong and clear speaking voice, speak conversationally, and include interesting information to engage the audience).
11
Allow time for students to create their presentations. Offer the option of peer editing for those that finish early. Provide a peer-editing checklist to guide this process.
12
Review good presentation skills and appropriate audience behavior. Have students present their work. For assessment, use a grade-appropriate rubric of your choice, and share this with students before they begin their presentations.
13
Wrap up by leading a class discussion on how learning about state pioneers helps us understand state history and can inspire future generations. Have students write a brief reflection on what they learned and how it connects to their own lives or community.
Acrostic Poems: Consider using an acrostic poem with the figure’s last name. Acrostic poems provide a structured format, build vocabulary, and are more manageable in scope. Also offer a fill-in-the-blank option for the biographical booklet, providing key facts that students can expand upon. This approach benefits student learning by providing scaffolding for students who may struggle with open-ended tasks, allowing them to focus on key information while still engaging creatively with the material.
Timeline of Figures: Create a timeline of the students’ finished work where historical figures are spread fairly evenly across different eras, including some contemporary figures who are currently making a difference in the state. Provide a visual template for the timeline and guide students in placing their people chronologically. Discuss how the state has changed over time based on the contributions of these pioneers. This benefits student learning by helping them contextualize historical figures and events, developing a sense of chronology and historical cause and effect.
Visual Supports: For English language learners or visual learners, provide picture cues or simple diagrams to accompany key vocabulary and concepts. Create a visual glossary of terms related to state history and pioneers. This strategy enhances student learning by making abstract concepts more concrete and accessible, particularly for students who may struggle with text-heavy information.
Jigsaw Groups: Divide the class into expert groups, each focusing on a different era or type of pioneer (e.g., political, scientific, cultural). Students then form new groups with one expert from each area to share their learning.
Interviews: Instead of giving students a choice in how they present their information, pair students to conduct interviews in which one student acts as a reporter and the other answers questions about their figure’s specific life events. Provide a template of interview questions to guide students and ensure key information is covered.
Digital Showcase: Create a class blog or digital portfolio where students can post their pioneer biographies. This allows for easy sharing, peer feedback, and the opportunity to include multimedia elements.
One Teaching, One Assisting: For collaborative teaching and learning environments, this learning activity is well suited to a One Teaching, One Observing strategy. In this model, one teacher provides direct instruction to the entire class while the other observes student behavior and engagement to gather evidence of learning. This approach allows for detailed observation and assessment, helping identify students who need additional support or intervention. By focusing on student responses and participation, the observing teacher can ensure that the learning needs of all students are addressed and met in the activity. Research shows that targeted observation can lead to more effective intervention strategies, improving student performance.
Introduction and Definition: Teacher A introduces the concept of state pioneers and their importance in state history. Teacher B circulates, helping students brainstorm examples and synonyms for pioneer.
Britannica School Demonstration: Teacher A demonstrates how to use Britannica School to find state pioneers. Teacher B assists individual students in accessing and navigating the database.
Mini Biography Graphic Organizer: Teacher A introduces and models how to fill out the Mini Biography graphic organizer using an example figure. Teacher B circulates, helping students follow along and addressing any questions.
Primary and Secondary Sources: Teacher A reviews the definitions and provides examples. Teacher B helps students identify these sources on Britannica School pages.
Research Period: Both teachers circulate, assisting students in choosing people to research, navigating Britannica School, and completing their Mini Biography graphic organizers.
Presentation Options: Teacher A reviews the four presentation formats in detail. Teacher B distributes checklists for each format and helps students choose the best option for their learning style.
Presentation Techniques: Teacher A discusses and models effective presentation skills. Teacher B notes students who might need extra support with public speaking.
Creation Time: Both teachers circulate as students create their presentations, offering support with content organization, creative ideas, and technical assistance as needed.
Peer Editing: Teacher A explains the peer-editing process. Teacher B distributes peer-editing checklists and assists pairs of students as they review each other’s work.
Presentations: Teacher A manages the presentation flow and provides feedback using the rubric. Teacher B assists with technology, supports presenters, and monitors audience engagement.
Activity Wrap-Up: Teacher A leads the final discussion on how learning about state pioneers helps understand state history. Teacher B facilitates the reflection writing, ensuring all students participate and understand the connections to their own lives or community.
Bringing History to Life with Biographies

Activity

5:

Historical Figure Time Capsule

By the end of the activity, students will be able to analyze a historical figure’s life, identify significant events and contributions, and creatively represent these in a tangible format.

>40

Minutes

Materials

Art supplies (markers, colored paper, glue, scissors)
Preselected list of historical figures
Printed biography excerpts or access to online resources
Shoeboxes or small containers (one per student)
Whiteboard and display

Resources

1
Begin by introducing the concept of a time capsule and its purpose. Explain that a time capsule is like a special box where we put things from today to save for people in the future. It’s a way to show what life is like right now, so people in the future have an opportunity to better understand the past in a more authentic way. Time capsules can be small, like a shoebox, or big, like a room. People put things inside like photos, newspapers, toys, and letters about daily life. Explain that these capsules are often hidden away for many years. When people in the future open them, they get to see what life was like when the capsule was created. Show examples of real time capsules or images of their contents if possible.
2
Tell students that they will create a time capsule representing a historical figure’s key moments and achievements. Then they’ll present their capsules to classmates.
3
As a class, brainstorm what items the class would put in a time capsule for people to find 100 years from now. Create a list on the board and discuss why each item would be important or a good representative of our current time.
4
Display a preselected list of historical figures and provide students with biographical information about the figures to help them choose one to research. Ensure a diverse range of figures from different time periods, cultures, and fields of achievement. Briefly introduce each figure to the class.
5
Distribute the Historical Figure Time Capsule handout and explain that students will create or draw three to four items representing key moments or achievements in their historical figure’s life. Model this process using a well-known historical figure not on the list, demonstrating how to choose significant items and explain their importance.
6
Provide clear guidelines for research, including recommended sources and key information to look for. Allow time for research and creation of time capsule items. Make various art supplies available for students to create their items.
7
Have students arrange their items in their shoeboxes or containers, adding a label for each item. Encourage students to consider the chronological order of items to tell a story about their historical figure’s life.
8
Before students present, review guidelines for respectful listening and providing constructive feedback. In small groups, have students present their time capsules, explaining the significance of each item. Consider providing a simple peer-feedback form for students to complete during presentations.
9
Conclude with a class discussion on what these historical figures contributed to society and how their achievements are still relevant today. Have students write a brief reflection on what they learned about their historical figures and how it connects to their own lives or aspirations.
Small-Group Work: Consider having students work in small groups to complete this task, with each student responsible for one or two items in the capsule before pooling their ideas for the final project. Use heterogeneous grouping to enhance learning. This approach benefits student learning by promoting collaboration, reducing individual workload, and allowing students to learn from peers with different strengths and perspectives.
Compare and Contrast: Choose biographical figures with significant similarities or a common connection, such as being from the same time period or studying the same branch of science. After presentations are done, hold a discussion comparing and contrasting the chosen figures and how they relate to the larger theme. This strategy enhances student learning by developing critical thinking skills and helping students understand historical figures within a broader context.
Scaffolded Research: Provide a structured research guide with specific questions for students who need more support in gathering information. This benefits student learning by breaking down the research process into manageable steps, ensuring all students can access the necessary information.
Class Museum: Create a class museum by displaying each student’s time capsule and having the class tour each other’s work to allow students to learn from their classmates’ projects and practice explaining their own projects multiple times, reinforcing their understanding.
Digital Time Capsule: In this digital variation, students create virtual collections using digital presentation tools, incorporating images, videos, audio files, and links to represent key moments in a historical figure’s life. Students then present their digital time capsules to classmates.
Living History Presentation: Have students dress up as their chosen historical figures and present their time capsules in character to encourage a deeper understanding of the historical figure’s perspective and experiences.
Team Teaching: For collaborative teaching and learning environments, this learning activity is well-suited to a Team Teaching strategy. In this model, both teachers deliver instruction together, often alternating or integrating their teaching styles seamlessly, sometimes called “tag team teaching.” This collaborative approach provides students with multiple perspectives and teaching styles, enriching their learning experience. By modeling effective teamwork and communication, this approach demonstrates how different viewpoints can enhance understanding and create a dynamic and interactive classroom environment. Evidence indicates that team teaching can enhance student engagement and provide a richer, more diverse educational experience.
Introduction and Time Capsule Concept: Teacher A introduces the concept of a time capsule and its purpose. Teacher B provides examples of real time capsules or shows images of their contents. They jointly lead the class brainstorming session on items for a modern time capsule.
Historical Figures Introduction: Teacher A displays the preselected list of historical figures. Teacher B provides brief introductions for each figure. They alternate in answering students’ questions about the figures.
Historical Figure Time Capsule Handout and Modeling: Teacher A distributes the Historical Figure Time Capsule handout and explains the task. Teacher B models the process using a well-known historical figure, demonstrating how to choose significant items and explain their importance.
Research and Creation Period: Both teachers circulate during the research and creation phase. Teacher A focuses on guiding students’ research, while Teacher B assists with the creative aspects of making or drawing time capsule items.
Presentation Preparation: Teacher A reviews guidelines for arranging items chronologically in the time capsule. Teacher B discusses how to write brief explanations for each item. They jointly answer students’ questions and provide feedback.
Small-Group Presentations: Teachers divide the class into two groups, each overseeing presentations for half the class. This allows for more in-depth support and feedback during the presentation process.
Class Discussion and Reflection: Teacher A leads the discussion on historical figures’ contributions to society. Teacher B guides the reflection writing process, ensuring students connect their learning to their own lives.
Project Display: Both teachers collaborate on organizing the display of time capsules in the classroom or school library, discussing how to effectively showcase students’ work.
© Encyclopædia Britannica, Inc. All rights reserved.