Lesson MINI

Britannica School logo in navy blue and green text

LESSON MINI

Be an Earth Helper!

Grade:

K-2

Topic:

Earth Day

Unit:

Protecting Our Planet
Eye icon in white on red background

Overview

Two children hugging a smiling Earth globe, promoting care for our planet.
© JrCasas/stock.adobe.com

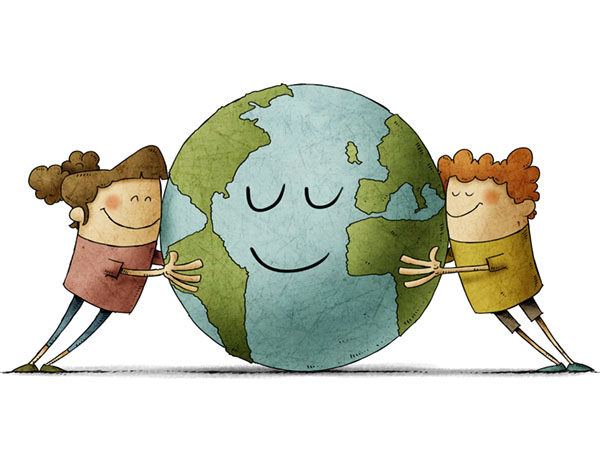
In this lesson mini, students explore how to care for Earth through informational texts and hands-on activities. Students learn about natural resources, conservation, pollution, and the 3Rs (reduce, reuse, and recycle). Through reading, discussion, creative projects, and real-world practice, students identify ways they can help protect the planet at school and at home.

Ideas for Implementation
Science
Literacy
Library media
Learning centers
Intervention or enrichment
Key Vocabulary & Definitions
conservation (noun): the careful preservation and protection of nature
forest (noun): a dense growth of trees and underbrush covering a large area
natural resources (noun): resources found in nature that animals, plants, and people need to survive, such as air, water, food, and a safe place to live
pollute (verb): to put something harmful into the environment
recycle (verb): to turn materials from old products into something new
reduce (verb): to use less of something
reuse (verb): to use something again
shelter (noun): a structure that covers or protects people or things
soil (noun): the loose material on the ground in which plants grow
wildlife (noun): non-human living things, such as animals and plants
Authentic Learning Extensions
Authentic learning opportunities for studying Earth Day involve real-world experiences and practical applications that help students understand the importance of conservation and protecting the planet in a meaningful way. Here are some examples:
Classroom Recycling Helpers: Assign students rotating roles as Recycling Helpers. Their job is to check that paper, plastic, and food waste are placed in the correct bins each day. Students can also remind classmates to reduce waste. This builds responsibility and helps students practice the 3Rs in a real setting.
Family Earth Day Challenge: Send home a simple Earth Day checklist with ideas such as turning off lights, recycling one item, using a reusable water bottle, or picking up litter. Invite families to complete at least one action together and return the checklist. This extends learning into students’ real home environments.
Plant and Care Project: Have students plant seeds in recycled containers and care for them over time. Assign watering responsibilities and observe growth. This helps students understand how caring for living things supports the environment.
School Clean-Up Walk: Take students on a supervised walk around the school grounds to look for litter. Provide gloves and bags so that students can safely collect trash. Afterward, discuss what types of items were found and how reducing waste can help keep the environment clean.

Choose Activity

5
Be an Earth Helper!

Activity

1 :

Earth: My Home

By the end of the activity, students will be able to explain the importance of protecting planet Earth’s natural resources by identifying natural resources and describing at least one way to care for them.

30-40

Minutes

Materials

Coloring supplies (colored pencils, crayons, and/or markers)
Whiteboard and display
Writing utensils

Resources

1
Tell students that today they will learn about planet Earth and what animals, plants, and people need to survive. Explain that Earth is our home and that it provides important natural resources that help living things to live and grow.
2
Begin by displaying the image of Earth from Britannica Library and asking students:
What do you notice about this picture?
What are the blue, green, and brown parts?
Who lives on planet Earth?
What places can we find on planet Earth?
3
Display the images found at the top of the What Makes a Good Home? article to prompt discussion. Guide students to observe carefully, read the captions, and describe the pictures using complete sentences.
4
Distribute printed copies of the What Makes a Good Home? article and writing utensils to students. Give them a few minutes to complete a word hunt in which they circle the phrase “natural resources” wherever they find it in the text. After students finish, ask, “How many times did you find the phrase ‘natural resources’ in the text?” [Answer: five] Then ask, “What are natural resources?” Have a few volunteers share their ideas, and write the following definition on the board:
natural resources: resources found in nature that animals, plants, and people need to survive, such as air, water, food, and a safe place to live
5
Read the What Makes a Good Home? article aloud, asking students to follow along. Pause for comprehension checks after each section using the following guiding questions:
Where do plants and animals live?
What are examples of animals that live in the water?
Where do deer live, and what natural resources do they use?
Where do rabbits live, and what natural resources do they use?
How do people use things from nature to survive?
6
Clarify for students that natural resources come from Earth and help all living things meet their basic needs.
7
Divide the class into six groups so that each natural resource listed in the article is represented. Distribute a Draw It, Write It graphic organizer and coloring supplies to each student.
a)
Assign each group a different natural resource mentioned in the text: air, water, plants, animals, soil, and rocks.
b)
Display the Draw It, Write It graphic organizer and model how to use it to set expectations. For example: Write the word water, draw a picture of a fish swimming in the water, and then write the sentence “Fish need water to swim.” Think aloud as you model so that students understand how the drawing and sentence connect to the natural resource.
c)
Remind students that each person will create their own drawing and sentence, but encourage them to brainstorm ideas for their drawings with the other members of their groups.
d)
After students complete their graphic organizers, have them share what they came up with in their groups. Ask students to read their sentences aloud to the other members of their groups to practice their speaking skills.
8
Tell the groups to come up with body movements to represent their assigned natural resources. Offer the following examples: “You can move your arms like ocean waves to represent water. Or you can stand up tall, moving your arms like branches, to represent a tree.” Give groups 1 or 2 minutes to practice their movements together.
9
Ask each group to present their body movements to the rest of the class. Then ask for volunteers to show their drawings and read aloud their sentences.
10
Wrap up the activity by asking students to record their thoughts about ways they can protect Earth’s natural resources. Give each student a Junior Journal handout. Prompt them to draw and write one way they can help care for Earth. After they finish, students can share their ideas with a nearby peer. Then bring the class together, and ask, “Why is it important to take care of our planet Earth?” Ask a few volunteers to share their thoughts with the class.
Language Support: Pre-teach key vocabulary words from the article (soil, fields, forests, natural resources, shelter) using simple definitions and visual aids to ensure students comprehend the article’s main ideas.
Sentence Starters: Provide sentence starters that refer to the article to support students in writing their sentences for the Draw It, Write It graphic organizer (e.g., “Fish need…” / “Deer need…” / “People use…” / “Animals live…”). This approach solidifies key ideas from the informational text.
Charades Game: Challenge students to further incorporate main ideas from the text by playing a game of charades in addition to the total physical response activity. Consider using the following phrases: Swim like a fish / Fly like a bird / Drink water like a deer / Hop like a rabbit / Build a house.
Exit Ticket: Instead of the journal exercise, consider having students complete the Write a Question handout for review. Consider writing “natural resources” as an answer and then challenging students to write questions that elicit this answer, such as “What do animals, plants, and people need? / “What does planet Earth have?”
One Teaching, One Assisting: For collaborative teaching and learning environments, this learning activity is well suited to a One Teaching, One Assisting strategy. In this model, one teacher leads the activity while the other circulates, assisting individual students as needed. This ensures that when students encounter difficulties, they receive immediate help in the form of personalized support and answers to their questions. By addressing students’ unique needs and keeping them on track, this approach enhances individual learning experiences and fosters a supportive classroom environment. Studies indicate that immediate feedback and individualized attention can significantly enhance student understanding and retention of material.
Activity Introduction: Both teachers introduce the activity and invite students to think about their home, planet Earth.
Article Reading: One teacher leads the What Makes a Good Home? article reading and discussion while the other assists students in understanding the key ideas presented. The lead teacher also asks students to circle the phrase “natural resources” while the assisting teacher supports students in completing this task.
Draw It, Write It: The lead teacher divides the class into six groups and models how to complete the Draw It, Write It graphic organizer. The assisting teacher distributes the graphic organizer and coloring supplies. Both teachers circulate and offer support as needed.
Total Physical Response: After students complete the graphic organizer, the lead teacher invites students to come up with body movements to represent their assigned natural resource.
Activity Wrap-Up: The lead teacher asks students to record their thoughts about ways they can protect Earth’s natural resources. The assisting teacher distributes the handout. After students finish, the lead teacher brings the class together for a final discussion of why it is important to take care of our planet.
Be an Earth Helper!

Activity

2:

Earth Day Celebration

By the end of the activity, students will be able to explain the significance of Earth Day and identify a key daily action they can take to protect nature.

>40

Minutes

Materials

Coloring supplies (colored pencils, crayons, and/or markers)
Images of people celebrating Earth Day
Large glass jar
Materials to decorate the birthday cards (construction paper, Earth-themed stickers, seeds, paper scraps, stamps, paint, scissors, glue)
Sticky notes (one per student)
Whiteboard and display
Writing utensils

Resources

Prepare for the Activity: Print and fold enough Earth’s Birthday Cards for each student pair to have one. Set aside an additional card to model the birthday card activity for students.
1
Tell students that today they will learn about Earth Day and why people celebrate it each year.
2
Begin the activity by showing April 22 on a classroom calendar or display. Share that this is Earth Day. Explain that Earth Day began in 1970 and is a special day when people around the world work together to take care of the planet.
3
Display images of people celebrating Earth Day from Britannica Library, ImageQuest Jr., or another royalty-free resource, and invite students to share what they notice. Ask:
How can we take care of planet Earth?
What birthday gift can we give planet Earth?
4
Give each student a copy of the Conservation article, and ask them to circle the following three vocabulary words each time they appear in the article: conservation, pollute, recycle. Afterward, define each of these words on the board using simple, student-friendly language.
conservation: taking care of nature
pollute: to make something dirty
recycle: to turn materials from old products into something new
Invite volunteers to use each new vocabulary word in a sentence.
5
Read the Conservation article aloud, asking students to follow along. Pause for comprehension checks after each section and ask:
Why do we need conservation?
How can people conserve nature?
What can we recycle?
6
As a class, brainstorm actions students can take to protect nature on April 22. Then guide students to think beyond one day and discuss simple actions they can take every day, such as saving water, turning off lights, and putting trash in a trash can. Display the images found in the Conservation article to prompt discussion, recording students’ ideas on the board.
7
Organize students into pairs, and tell them that they will be working collaboratively to create a birthday card and think of a special gift for planet Earth.
a)
Model a finished Earth’s Birthday Card to set expectations, and then distribute one folded Earth’s Birthday Card to each pair.
b)
Tell students that they will decorate the birthday card and decide on one helpful action they promise to do for Earth. Show students that inside the birthday card they have to complete the following sentence frame: “My birthday gift to you is….” On the board, model possible answers, such as “My birthday gift to you is more forests and fields.”
c)
Provide students with coloring supplies and materials to decorate their cards.
d)
Allot time for students to work with their partners, and circulate the room to offer support as needed.
8
Invite students to share their cards and the birthday gift they plan to give planet Earth with the rest of the class. Encourage students to clearly state the action they will take to help protect Earth.
9
Wrap up the activity by showing students a glass jar. Distribute a sticky note to each student and have them think of a one-word wish for planet Earth. Brainstorm possible answers as a class, and write the words on the board for everyone to see, for example: health, strength, and clean. Tell students to write their wishes and place them inside the birthday jar.
10
To close, sing “Happy Birthday to You” to planet Earth. Keep the celebration simple, focusing on the message of caring for Earth.
Language Support: Use visual aids to define the key vocabulary words from the text (conservation, pollute, recycle, wildlife). Consider providing an adapted version of the article in students’ home languages. Pair students with supportive peers for the partner task.
Writing Support: Offer students sentence starters and word banks supported with visual aids as prompts to write their birthday cards. This strategy helps students build their writing skills.
Reading Challenge: Invite students to read the article independently and write the answers to simple guiding questions. This approach encourages students to develop their reading comprehension skills.
Conservation Collage: Instead of writing a birthday card, students can choose different conservation initiatives and create a collaborative group collage, using the supplies suggested for decorating the birthday card. This approach fosters group work and creative expression.
Parallel Teaching: For collaborative teaching and learning environments, this learning activity is well suited to a Parallel Teaching strategy. In this model, the class is divided into two groups, and each teacher delivers the same activity simultaneously to their group. This reduces the student-teacher ratio, allowing for more interaction and individualized attention. With smaller groups, students are more likely to participate actively and receive immediate feedback, which fosters a deeper understanding of the content and promotes a more engaging learning experience. Evidence suggests that small-group instruction leads to increased student engagement and improved academic outcomes.
Be an Earth Helper!

Activity

3:

Pollution: What Is It, and How Can We Reduce It?

By the end of the activity, students will be able to describe different types of pollution and explain at least one way people can help reduce pollution.

>40

Minutes

1
Tell students that today they will learn about pollution.
2
Begin by displaying the first three images in the What Is Pollution? article and asking students to describe what they notice. Ask:
What types of pollution are there?
Why is pollution bad for people, plants, and animals?
Record student responses on the board.
3
Give each student a copy of the What Is Pollution? article. Read the article aloud, and instruct students to follow along. Pause for comprehension checks after each section using the following guiding questions:
What is air pollution?
What are land and water pollution?
How do people work to make less pollution?
Clarify unfamiliar vocabulary as needed, and restate key ideas in student-friendly language.
4
As a class, brainstorm solutions to control air pollution, land pollution, and water pollution. Guide students to connect each solution to a specific type of pollution. For example:
To control air pollution, we can plant trees!
To control land pollution, we can pick up trash and recycle!
To control water pollution, we can clean up the beaches!
5
Ask students to reflect on who takes care of Earth today. Then ask, “Who is your favorite superhero?” and “If you could have one superpower, what would it be?” Facilitate a whole-group discussion on different superheroes and superpowers, while focusing on the environment. Focus the conversation on positive actions and caring for the environment.
6
Tell students that they will become Earth Day superheroes to save the planet from pollution.
a)
Give each student an Earth Day Superheroes handout and coloring supplies.
b)
Tell students to draw a superhero and show at least one way their superhero helps reduce pollution. Model an example on the board, such as a superhero planting trees or picking up litter.
c)
Remind students to include details in their drawing that show the type of pollution they are helping to reduce.
d)
After students finish the task, have them share their drawings with a nearby partner.
7
Call on volunteers to act out their solution using the following sentence frame: “Today, I will help Earth by….”
8
Wrap up the activity by asking student volunteers to share one new thing they learned about pollution and how to protect planet Earth.
Language Support: Provide a translated version of the What Is Pollution? article. Encourage students to read the article before class at their own pace or with adult support, depending on their reading levels. In addition, pre-teach key vocabulary related to superheroes (e.g., superpowers, flight, strength, invisibility).
Superheroes Support: Adapt the Earth Day Superhero handout to provide more guided support for students. Offer a word bank with different superpowers to control pollution, supported by visual aids. This approach helps with task initiation by helping students brainstorm ideas for their drawings.
Superpowers in Action: Challenge students to work collaboratively to brainstorm specific actions they can take to help control pollutants, such as picking up trash around the school, turning off lights at home, or planting trees in their neighborhood. This approach supports students in making text-to-self connections.
Superheroes Collage: Instead of providing each student an Earth Day Superhero handout, divide students into groups of four or five and challenge each group to make a collaborative poster with one Earth Day superhero and a solution to control pollution. Instruct students to give this superhero a name and brainstorm their superpowers. This approach supports teamwork and creative thinking.
One Teaching, One Observing: For collaborative teaching and learning environments, this learning activity is well suited to a One Teaching, One Observing strategy. In this model, one teacher provides direct instruction to the entire class while the other observes student behavior and engagement to gather evidence of learning. This approach allows for detailed observation and assessment, helping identify students who need additional support or intervention. By focusing on student responses and participation, the observing teacher can ensure that the learning needs of all students are addressed and met in the activity. Research shows that targeted observation can lead to more effective intervention strategies, improving student performance.
Activity Introduction: Teacher A tells students they will learn about pollution and prompts a class discussion by displaying images of air, land, and water pollution. Teacher B observes students’ responses and engagement.
Article Reading: Teacher A displays and distributes a copy of the What Is Pollution? article and reads it aloud to students, pausing for comprehension checks after each section. After the reading, Teacher A facilitates a guided class reflection. Teacher B takes notes on students’ reading comprehension and engagement during the class discussion.
Superheroes in Action: Teacher A guides a class discussion about students’ favorite superheroes and superpowers and introduces the superhero activity. Teacher B distributes the Earth Day Superhero handout and then circulates the room to observe students’ work.
Activity Wrap-Up: Teacher A wraps up by asking student volunteers to share one new thing they learned about pollution and how to protect planet Earth. Teacher B listens carefully to student responses, takes notes on their understanding and participation, and identifies any students who may need additional support or enrichment in future lessons.
Be an Earth Helper!

Activity

4:

Reduce, Reuse, and Recycle

By the end of the activity, students will be able to understand the importance of reducing, reusing, and recycling to protect nature by defining and giving at least one example of each of the 3Rs.

>40

Minutes

1
Tell students that today they will learn about the concept of the 3Rs, which stands for “reduce, reuse, and recycle.” Explain that the 3Rs are three important ways we can take care of Earth and its natural resources.
2
Begin by asking students, “What are ways you reduce, reuse, and recycle at school or home?” Guide them to share examples such as the following:
We use both sides of paper when drawing (reduce).
We make crafts from old shoeboxes (reuse).
We put plastic bottles in the recycling bin (recycle).
Record student responses in three columns on the board labeled “Reduce,” “Reuse,” and “Recycle.”
3
Display the Reduce, Reuse, Recycle! article, and give each student a copy. Read the article aloud, and ask students to follow along. Pause after each section to ask the associated question:
What does it mean to reduce, and what are ways we can reduce the use of natural resources?
What does it mean to reuse, and what are ways we can reuse things at school and at home?
What does it mean to recycle, and what things can we recycle?
Use the image shown in each section to enhance students’ understanding and enrich discussion. Pause to clarify vocabulary and restate definitions in simple, student-friendly language. For example, reduce means to use less, reuse means to use something again, and recycle means to collect old things so they can be made into something new.
4
Tell students that they will work in groups to complete the Reduce, Reuse, Recycle handout. Review the handout instructions, and tell students that their job is to look at different images and decide if they show examples of reducing, reusing, or recycling. To model the activity, display the Recycling image and ask students, “Would this be an example of reducing, reusing, or recycling?” [Answer: recycling]
5
Organize the class into groups of three, and give each group a copy of the Reduce, Reuse, Recycle handout. Explain that all group members should discuss each picture before choosing an answer. Suggest that students take turns circling the correct answers.
6
Give students time to complete the task. After they finish, review the answers. [Answers: 1. b; 2. c; 3. a; 4. c; 5. b]
7
Explain that students will continue working in the same groups to come up with new uses for recyclable items. Display and discuss the Reuse Old Things image to set expectations. Ask students what each object was before and what it became after being reused.
8
Review safety expectations before distributing to each group a few recyclable objects that can be reused (e.g., plastic bottles, shoeboxes, milk jugs, paper towel rolls, egg cartons, or glass jars) along with coloring materials, glue, scissors, string, and other craft materials that students can use to complete their projects. Challenge students to work together to find another use for one or two of the objects.
9
As students work, circulate the room and offer support as needed. After they finish, call on each group to share their projects and explain how they reused the objects. Encourage students to use the sentence frame, “We reused this by…” when presenting.
10
Facilitate a class discussion on ways students can reduce, reuse, and recycle at home and at school. Add any new ideas to the three-column chart created at the beginning of the activity.
11
Wrap up the activity by asking:
Why is it important to reduce, reuse, and recycle?
How do the 3Rs protect planet Earth?
Prompt students to respond using complete sentences and include one example of a 3R in their answer.
Language Support: Pre-teach key vocabulary words supported by visual aids prior to reading the Reduce, Reuse, Recycle! article. Provide a translated version of the text in students’ home languages before class to enhance their understanding. Provide sentence frames to support students in presenting their work (e.g., “This object can be reused…”).
Creative Projects: Provide guiding questions to support students in constructing their projects. Offer questions to keep students’ work focused and connected to the learning objective. For example, “What can this object become?” and “Who can use this?” Model examples with a few different objects before students work in small groups.
Article Reading: Challenge students to read the Reduce, Reuse, Recycle! article independently and then answer the question, “How can I reduce, reuse, and recycle at home and school?” Provide the sentence frame, “I can…” This activity gives students the opportunity to enhance their reading comprehension skills and independent writing skills.
Recycled Planters: Instead of having students complete the creative collaborative project, have students reuse containers, such as plastic bottles or egg cartons, to make planters for seeds. Discuss how reusing containers helps reduce waste.
One Teaching, One Assisting: For collaborative teaching and learning environments, this learning activity is well suited to a One Teaching, One Assisting strategy. In this model, one teacher leads the activity while the other circulates, assisting individual students as needed. This ensures that when students encounter difficulties, they receive immediate help in the form of personalized support and answers to their questions. By addressing students’ unique needs and keeping them on track, this approach enhances individual learning experiences and fosters a supportive classroom environment. Studies indicate that immediate feedback and individualized attention can significantly enhance student understanding and retention of material.
Activity Introduction: Both teachers introduce the activity and invite students to think about the concept of the 3Rs. The lead teacher asks students, “What are ways you reduce, reuse, and recycle at school or home?” The assisting teacher ensures students stay engaged throughout the discussion.
Article Reading: One teacher leads the article reading and discussion, while the other teacher distributes a printed copy of the article to each student and ensures students understand the key ideas presented.
Reduce, Reuse, Recycle: The lead teacher tells students that they will work in small groups to complete the Reduce, Reuse, Recycle handout and reviews instructions with the class. The assisting teacher circulates the room and offers support as students work in small groups while the lead teacher prepares materials for the collaborative creative project.
Creative Project: The lead teacher instructs students to continue working in the same groups to find alternative uses for recyclable objects. The assisting teachers distribute materials. As students work, both teachers offer support. After they finish, the lead teacher brings the class back together and calls on groups to present.
Activity Wrap-Up: Both teachers discuss the importance of the 3Rs.
Be an Earth Helper!

Activity

5:

Recycle, Recycle, Recycle!

By the end of the activity, students will be able to understand the process of recycling and how it benefits the environment.

>40

Minutes

1
Tell students that today they will learn about the process of recycling and how recycling helps protect Earth.
2
Begin by defining recycling as “turning materials from old products into something new.” Write the definition on the board and read it together as a class. Then ask the following questions:
Do you know how to recycle?
What are some materials that can be recycled?
Why is it important to recycle?
Record student responses on the board to activate prior knowledge.
3
Display the Recycling video, and preview that it shows how recycling works and how old materials can become new products. After watching the video, ask, “What is something new you learned?” Follow up by asking, “What happens to materials after we put them in the recycling bin?” to reinforce understanding of the recycling process.
4
Give each student a Sketch and Share handout, and ask them to draw everything they learned about recycling. Encourage students to include at least one step in the recycling process in their drawing. Then invite them to share their work with a partner. Write discussion questions such as “What is your sketch about?” on the board to guide the partner exchange.
5
Bring the class back together, and call on volunteers to share their ideas with the whole class. Then facilitate a class discussion and ask:
How is garbage recycled?
How does recycling help Earth?
6
Tell students that they will work in groups of four or five to play a recycling sorting game. Explain that sorting materials correctly is an important step in the recycling process. The objective of the game is to place sorting cards into the correct recycling bins.
a)
Distribute to each group one set of Recycling Sorting Cards and four different-colored paper bags that represent the recycling bins (blue for paper, green for food waste, yellow for plastic, red for metal). Review each bin color and what materials belong in each bin before students begin.
b)
Show examples of the sorting cards, and ask students where they should place the item. For example, “Where should I place the drawing?” [Answer: in the blue recycling bin] / “Where should I place the banana peel?” [Answer: in the green bin]. Model thinking aloud so that students understand how to decide where each item belongs.
c)
After modeling expectations, tell students to work with their groups to sort the objects into the correct bags to practice recycling. Remind students to discuss each card as a group before placing it in a bag.
d)
After each group is done, review the answers together as a class. Instead of focusing on speed, emphasize accuracy and teamwork. If you instead choose to make it a race, remind students that correct sorting is more important than finishing first.
7
Wrap up the activity by asking students, “What is something that I can recycle at home this week?” Ask students to respond using a complete sentence such as, “I can recycle…” to reinforce understanding.
8
Conclude by briefly restating the key idea: Recycling turns old materials into new products and helps reduce waste and protect Earth.
Language Support: Offer students the option of watching the Recycling video at home prior to class to enhance their understanding. Pre-teach key vocabulary words supported by visuals aids (e.g., glass, plastic, cans, paper). Group multilingual students with supportive peers.
Recycling in Action: Support students in understanding the concept of recycling by having them check their schoolbags and walk around their classrooms and/or school cafeteria to search for items that can be recycled. Have students place these items in on-site recycling bins, if available. This activity provides a hands-on approach to recycling.
Word Hunt: Challenge students to read the Britannica Library Recycling article and complete a word hunt. Write the following words on the board: paper, plastic, cans, glass, and food. Tell students to find these words in their articles and circle them. As students finish, ask them, “Why do you think the bins for these items have different colors?”
Recycling Handout: Instead of preparing sorting cards for students, consider using a simple matching handout that challenges students to place different items into the correct recycling bins.
Parallel Teaching: For collaborative teaching and learning environments, this learning activity is well suited to a Parallel Teaching strategy. In this model, the class is divided into two groups, and each teacher delivers the same activity simultaneously to their group. This reduces the student-teacher ratio, allowing for more interaction and individualized attention. With smaller groups, students are more likely to participate actively and receive immediate feedback, which fosters a deeper understanding of the content and promotes a more engaging learning experience. Evidence suggests that small-group instruction leads to increased student engagement and improved academic outcomes.
© Encyclopædia Britannica, Inc. All rights reserved.