Lesson MINI

Britannica School logo in navy blue and green text

LESSON MINI

Busy Little Bugs

Grade:

K-2

Topic:

Animals

Unit:

Animal Traits
Eye icon in white on red background

Overview

Closeup of red ladybug with black spots perched on green plant stem.
© Dan/stock.adobe.com

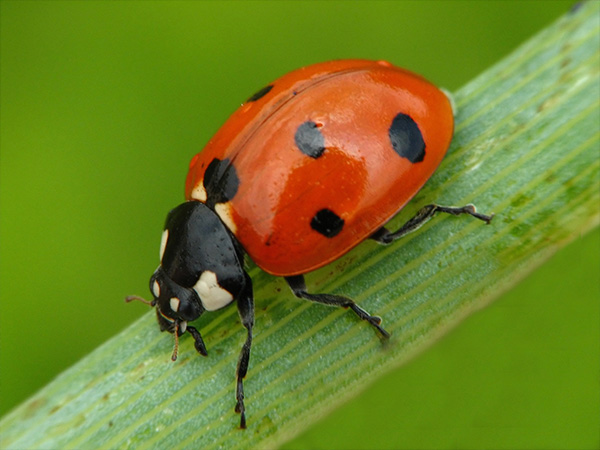
In this lesson mini, students explore insect traits through vocabulary exercises, observations, and drawing. Students identify insect traits, compare different species, and examine body parts, behaviors, and life cycles. They develop observational and analytical skills while learning about insect diversity and how traits help insects thrive.

Ideas for Implementation
Science
Literacy
Library media
Learning centers
Intervention or enrichment
Interdisciplinary collaboration
Key Vocabulary & Definitions
antennae (noun): the long, thin parts on an insect’s head that help it feel and smell things; also called feelers
exoskeleton (noun): the hard outer covering on an insect’s body that keeps it safe, like a suit of armor
insect (noun): a small animal, sometimes called a bug, with six legs and three body parts that usually has wings, such as a butterfly or a bee
stinger (noun): the sharp part on some insects, such as bees or wasps, that the insect can stick into you and cause your skin to hurt
trait (noun): a quality or characteristic that makes something special, such as its body parts, color, shape, behavior, or size
wings (noun): the parts on an insect’s body that help it fly
Authentic Learning Extensions
Authentic learning opportunities for studying insects involve real-world experiences and practical applications that help students understand biological concepts. Examples include:
Collage: Have students make a collage using natural elements that represent insect habitats. With their guardians, students can collect different-colored leaves, flowers, and sticks from home. They can place cut-out models of insects on their collages. This activity fosters a home-to-school connection.
Insect Life Cycle: Offer students opportunities to observe the different life cycles of insects (e.g., the butterfly life cycle). Understanding these processes supports students’ understanding of insects’ biology.
Insect Night Exploration: Encourage students to walk with their guardians at night and bring a flashlight to observe nocturnal insects. This encourages students to observe how insects behave in different environments.
Insect Observation: Give students a variety of insect cubes (insects or insect models preserved in clear resin cubes) and encourage them to discuss the different insect traits they observe. Have students work in small groups to continue building language fluency and interpersonal communication skills.
Insect Treasure Hunt: Use your school’s outdoor space to create an insect scavenger hunt. Hide cutouts or models of different insects in places that reflect the insects’ real habitats and have students search for them. This game-based activity builds classroom community.
Nature Walk: Take students on a nature walk and have them observe different insects in their environment. Ask students to record their observations on a sketch pad that each has brought along on the walk. This activity encourages students’ curiosity about their surroundings and helps them develop their observational skills.
Sounds Study: Record and analyze different insect noises. Students can learn to identify when insects make noises and what the sounds might mean in different contexts. Encourage students to keep track of their observations.

Choose Activity

4
Busy Little Bugs

Activity

1:

Buggy Words

By the end of the activity, students will be able to use new insect-related vocabulary words in original sentences correctly.

30-40

Minutes

Materials

Whiteboard and display
Writing utensils or highlighters

Resources

1
Tell students that during today’s activity they will learn new insect-related vocabulary, “Buggy Words,” by engaging in a Vocabulary Cloze activity.
2
Display the Insect article and ask students to predict what they will learn about in the article based on the title, subheadings, and images on the page.
3
Ask students to share things they know about insects before getting started.
4
Read the article aloud as a whole class. While reading, pause for comprehension checks at the end of each section. Example questions for each section include:
Introduction: How many kinds of insects are there?
Insect Bodies: Do insects have bones? What do they have instead? / How many body parts do insects have? / How many legs do insects have? / What do insects have on their heads? / What helps insects fly?
An Insect’s Life: Where do insects come from? / What kinds of changes do they go through? / What do caterpillars become?
Harmful and Helpful Insects: What are pests? / How can insects be harmful and helpful?
5
After reading the article, ask students to circle or highlight insect traits on a paper copy of the article. Explain that insect traits are special words related to insects!
6
Scribe the words that students come up with on the board (e.g., wings, feelers, eggs).
7
Engage the whole class in a Vocabulary Cloze activity to support vocabulary acquisition, focusing on five or six suggested vocabulary terms above. Follow the specific procedures outlined for the Vocabulary Cloze instructional strategy.
Example Cloze Sentences
1.
Insects do not have bones. They have (exoskeletons).
2.
Insects have 6 (legs). They help insects crawl, jump, and climb!
3.
Insects have (antennae) on their heads to help them sense things.
4.
(Wings) help some insects fly.
5.
Most insects are (harmless).
6.
Some insects are helpful. Others are (pests) that might spread sickness.
8
Conclude the activity by asking students to make sentences using different keywords. Students say their sentences out loud. To add some extra challenge, display keywords on cards and tell students that once a keyword is used, it cannot be repeated until all the keywords have been used. Remove words from the display as they are used. Consider tossing a soft ball or beanbag to different students as they participate in the share-out.
Visual Aids: Provide images or simple illustrations that depict the word’s meaning. This visual support helps students better understand and remember the vocabulary by connecting the word to a concrete image, which can significantly aid comprehension and retention. Additionally, visuals can help bridge language barriers by providing context clues directly related to the word, making it easier for students to participate actively and confidently in the cloze activity.
Varied Context Clues: Create cloze sentences with varying context clues, from direct to abstract. Direct clues can make it easier for younger audiences to grasp the word’s meaning. For a greater challenge, use sentences with minimal or complex clues, like synonyms or antonyms, that require deeper inferential thinking. This method deepens students’ engagement with the text by demanding they use their broader linguistic and cultural knowledge. It also improves their vocabulary comprehension and critical thinking skills.
Interactive Story Cloze: Instead of individual sentences, write a short narrative or story that incorporates multiple new vocabulary words within its context. Each vocabulary word appears as a blank within the story.
Team Teaching: For collaborative teaching and learning environments, this learning activity is well suited to a Team Teaching strategy. In this model, both teachers deliver instruction together, often alternating or integrating their teaching styles seamlessly, sometimes referred to as “tag team teaching.” This collaborative approach provides students with multiple perspectives and teaching styles, enriching their learning experience. By modeling effective teamwork and communication, this approach demonstrates how different viewpoints can enhance understanding and create a dynamic and interactive classroom environment. Evidence indicates that team teaching can enhance student engagement and provide a richer, more diverse educational experience.
Introduction to Vocabulary: One teacher introduces the focus on insect vocabulary and displays the Insect article, while the other teacher helps students predict content based on the title, subheadings, and images.
Pre-Reading Discussion: One teacher prompts students to share their prior knowledge about insects, while the other teacher encourages participation and manages responses.
Reading and Comprehension Checks: One teacher reads the article aloud, pausing for comprehension checks, while the other teacher asks guiding questions to ensure understanding.
Identifying and Highlighting Traits: One teacher instructs students to highlight insect traits in the article, while the other teacher scribes the identified words on the board.
Vocabulary Cloze Activity: One teacher leads the Vocabulary Cloze activity using the example sentences, while the other teacher circulates the room, offering individual help and ensuring student engagement.
Sentence Creation and Share-Out: One teacher concludes the activity by having students create sentences with key vocabulary, incorporating a fun element such as tossing a beanbag, while the other teacher ensures active participation and smooth transitions.
Busy Little Bugs

Activity

2:

Insect Traits

By the end of the activity, students will be able to identify and illustrate traits of their chosen insect on their drawing worksheet.

20-30

Minutes

Materials

Colored pencils, markers, or crayons
Insect images (e.g., butterfly, ladybug, bee, ant, moth, mosquito)
Whiteboard or display

Resources

1
Tell students that during today’s activity they will learn about insect traits through discussion, observation of images, and creation of their own insect drawings.
2
Introduce the concept of “traits” as characteristics used to describe animals, and prompt students to think about what some specific traits might be. Allow a moment for responses, and engage in a brief discussion of students’ ideas.
3
Explain that traits are distinguishing features, such as animals’ body parts and their shapes, sizes, and colors. Mention that the activity will cover traits of insects, or “bugs,” such as bees, butterflies, and moths.
4
Ask students to draw personal connections about insects by asking the following guiding questions:
Do you like insects?
Are there insects that are scary? Which ones?
What is your favorite insect?
Where do insects live?
5
Show students teacher selected insect images from ImageQuest Jr., Britannica School or another royalty-free source. Ask them to make simple oral observations about what they see.
6
Guide students to identify the common traits that insects have (e.g., some insects can fly, insects have six legs, and insects have antennae).
7
Distribute a copy of the Insect Drawing handout to each student. Prompt students to draw their favorite insect. They should also identify it and give it a name in the sentences beneath their drawing, and then identify its key traits by answering the questions at the bottom of the worksheet.
8
Ask students to show a partner their drawing, emphasizing that they should talk about the specific traits they drew for their insect.
9
Engage students in a whole-class discussion, asking them to share one trait they liked about their partner’s drawing.
Guiding Questions: Use guiding questions to support students in thinking about the traits of insects (e.g., Are insects big or small?). Guiding questions encourage active participation and critical thinking by providing students with clear prompts to contemplate and discuss the characteristics of insects.
Visual Cues: During the initial whole-group discussion, use the whiteboard to illustrate, write, and label students’ responses. Continue displaying different insect images throughout the activity and around the room, allowing students to refer to visuals as necessary when completing their drawings or participating in class discussions. Visual support enhances comprehension and engagement by reinforcing learning and providing tangible examples of insect characteristics.
Compare and Contrast: Encourage students to compare and contrast different insects they discussed in class or others they already know. Comparing and contrasting promotes higher-order thinking skills as students analyze the similarities and differences between insects, fostering deeper understanding.
Digital Drawings: Offer students the option of drawing their favorite insect on a tablet instead of on a worksheet. Consider using the Create section of Britannica Fundamentals as a sketch tool!
Team Teaching: For collaborative teaching and learning environments, this learning activity is well suited to a Team Teaching strategy. In this model, both teachers deliver instruction together, often alternating or integrating their teaching styles seamlessly, sometimes referred to as “tag team teaching.” This collaborative approach provides students with multiple perspectives and teaching styles, enriching their learning experience. By modeling effective teamwork and communication, this approach demonstrates how different viewpoints can enhance understanding and create a dynamic and interactive classroom environment. Evidence indicates that team teaching can enhance student engagement and provide a richer, more diverse educational experience.
Explanation of Traits: Teacher A explains distinguishing features and insect traits, as Teacher B provides visual aids and engages students in observations.
Drawing and Identifying Traits: Teacher A guides students in identifying insect traits and explains the drawing activity, while Teacher B offers individual support and additional visual inspiration.
Partner Sharing and Whole-Class Discussion: Teacher A organizes partner sharing and facilitates a class discussion, with Teacher B assisting in managing the discussion and tallying different insects drawn.
Busy Little Bugs

Activity

3:

Comparing and Contrasting Butterflies and Moths

By the end of the activity, students will be able to compare and contrast butterflies and moths, identifying similarities and three differences, including aspects of their life cycles.

20-30

Minutes

1
Tell students that during today’s activity they will explore butterfly and moth traits through discussion, reading, video analysis, sequencing activities, and summarizing key points.
2
Invite students to participate in a whole-class discussion sharing everything they know about butterflies and moths. During the discussion, guide students in making predictions about how butterflies and moths are the same and how they are different, and encourage students to use insect-related vocabulary.
3
Display an image of a moth and a butterfly from ImageQuest Jr., Britannica School or another royalty-free source. Ask students to look at the image and compare and contrast the two insects. Encourage students to think about what they see, including any similarities and differences they notice. As students share, consider scribing their responses on a T-chart graphic organizer drawn on the board or displayed on a projector.
4
Display the Moth article, using the up arrows in each section to collapse all but the “Moth or Butterfly?” section. Read the “Moth or Butterfly?” section as a whole class. Then ask students to identify the additional differences between moths and butterflies that they learned about from the reading. Continue to scribe their answers in the T-Chart graphic organizer on the board.
5
Watch the Butterflies video. Then discuss the main ideas, adding new points to the T-Chart graphic organizer as appropriate. Example responses may include those in the example below:
Butterfly: flies during the day / rests with wings closed / bright colors / butterfly antennae do not look like feathers / boldly patterned / thinner body / live throughout the world / antennae—slender, with knobs migrate to find food and avoid winter / egg:caterpillar:pupa:adult life cycle
Moth: flies at night / rests with wings open / dull colors / antennae look like feathers / thicker body / live throughout the world / antennae—do not have knobs / egg:caterpillar:pupa:adult life cycle
6
Remind students that at the end of the video the life cycle of the butterfly was discussed, and tell them that now they will read about the butterfly’s life cycle.
7
Read the “A Butterfly’s Life” section of the Butterfly article as a whole class.
8
After reading, give each student a set of Butterfly sequencing Cards and have them order the cards on their own. When everyone has done so, review the correct sequence, allowing time for students to reorder their cards if necessary.
9
To compare the life cycles of a moth and a butterfly, read the “A Moth’s Life” section of the . (After reading, point out to students that the “cocoon” mentioned in the article is a covering for a moth pupa.)
10
Give each student a set of Moth Sequencing cards and have them order the cards. When everyone has done so, review the correct sequence, allowing time for students to reorder their cards if necessary.
11
Ask students what they notice about the butterfly and moth life cycles, guiding them to the observation that the life cycles are similar: egg–caterpillar–pupa–adult.
12
Add the life cycles of each insect to the Butterfly and Moth T-Chart graphic organizer.
13
Conclude by discussing what moths and butterflies have in common, summarizing and emphasizing the key traits.
Listening Comprehension: Have students listen to the “Moth or Butterfly?” section of the Moth article two times before asking them to identify the differences between moths and butterflies. The option of listening to the text supports non-readers and provides a different input for the information. Some students greatly benefit from auditory learning.
Compare and Contrast: Guide students to compare and contrast butterflies and moths, using linking words (e.g., both, and, but). This promotes higher-order thinking skills and invites students to practice using key vocabulary.
Independent Practice: Ask students to read the Moth article and Butterfly article independently and then complete a T-Chart graphic organizer with guided support. This activity promotes autonomous learning and gives students the opportunity for extra reading practice.
Parallel Teaching: For collaborative teaching and learning environments, this learning activity is well suited to a Parallel Teaching strategy. In this model, the class is divided into two groups, and each teacher delivers the same activity simultaneously to their group. This reduces the student-teacher ratio, allowing for more interaction and individualized attention. With smaller groups, students are more likely to participate actively and receive immediate feedback, which fosters a deeper understanding of the content and promotes a more engaging learning experience. Evidence suggests that small-group instruction leads to increased student engagement and improved academic outcomes.
Whole-Group Discussion: Each teacher leads a group discussion in which students share their knowledge about butterflies and moths. The teacher guides the students in making predictions about similarities and differences and encourages the use of insect-related vocabulary.
Visual Comparison: Both teachers display images of a moth and a butterfly to their respective groups, asking students to compare and contrast the two insects. Teachers record student observations on a T-chart.
Article Reading and T-Chart Activity: Each teacher displays the Moth article, focusing on the “Moth or Butterfly?” section. They read this section aloud to their group and ask students to identify additional differences between moths and butterflies, adding to the T-chart.
Video Viewing and Discussion: The two groups gather together to watch the Butterflies video. Then students return to their groups, and each teacher facilitates a discussion about the main ideas, adding new points to their group’s T-chart.
Butterfly Life Cycle: Each teacher reads the “A Butterfly’s Life” section of the Butterfly article to their group. They then distribute Butterfly Sequencing Cards to each student and guide them through ordering the cards, reviewing the correct sequence.
Moth Life Cycle: Teachers read the “A Moth’s Life” section of the Moth article to their groups. They distribute Moth Sequencing Cards and guide students through ordering them, reviewing the correct sequence.
Life Cycle Comparison: Each teacher leads a discussion about the similarities between butterfly and moth life cycles, adding this information to the T-chart.
Conclusion: Each teacher guides their group in summarizing what moths and butterflies have in common, emphasizing key traits.
Busy Little Bugs

Activity

4:

Busy Bees

By the end of the activity, students will be able to describe traits of bees using information gathered from the article and class discussions.

20-30

Minutes

1
Tell students that during today’s activity they will learn about bees by completing a K-W-L chart, reading, comprehension questions, matching exercises, and group discussions.
2
Familiarize yourself with the K-W-L instructional strategy and procedure and display the accompanying graphic organizer. Introduce the topic of bees and direct students’ attention to the displayed K-W-L graphic organizer that the class will complete together.
3
Complete the “Know” column of the K-W-L chart by scribing students’ responses to guiding questions such as the following:
What do bees look like?
Why do you think they are special?
How big are bees?
How do they live?
What are their traits?
How do you think bees are different from butterflies or moths?
4
Write a model “Wonder” statement (e.g., I wonder what bees eat) in the “W” column of the K-W-L organizer and scribe other wonder statements shared by students.
5
Read the Bee article as a whole class, pausing for comprehension checks as you read. Consider asking questions such as:
What do bees look like? What color are bees? / How many legs do they have? / How many eyes do they have? / Who has stingers? / How do bees fly?
How do bees live? Do bees live alone or in groups? / Where do they live? / What do they lay? / What are male bees called? / What does each nest have?
What do bees eat? What is nectar? / How do bees make honey? / What is pollen? / How do bees help flowers grow?
6
After reading the article, ask students to share what they learned about bees from the article, scribing their answers to complete the “L” column of the K-W-L chart.
7
Assign students an independent matching exercise, Busy Bees matching activity, to help them internalize the main ideas from the text.
8
Review the answers to the matching exercise as a whole class.
9
Have students turn and talk with a classmate, asking them to describe bees to each other using the following sentence starters. Then conclude with a whole-class reflection question, using another Think-Pair-Share activity related to the question “What makes bees special?”
Bees are…
Bees have…
Bees live…
Differentiated Matching Exercise: Provide fewer support choices and extra enrichment choices to help students complete the independent matching activity. Differentiated support helps students process information at their own pace and gives them the opportunity to complete tasks successfully.
Match-Up Exercise: Consider pre-cutting the match-up cards to expedite the process and support students as needed.
Writing Practice: Invite students to write down their own answers to the Busy Bees guiding comprehension questions and then share their answers with the class. This activity allows students to practice independent writing, internalize what they have learned, and discuss their writing.
Listening Comprehension: Invite students to listen to the article independently instead of reading it as a whole class. This encourages students to absorb learning in an auditory way and offers early readers another option for acquiring the information.
Oral Practice: Encourage students to complete the matching exercise orally and make it into a whole-class guessing game. This allows students who are in the early writing stages to be able to participate in this activity and internalize new information effectively.
Parallel Teaching: For collaborative teaching and learning environments, this learning activity is well suited to a Parallel Teaching strategy. In this model, the class is divided into two groups, and each teacher delivers the same activity simultaneously to their group. This reduces the student-teacher ratio, allowing for more interaction and individualized attention. With smaller groups, students are more likely to participate actively and receive immediate feedback, which fosters a deeper understanding of the content and promotes a more engaging learning experience. Evidence suggests that small-group instruction increases student engagement and improves academic outcomes.
Introduction and K-W-L Chart: Each teacher tells their group that they will learn about bees, introduces the K-W-L chart, and scribes students’ responses to guiding questions to fill out their respective charts’ “Know” column.
Independent Matching Exercise: Each teacher assigns the Busy Bees matching activity exercise to the students in their group, monitoring and assisting as needed.
Group Review and Whole-Class Discussion: Teachers review the answers to the matching exercise with their groups. Then they bring the whole class together for a Talk-Pair-Share activity in which students describe bees using sentence starters.
Conclusion and Reflection: Both teachers conclude with a whole-class reflection using the Think-Pair-Share strategy to discuss “What makes bees special?”
© Encyclopædia Britannica, Inc. All rights reserved.