Lesson MINI

Britannica School logo in navy blue and green text

LESSON MINI

Discovering Dinosaurs and Paleontology

Grade:

K-2

Topic:

Dinosaur Discoveries

Unit:

Dinosaurs and Fossils
Eye icon in white on red background

Overview

Colorful illustration of dinosaurs near water with mountains, flying pterosaurs, and erupting volcano.
© blueringmedia/stock.adobe.com

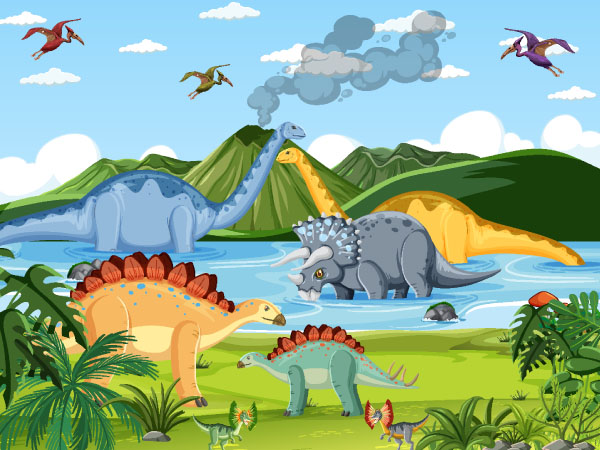
In this lesson mini, students explore dinosaur traits and learn how paleontologists study fossils to understand the past. Through informational texts, image analysis, group discussions, and hands-on investigations, students compare and contrast different dinosaur species and use fossil evidence to make inferences about what dinosaurs looked like, what they ate, and where they lived millions of years ago.

Ideas for Implementation
Science
Literacy
Library media
Learning centers
Intervention or enrichment
Key Vocabulary & Definitions
excavate (verb): to discover something by digging
fossil (noun): something (such as a leaf, skeleton, or footprint) that is from a plant or an animal that lived a long time ago and turned into a hardened rock
herd (noun): a group of animals that live together
paleontologist (noun): a scientist who studies dinosaurs
reptile (noun): any of a group of animals that are cold-blooded, breathe air, have backbones and scales or bony plates, and usually lay eggs
trait (noun): a quality or characteristic that makes something special, like its body parts, color, shape, behavior, or size
Authentic Learning Extensions
Authentic learning opportunities for studying dinosaurs involve real-world experiences and practical applications that help students understand the importance of paleontology in a meaningful way. Here are some examples:
Classroom Dinosaur Museum: Students create labeled dinosaur models, fossil drawings, and fact cards to display in a classroom museum. Invite families or another class to visit. Students serve as museum guides and explain dinosaur traits and fossil evidence. This provides a real audience and purpose for their learning.
Family Fossil Investigation: Send home a simple “fossil hunt” activity where students look for natural objects such as rocks, shells, or leaf imprints and record observations. Students share their findings in class and explain what scientists can learn from clues. This connects classroom learning to real-world observation.
Virtual or Local Museum Experience: Arrange a visit to a science museum or participate in a virtual field trip featuring dinosaur fossils and exhibits. Have students prepare questions beforehand and reflect afterward on what paleontologists do. This connects students with real scientific work and careers.

Choose Activity

3
Discovering Dinosaurs and Paleontology

Activity

1 :

Exploring Dinosaur Traits and Fossils

By the end of the activity, students will be able to describe the characteristics of dinosaurs and explain how scientists study them.

30-40

Minutes

Materials

Colored pencils, crayons, and/or markers
Large poster board (one per group)
Whiteboard and display
Writing utensils

Resources

1
Tell students that today they will learn about dinosaurs, their characteristics, and how scientists study them.
2
Begin the lesson by displaying and giving each student a Dinosaur Bubble Web graphic organizer. Call on students to share what they know about dinosaurs, and record their ideas on the board. Model an example such as, “Dinosaurs lived a long time ago.” Encourage all ideas.
3
Display The Sauropods: Plant-Eating Giants image, and ask students to describe what they notice. Tell them that the word trait means “a quality or characteristic that makes something special, like its body parts, color, shape, behavior, or size.” To support students in describing dinosaur traits, consider asking the following questions:
What did this dinosaur look like?
Do you think this dinosaur was big or small?
What do you notice about its neck?
Do you think it was slow or fast?
Guide students to base their answers on what they observe in the image.
4
Display the Dinosaur article, and give each student a copy. Read the article aloud, and pause for comprehension checks after each section using the following questions:
How do scientists learn about dinosaurs?
Where are fossils found?
What did this dinosaur look like?
What sizes were dinosaurs?
What did dinosaurs eat?
Why did dinosaurs disappear?
Clarify that scientists use evidence such as fossils to make careful conclusions about dinosaurs. Emphasize that explanations are based on scientific research.
5
Divide the class into groups of three or four students, and give each student a copy of the Dinosaurs handout. Have each group complete the match-up activity in Part 1 and then answer the reading comprehension questions in Part 2. After students finish, bring the class back together to review the answers. (Note: Depending on your students’ reading level, consider reading the handout questions aloud.) [Answers: Part 1. 1. a; 2. c; 3. b.; Part 2. 1. c; 2. a; 3. a; 4. c; 5. a.]
6
Tell students that they will continue working in their groups to draw a new dinosaur species.
a)
Give one large poster board and one Dinosaur Features handout to each group.
b)
Tell students to draw their dinosaurs and cut out the features from the handout as needed (e.g., horns, spikes, feathers). Remind students to choose features that match what their dinosaur eats or how it lives.
c)
Tell students to come up with a dinosaur name and finish it with the letters “saurus,” for example, “Kidsaurus” or “Greensaurus.”
d)
Consider assigning roles to each group member and displaying images of dinosaurs from Britannica Library , ImageQuest Jr., or another royalty-free resource to help students draw inspiration for their project.
7
After students finish their dinosaur drawing, have them write where their dinosaur lived, its size (big, medium, or small), and what it ate on the back of the poster board. Have them explain why their dinosaur had specific features. Model an example from the article, such as “The Triceratops had flat teeth because it ate plants.”
8
Call on each group to present their new dinosaur species to the rest of the class. Invite audience members to provide positive feedback to the presenters. Model behavior to set expectations; for example, “I like your dinosaur’s original name.”
9
After every group presents, ask students to share with a nearby peer one new characteristic or trait they learned about dinosaurs.
10
Wrap up the activity by bringing the class back together and asking students to share something interesting their partner said. Then ask the class, “How do fossils give us clues about how dinosaurs lived?” Invite a few volunteers to share their thoughts.
Language Support: Pre-teach key vocabulary words from the article using simple definitions and visual aids to ensure students comprehend the article’s main ideas (e.g., dinosaurs, feathers, horns, claws). Consider providing an adapted version of the article in students’ home languages. Place students with supportive peers for the group tasks.
Dinosaur Characteristics: Provide sentence frames for students to use when describing their dinosaur creations (e.g., “Our dinosaur lived…” / “Our dinosaur ate…” / “Our dinosaur was…”). This approach helps beginning readers express themselves effectively.
Dinosaur Puppets: Challenge students to make dinosaur puppets representing different species mentioned in the article and create a skit with a simple storyline. This approach fosters creativity and supports students’ oral skills.
3-D Dinosaurs: Instead of creating dinosaur posters, students can create 3-D models of their dinosaurs using modeling clay. This approach encourages students to participate in hands-on tasks and develop their motor skills.
One Teaching, One Assisting: For collaborative teaching and learning environments, this learning activity is well suited to a One Teaching, One Assisting strategy. In this model, one teacher leads the activity while the other circulates, assisting individual students as needed. This ensures that when students encounter difficulties, they receive immediate help in the form of personalized support and answers to their questions. By addressing students’ unique needs and keeping them on track, this approach enhances individual learning experiences and fosters a supportive classroom environment. Studies indicate that immediate feedback and individualized attention can significantly enhance student understanding and retention of material.
Activity Introduction: The lead teacher tells students they will learn about dinosaurs and prompts a class discussion by displaying a dinosaur image. The assisting teacher notes students’ responses and engagement and assists them as needed.
Article Reading: The lead teacher displays and distributes a copy of the Dinosaur article and reads it aloud to students, while pausing for comprehension checks after each section. The assisting teacher circulates the classroom, takes notes on students’ reading comprehension and engagement during the class discussion, and offers personalized support to meet the unique needs of students.
Dinosaurs Handout: The lead teacher divides the class into small groups, distributes a Dinosaurs handout to each student, and explains the match-up and reading comprehension tasks. After each part, the lead teacher brings the class back together and reviews the answers. The assisting teacher circulates the room and assists students as needed while they complete the tasks.
Dinosaur Creations: The lead teacher tells students they will continue working in their groups to create a dinosaur, and the assisting teacher provides necessary materials. Both teachers circulate the room to offer support as students work on their dinosaur creations.
Activity Wrap-Up: The lead teacher wraps up the lesson by asking students to discuss with a nearby peer what they learned about dinosaur characteristics. The assisting teacher circulates the room and offers feedback. Then both teachers reassemble the class and ask students to share something interesting their partner said. They then prompt students to respond to the final question.
Discovering Dinosaurs and Paleontology

Activity

2:

Comparing Tyrannosaurus rex and Brachiosaurus

By the end of the activity, students will be able to compare and contrast T. rex and Brachiosaurus using information from text and images.

>40

Minutes

Prepare for the Activity: Print and cut out the Tyrannosaurus rex and Brachiosaurus images so that each student has a picture of each dinosaur to compare and contrast.
1
Tell students that today they will compare and contrast Tyrannosaurus rex, or T. rex, and Brachiosaurus.
2
Begin the activity by displaying the images of Tyrannosaurus rex and Brachiosaurus and asking students to describe what they notice about each dinosaur. Encourage students to base their responses only on what they observe in the images. Record observations on the board under each dinosaur’s name.
3
Give each student a set of Tyrannosaurus rex and Brachiosaurus images. Invite them to discuss the dinosaurs’ physical similarities and differences. Write language related to comparing and contrasting on the board to guide discussion (e.g., similar, alike, both, different; “this one has…, but that one has…”). (Note: Students will use these cards again at the end of the activity.)
4
Display and give each student a Dinosaur Venn Diagram graphic organizer with sentence frames to support their writing process. Explain that a Venn diagram helps us to think about how two things are similar and how they are different by organizing the similarities in the overlapping middle section and the differences in the outer sections. Call on students to share their ideas, and record them on the board. Model an example: “The T. rex and Brachiosaurus were both dinosaurs that lived a long time ago. The T. rex had a large head, but the Brachiosaurus had a smaller head compared to its body.”
5
Display the Tyrannosaurus Rex article and then the Brachiosaurus article, and give a copy of each article to each student. Share that you will read each article aloud. Challenge students to reflect on the similarities and differences in the two dinosaurs while they read along with you. Emphasize that students should pay attention to the dinosaurs’ traits (what they looked like), habitat (where they lived), and diet (what they ate).
6
Read aloud the Tyrannosaurus Rex article. Pause at the end of each section, and ask:
What did T. rex eat? What were its teeth like?
How big was it?
Where did it live?
How did it behave?
Record students’ ideas in the corresponding circle on the Venn diagram, and have students copy the text on their own graphic organizers.
7
Read aloud the Brachiosaurus article. Pause at the end of each section, and ask:
What did Brachiosaurus eat? What were its teeth like?
How big was it?
Where did it live?
How did it behave?
Record students’ ideas in the corresponding circle of the Venn diagram, and have them copy the text in their own graphic organizers. Point out that initially they should put the trait in the larger, nonoverlapping part of the circle, but then after reading about both dinosaurs, they might need to move some of these traits if they are shared.
8
After identifying the key characteristics of each dinosaur, facilitate a class discussion to support students in identifying the similarities between T. rex and Brachiosaurus. For example: “They were both large dinosaurs, both lived a long time ago in North America, and both used their teeth for eating.” Encourage students to support similarities with information from the articles.
9
After students complete the guided task, have them use their Venn diagrams to talk with a nearby peer about the differences and similarities between these two types of dinosaurs.
10
Bring the class back together, and wrap up the lesson by playing a review game. Have each student lift up an image of either a T. rex or a Brachiosaurus (from the image cards used in step 3) to answer the following questions:
Which dinosaur had a long neck? [Answer: Brachiosaurus]
Which dinosaur ran faster? [Answer: Brachiosaurus]
Which dinosaur ate meat? [Answer: T. rex]
Which dinosaur ate plants? [Answer: Brachiosaurus]
Which dinosaur lived in groups? [Answer: Brachiosaurus]
Which dinosaur had small front legs? [Answer: T. rex]
After each question, briefly ask students to explain how they know, referring back to the text or the class Venn diagram.
Language Support: Pre-teach key vocabulary words supported by visual aids prior to reading the articles. Provide a translated version of the text in the students’ home languages before class to enhance their understanding. Teach linking words to help students compare and contrast the Brachiosaurus and T. rex.
Word Banks: Provide word banks to support students in discussing the similarities and differences of the Brachiosaurus and T. rex. Include words and phrases such as plant-eating, meat-eating, sharp claws, thick legs, long neck, and big head. This approach helps students organize their thoughts and encourages accuracy in their oral expression.
Labeled Images: Challenge students to label the images of the Brachiosaurus and T. rex with information discussed in class and in the articles. This approach helps students synthesize main ideas and develop their independent writing skills.
Venn Diagram Groups: Instead of reading aloud both articles, divide the class in half and have each half focus on one of the dinosaurs. Then have students read the text in their groups and complete the corresponding Venn diagram circle. Afterward, have students exchange their learnings. This approach encourages students to develop their independent reading and presentation skills.
Parallel Teaching: For collaborative teaching and learning environments, this learning activity is well suited to a Parallel Teaching strategy. In this model, the class is divided into two groups, and each teacher delivers the same activity simultaneously to their group. This reduces the student-teacher ratio, allowing for more interaction and individualized attention. With smaller groups, students are more likely to participate actively and receive immediate feedback, which fosters a deeper understanding of the content and promotes a more engaging learning experience. Evidence suggests that small-group instruction leads to increased student engagement and improved academic outcomes.
Discovering Dinosaurs and Paleontology

Activity

3:

Paleontologists and Dinosaur Fossils

By the end of the activity, students will be able to explain how paleontologists use fossils to make inferences about what dinosaurs looked like, what they ate, and where they lived.

>40

Minutes

Prepare for the Activity: To set up six paleontology digging stations, print six copies of the Dinosaur Fossils Cutouts, cut out the 12 images, hide each set in one of six sand bins, and set up a few excavating brushes at each station.
1
Tell students that in today’s activity they will learn about how paleontologists use fossils to learn about dinosaurs. Write the word paleontologist on the board, and explain that a paleontologist is a scientist who studies plants and animals, like dinosaurs, that lived a long time ago.
2
Begin the lesson by showing the Dinosaur Bones image and explaining to students that paleontologists put together bone fossils to show what dinosaurs looked like. Ask students to describe the image, and encourage them to base their responses on visible evidence.
3
Display the What Is a Paleontologist? article, and give a copy to each student. Invite students to complete a word hunt by circling the following key words each time they appear in the article: scientists, fossils, and dinosaurs. After students finish, invite them to share their work with a nearby peer. Ask student pairs to discuss the following question: “How do paleontologists study dinosaurs?”
4
Read aloud the What Is a Paleontologist? article, and pause at the end of each section to check comprehension. Ask:
How do we know about dinosaurs?
What is a fossil?
What are examples of fossils?
How are fossils found?
What can scientists learn from fossils?
5
Display the Hunting for Fossils image, and have students describe what they notice. Then tell students they will pretend they are paleontologists and work in small groups to hunt for dinosaur fossils.
a)
Divide the class into six groups, and assign each group a paleontology digging station (a sand bin). Consider assigning group roles, such as fossil excavators, recorders, and reporters.
b)
Explain to students that they will have to excavate dinosaur fossils (Dinosaur Fossils Cutouts) using brushes. Remind students to handle materials gently and work cooperatively.
c)
Give each student a Paleontology Journal handout, and have them look for clues about their dinosaur based on the fossils they find. Model an example: “Today I found a fossil of a flat tooth. I think the dinosaur ate plants.”
6
Bring the class back together, and call on volunteers to share the dinosaur fossils they found and the predictions they made about the dinosaurs based on their findings. Guide students to explain the evidence that supports their ideas.
7
Give one Focus Frame Feedback handout to each student. Tell them to identify the most important ideas from today’s activity and draw, inside the magnifying glass frame, something that shows what paleontologists do. After finishing their drawing, students can write a few sentences about what they illustrated.
8
Invite students to share their work with a nearby peer, and then call on volunteers to say what they learned about paleontologists.
Language Support: Pre-teach key vocabulary words (e.g., scientists, fossils, dinosaurs) supported by visual aids prior to reading the What Is a Paleontologist? article. Provide a translated version of the text in students’ home languages before class to enhance their understanding. Group multilingual students with supportive peers.
Article Handout: After reading the What Is a Paleontologist? article, give each student a reading comprehension handout to check their understanding. Tailor the handout to varying reading levels. This approach enhances students’ understanding of key concepts.
Dino Match-Up: Instead of having students excavate fossil cutouts, have students complete a match-up task. Provide different fossil images, and have students identify the dinosaurs they belonged to. This variation serves as a unit review.
One Teaching, One Observing: For collaborative teaching and learning environments, this learning activity is well suited to a One Teaching, One Observing strategy. In this model, one teacher provides direct instruction to the entire class while the other observes student behavior and engagement to gather evidence of learning. This approach allows for detailed observation and assessment, helping identify students who need additional support or intervention. By focusing on student responses and participation, the observing teacher can ensure that the learning needs of all students are addressed and met in the activity. Research shows that targeted observation can lead to more effective intervention strategies, improving student performance.
Activity Introduction: Both teachers introduce the activity and explain what paleontologists do and how we can learn about dinosaurs.
Article Word Hunt and Reading: Teacher A leads the What Is a Paleontologist? article word hunt while Teacher B distributes the articles and notes students’ engagement. Teacher A reads the article aloud and asks comprehension questions. Teacher B circulates the room to observe students’ behavior and notes their understanding of key ideas.
We Are Excavators Group Work: Teacher A divides the class into groups and invites students to pretend they are paleontologists and hunt for dinosaur fossils. Teacher B sets up the digging stations and distributes necessary materials. As both teachers circulate the room, Teacher A offers support as needed and Teacher B notes how students work collaboratively.
Focus Frame Feedback: Teacher A tells students to draw and write about the activity’s key takeaways. Teacher B distributes the Focus Frame Feedback handout and gathers evidence about students’ takeaways.
Discovering Dinosaurs and Paleontology

Activity

4:

Minutes

Materials

copy text here
copy text here

Resources

Prepare for the Activity:
1
copy text here
2
copy text here
3
copy text here
a)
copy text here
TEXT BLOCK: Lorem ipsum dolor sit amet, consectetur adipiscing elit, sed do eiusmod tempor incididunt ut labore et dolore magna aliqua. Ut enim ad minim veniam,
Lorem ipsum dolor sit amet, consectetur adipiscing elit, sed do eiusmod tempor incididunt ut labore et dolore magna aliqua. Ut enim ad minim veniam, quis nostrud exercitation ullamco laboris nisi ut aliquip ex ea commodo consequat. Duis aute irure dolor in reprehenderit in voluptate velit esse cillum .
copy text here
copy text here
copy text here
Discovering Dinosaurs and Paleontology

Activity

5:

Minutes

Materials

copy text here
copy text here

Resources

Prepare for the Activity:
1
copy text here
2
copy text here
3
copy text here
a)
copy text here
TEXT BLOCK: Lorem ipsum dolor sit amet, consectetur adipiscing elit, sed do eiusmod tempor incididunt ut labore et dolore magna aliqua. Ut enim ad minim veniam,
Lorem ipsum dolor sit amet, consectetur adipiscing elit, sed do eiusmod tempor incididunt ut labore et dolore magna aliqua. Ut enim ad minim veniam, quis nostrud exercitation ullamco laboris nisi ut aliquip ex ea commodo consequat. Duis aute irure dolor in reprehenderit in voluptate velit esse cillum .
copy text here
copy text here
Lorem ipsum dolor sit amet, consectetur adipiscing elit, sed do eiusmod tempor incididunt ut labore et dolore magna aliqua. Ut enim ad minim veniam, quis nostrud exercitation ullamco laboris nisi ut aliquip ex ea commodo consequat. Duis aute irure dolor in reprehenderit in voluptate velit esse cillum .
copy text here
copy text here
copy text here
© Encyclopædia Britannica, Inc. All rights reserved.