Lesson MINI

Britannica School logo in navy blue and green text

LESSON MINI

Meeting George Washington

Grade:

K-2

Topic:

People

Unit:

Historical Figures
Eye icon in white on red background

Overview

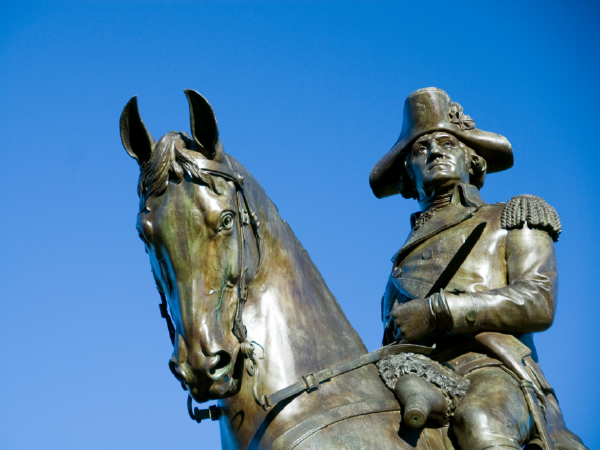
Bronze equestrian statue of George Washington against blue sky.
© MarketingShotz/stock.adobe.com

In this lesson mini, students learn about George Washington through an age-appropriate informational text. Students practice early literacy skills while learning about this important historical figure. They engage with the text to identify key details about Washington’s life, his role as the first president of the United States, and his nickname “Father of Our Country.” Through guided reading, discussions, and simple comprehension activities, students develop their understanding of both Washington and basic informational text features.

Ideas for Implementation
Social studies
Literacy
Library media
Learning centers
Intervention or enrichment
Interdisciplinary collaboration
Key Vocabulary & Definitions
American Revolution (noun): a war in which American colonists fought to become free from British rule and create their own country
country (noun): a large piece of land where many people live together, sharing the same laws and leaders
George Washington (noun): the first president of the United States
Mount Vernon (noun): George Washington’s home in northeastern Virginia
president (noun): the person chosen to be the leader of our country; the leader of the United States
timeline (noun): a line that shows when things happened, like a story of events from start to finish
United States (noun): a country in North America
Authentic Learning Extensions
Authentic learning opportunities for studying George Washington involve real-world experiences and practical applications that help students understand George Washington’s life. Here are some examples:
Library Visit: Organize a trip to your school or community library. Ask a librarian to organize books, songs, and other activities highlighting George Washington’s life. Encourage students to find books about George Washington and other U.S. presidents on the library shelves.
Rules for a New Country: Remind students that George Washington helped to form a new country: the United States of America. Tell students to pretend they are building a new country. Have them work in groups to come up with rules that will help people live safely and happily in their pretend country. Afterward, have each group share their rules. Point out any interesting rules students created and rules that multiple groups included. If there’s time, show students the Bill of Rights. Explain that these were some of the first rules that Americans made for themselves.
Your State in 1776: The United States looked very different when it was founded in 1776. Guide your students to research what your state was like on the first Fourth of July. Was your state a part of the new country? If not, when was your state founded? Who lived in your state in 1776? Were there groups of American Indians there? What can you find out about them?

Choose Activity

3
Meeting George Washington

Activity

1:

George Washington Glossary

By the end of the activity, students will be able to define and draw key vocabulary terms related to George Washington’s life.

20-30

Minutes

Materials

Whiteboard and display
Writing utensils

Resources

1
Introduce the activity by telling students that they’ll view a picture about today’s topic. Show students the George Washington image.
2
Complete a Guided Image Observation instructional strategy as a class. In addition to the questions suggested in the strategy, you might consider asking additional questions such as the following:
Who do you think these people are? What are they doing?
What do you notice about the man standing up at the front of the boat?
What does the artist want us to think about these people?
3
Explain that this is a painting of George Washington and the American soldiers crossing the Delaware River, on their way to attack British troops in New Jersey. Highlight that Washington’s pose and the light behind him work together to make him look heroic and noble.
4
Tell students that today they’ll read an informational text about George Washington’s life and take notes on what they learn.
5
Distribute a Vocabulary One-Pager four-word graphic organizer to each student. Have students write the following words on their organizers, one in each section (or prefill the blanks with these words before making copies for students):
George Washington
President
American Revolution
Mount Vernon
6
Ask students to listen for these words during the reading. When they hear one, they can touch their heads.
7
Display and read the George Washington article aloud, or use the read-aloud feature to have the article read aloud to the class. When students hear a word and touch their heads, pause and point out the word, asking these questions:
What do you think that word means?
How do you know?
What did we learn about this?
8
Following the reading, organize students into small groups and have them return to the Vocabulary One-Pager. Ask students to work in their groups to complete the organizer by adding words, symbols, or pictures that represent each word’s meaning.
9
When students have finished writing and drawing, invite several volunteers to share their work, asking questions such as the following:
Tell us about your drawing for [word].
What did you learn about [word]?
10
Wrap up the activity by having students share their favorite fact about George Washington and explain how it connects to one of the vocabulary words they learned.
Complete in Home Language: Encourage students to use their home language to complete the organizer. Adding cognates or words and phrases in their home language helps students make connections between the word and familiar concepts. Studies show that using their first language can improve students’ understanding and aid in learning new words.
Depth of Observation: After students share their initial observations, challenge them to identify and discuss any details in the image that may suggest deeper meanings or themes related to the curriculum or broader concepts. This scaffold promotes critical thinking by prompting students to move beyond surface-level observations and consider the significance of visual elements within the context of their learning. It encourages them to analyze and interpret the image’s implications, fostering a deeper understanding of both the visual content and its connections to broader ideas or themes in their studies.
Collaborative Vocabulary One-Pager: Organize students into groups of three, and assign each group one vocabulary word. Provide a large sheet of paper for them to create a visual representation of their word using symbols, drawings, and other relevant words. Display the finished work on the classroom wall to create a shared visual glossary for the class to reference.
Parallel Teaching: For collaborative teaching and learning environments, this learning activity is well suited to a Parallel Teaching strategy. In this model, the class is divided into two groups, and each teacher delivers the same activity simultaneously to their group. This reduces the student-teacher ratio, allowing for more interaction and individualized attention. With smaller groups, students are more likely to participate actively and receive immediate feedback, which fosters a deeper understanding of the content and promotes a more engaging learning experience. Evidence suggests that small-group instruction leads to increased student engagement and improved academic outcomes.
Activity Introduction and Article Reading: Both teachers begin with their groups simultaneously, each using the George Washington image for the Guided Image Observation activity. Each teacher then reads the George Washington article to their group, pausing for the vocabulary head-touching activity.
Vocabulary Development: Each teacher guides their group through the Vocabulary One-Pager activity, supporting students as they write and draw about the key terms. Teachers facilitate small-group discussions within their sections as students work.
Activity Wrap-Up: The class comes together as a whole group. Teachers collaborate to create the class vocabulary chart, with both groups contributing. Students from each group share their favorite George Washington facts and explain connections to vocabulary words. Both teachers guide the final discussion about Washington’s importance as a leader.
Meeting George Washington

Activity

2:

Draw to Understand George Washington

By the end of the activity, students will be able to recall and draw key details about George Washington from an informational text.

<20

Minutes

Materials

Crayons or markers
Paper (one sheet per student)
Whiteboard and display
Writing utensils

Resources

1
Introduce the activity by telling students that today they will learn about and draw George Washington, the United States’ first president.
2
Give each student a sheet of paper and crayons or markers. Instruct students to fold their papers to create quadrants.
3
Read the George Washington article aloud, pausing after each section and referring to the Draw to Understand instructional strategy for this discussion.
a)
Have students draw what they heard in one of the quadrants.
b)
Invite volunteers to share their drawings.
c)
Ask students gentle questions about their artwork: Who did you draw in your picture? What is happening in your drawing? Can you tell me more about what you drew?
d)
Repeat for each section of the article.
4
Following students’ completion of artwork from the instructional strategy, invite them to summarize key points about George Washington, highlighting simple facts such as where he lived, his job as a leader, and his becoming the first president. You might say the following:
Let’s look at your drawings and remember what we learned about George Washington.
Students might say:
He lived at Mount Vernon.
He was a general during the American Revolution.
He was the first U.S. president.
5
Create a class display with students’ artwork posted around a “George Washington” sign. Use this display as the class continues to learn about Washington in future activities.
Chunk the Text: To support reading and comprehension of a longer or more complex text, provide pausing points and ask students to draw after each pause. This allows students to stop and process information in segments.
Important Ideas Drawing: For students who would benefit from the added challenge of evaluating information, invite them to choose the most important quote, sentence, or detail from the George Washington article and use that to create their drawings. In their sharing, students will explain why this is the most important idea in the text.
Bilingual Drawings: Invite students to create their drawings and label them in a home language and English. This allows students to build their understanding of a concept alongside language development and not be hindered by unknown content-specific vocabulary in a new language.
Group Drawings: Place students in small groups and invite them to create a drawing together. Students may assign each group member a stage, phase, or part of the drawing, or divide work so that some students draw, others label, and others explain the drawing to the class.
Team Teaching: For collaborative teaching and learning environments, this learning activity is well suited to a Team Teaching strategy. In this model, sometimes referred to as “tag team teaching,” both teachers deliver instruction together, often alternating or integrating their teaching styles seamlessly. This collaborative approach provides students with multiple perspectives and teaching styles, enriching their learning experience. By modeling effective teamwork and communication, this approach demonstrates how different viewpoints can enhance understanding and create a dynamic and interactive classroom environment. Evidence indicates that team teaching can enhance student engagement and provide a richer, more diverse educational experience.
Activity Introduction and Article Reading: Teacher A introduces the activity about George Washington, explaining that students will learn through reading and drawing. They distribute drawing materials to each student. Teacher A then reads the George Washington article aloud to the whole class, pausing after each section.
Draw to Understand Activity: Teacher B explains the Draw to Understand activity, instructing students to illustrate what they heard in each section. After each section is read, both teachers circulate among students as they draw, offering support and encouragement. Teacher A then invites volunteers to share their drawings, asking gentle questions such as “Who did you draw?” or “What’s happening in your picture?” This process is repeated for each section of the article, ensuring students engage with and visually represent the information about George Washington.
Activity Wrap-Up: Teacher B leads a summary discussion using students’ drawings as visual aids. The artwork helps students recall key points about George Washington’s life, such as where he lived and his role as the first president. Both teachers collaborate to create a display of students’ drawings around a “George Washington” sign, which can be used for future discussions about his legacy.
Meeting George Washington

Activity

3:

George Washington Timeline

By the end of the activity, students will be able to create a timeline of George Washington’s life from an informational text.

20-30

Minutes

Materials

Glue
Half pieces of chart paper (one per student and one for teacher)
Markers
Rulers
Scissors
Whiteboard and display
Writing utensils

Resources

1
Show students the Space Travel Timeline display. To activate students’ thinking, consider asking the following questions related to the timeline:
What do you see in this picture?
What is this type of picture called?
How can we read it?
What do the numbers mean?
2
Explain to students that this chart is called a timeline. Share that a timeline is a tool that organizes information about the order in which events happen and shows things that happened over time. We usually read timelines from left to right, and the numbers are usually years.
3
Tell students that they can create timelines about anything that happens over time. On chart paper, demonstrate creating a simple timeline of your life, modeling your thinking aloud. Point out that your baby and childhood years are represented toward the left, and as you grow up, the events move to the right. Tell students that the events can be written in words or drawn in pictures.
4
Tell students that today they will work together as a class to create a timeline about George Washington’s life. First, they will read the George Washington article. Then they will create timelines of his life.
5
Read the George Washington article aloud or have volunteers read parts.
6
Distribute a Timeline handout, a half piece of chart paper, a marker, a ruler, scissors, and glue to each student. Guide students to do the following:
a)
Cut out the event ovals.
b)
Draw a line on their chart paper.
c)
Write “George Washington’s Life” at the top.
7
Reread the article. When students hear an event, have them place (not glue) that event on their timelines. Once all events are placed, they can glue them down.
8
To wrap up, guide student volunteers to narrate their timelines by asking the following guiding questions:
What happened first in George Washington’s life?
Then what happened?
What happened next?
What was the last thing that happened?
Encourage students to use words such as first, next, then, and last in their answers. An example response might be “First, George Washington was born.”
Pair Work: Consider having students complete the timeline activity in pairs rather than as a whole class. This gives students more responsibility and independence, allowing them to build their reading comprehension and research strategies with peers.
No Timeline: If your students are not yet ready to engage with timelines, skip the first two steps. Model drawing events in your life in order on the whiteboard. Then guide students to order the event ovals from the handout from left to right. This allows students to think about and model chronological sequence without the added complexity of a timeline.
Jumbo Timeline: For a fun no-handout alternative, make a jumbo timeline by taping a long piece of masking tape across your classroom floor. Create large labeled drawings of each of the events shown in the handout. Spread the drawings out away from the tape where students can see them. Have students place the events on the tape timeline as they read about them. Review the timeline as a class.
Parallel Teaching: For collaborative teaching and learning environments, this learning activity is well suited to a Parallel Teaching strategy. In this model, the class is divided into two groups, and each teacher delivers the same activity simultaneously to their group. This reduces the student-teacher ratio, allowing for more interaction and individualized attention. With smaller groups, students are more likely to participate actively and receive immediate feedback, which fosters a deeper understanding of the content and promotes a more engaging learning experience. Evidence suggests that small-group instruction leads to increased student engagement and improved academic outcomes.
Activity Introduction and Timeline Concept: Teacher A introduces the Space Travel Timeline and explains the concept of timelines to the whole class. They demonstrate creating simple timelines of their own lives on chart paper.
Article Reading and Timeline Preparation: The class is divided into two groups. Each teacher reads the George Washington article to their group. They then distribute Timeline handouts, chart paper, markers, rulers, scissors, and glue to their students. Both teachers guide their groups in cutting out event ovals and preparing their timelines.
Timeline Creation: Each teacher rereads the article slowly to their group. They pause when students identify events, helping them place these on their timelines. Both teachers provide individualized support as students arrange and then glue down their timeline events.
Activity Wrap-Up: The class comes back together. Teacher B leads a whole-class discussion, inviting volunteers from both groups to narrate George Washington’s life using their timelines. They encourage the use of sequence words such as first, next, then, and last. Teacher A supports this by highlighting key points on a master timeline that is visible to all students.
Meeting George Washington

Activity

4:

Minutes

Materials

copy text here
copy text here

Resources

Prepare for the Activity:
1
copy text here
2
copy text here
3
copy text here
a)
copy text here
TEXT BLOCK: Lorem ipsum dolor sit amet, consectetur adipiscing elit, sed do eiusmod tempor incididunt ut labore et dolore magna aliqua. Ut enim ad minim veniam,
Lorem ipsum dolor sit amet, consectetur adipiscing elit, sed do eiusmod tempor incididunt ut labore et dolore magna aliqua. Ut enim ad minim veniam, quis nostrud exercitation ullamco laboris nisi ut aliquip ex ea commodo consequat. Duis aute irure dolor in reprehenderit in voluptate velit esse cillum .
copy text here
copy text here
copy text here
Meeting George Washington

Activity

5:

Minutes

Materials

copy text here
copy text here

Resources

Prepare for the Activity:
1
copy text here
2
copy text here
3
copy text here
a)
copy text here
TEXT BLOCK: Lorem ipsum dolor sit amet, consectetur adipiscing elit, sed do eiusmod tempor incididunt ut labore et dolore magna aliqua. Ut enim ad minim veniam,
Lorem ipsum dolor sit amet, consectetur adipiscing elit, sed do eiusmod tempor incididunt ut labore et dolore magna aliqua. Ut enim ad minim veniam, quis nostrud exercitation ullamco laboris nisi ut aliquip ex ea commodo consequat. Duis aute irure dolor in reprehenderit in voluptate velit esse cillum .
copy text here
copy text here
Lorem ipsum dolor sit amet, consectetur adipiscing elit, sed do eiusmod tempor incididunt ut labore et dolore magna aliqua. Ut enim ad minim veniam, quis nostrud exercitation ullamco laboris nisi ut aliquip ex ea commodo consequat. Duis aute irure dolor in reprehenderit in voluptate velit esse cillum .
copy text here
copy text here
copy text here
© Encyclopædia Britannica, Inc. All rights reserved.