Lesson MINI

Britannica School logo in navy blue and green text

LESSON MINI

What Is a Community?

Grade:

K-2

Topic:

People and Places

Unit:

Community
Eye icon in white on red background

Overview

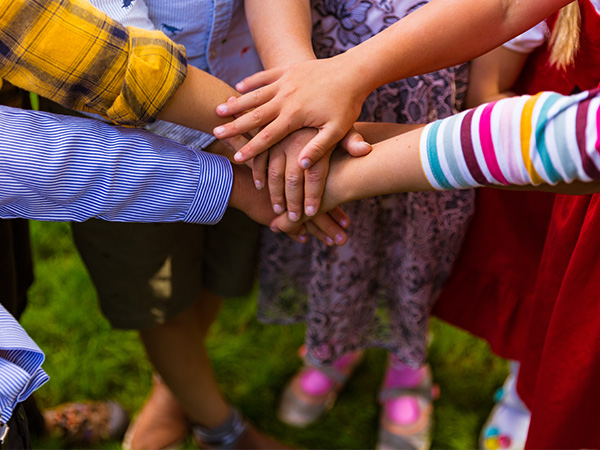
Hands stacked together, showing unity
© Tinatin1—iStock/Getty Images Plus/Getty Images

In this lesson mini, students learn about what a community is, different types of communities (school, neighborhood, city), and how communities help people. Students participate in interactive activities including a vocabulary exercise, creation of a classroom mural, and interviews of classmates to gain a deeper understanding of communities and their importance.

Ideas for Implementation
Social Studies
Literacy
Library media
Learning centers
Intervention or enrichment
Interdisciplinary collaboration
Key Vocabulary & Definitions
city (noun): a place where many people live closely together
community (noun): a group of people who live in the same area and work together
family (noun): a group of people who are related to each other and live together
interview (noun): a meeting at which someone asks questions to get information from someone else
neighbor (noun): a person who lives in a neighborhood
neighborhood (noun): a part of a town or city where people live
town (noun): a place where people live together that is smaller than a city
Authentic Learning Extensions
Authentic learning opportunities for studying communities involve real-world experiences and practical applications that help students understand community concepts meaningfully. Here are some examples:
Guest Speaker Series: Invite a few people who do different jobs in your community, such as librarians, park attendants, and postal workers, to talk to your class about their jobs. After the visit, have students make thank-you notes for the community members with drawings that represent what they learned.
Library Visit: Ask students what people can do at libraries. Then take them to visit your local public library. Ask a librarian to show you and your class around the library and explain all the things people can do at the library and the kinds of materials they can check out. Emphasize that libraries do a lot more for a community than house books!
Model Community: Discuss with students what makes a good neighborhood community. Guide students to name things like places, services, people, and design elements such as sidewalks and trees. Have students use cardboard boxes and other craft supplies to create a model community on the floor of your classroom. Invite them to explain what they’re adding to their model community and why. If desired, have students invite and host other classes to tour their model community.
School Tour: Begin by discussing what makes a community. Then take students for a walk around the school. Have them point out people and places that make up their school community, as well as any cultural elements and evidence of helping.

Choose Activity

3
What Is a Community?

Activity

1:

What Is a Community?

By the end of the activity, students will be able to define key vocabulary words related to communities and represent the vocabulary words with artwork.

20-30

Minutes

Materials

Coloring supplies
Images of different kinds of communities
Tape
Whiteboard or display
Writing utensils

Resources

1
Tell students that today they will learn about communities. Show images of different kinds of communities from ImageQuest, Britannica Library, or another royalty-free source. Consider including images of cities, suburbs, rural areas, schools, sports teams, and people using public resources such as libraries and parks. Ensure that all images are positive representations of communities.
2
Explain that these images are all examples of communities. Encourage a whole-class discussion by asking these guiding questions:
What is a community?
What makes up a community?
What is a community you’re a part of?
What do you like to do with that community?
Why is that community important to you?
Listen to and affirm student responses.
3
Familiarize yourself with the Vocabulary One-Pager instructional strategy, and distribute a Vocabulary One-Pager graphic organizer and coloring supplies to each student. Tell students that they will use this resource to organize what they learn about communities during the activity, starting with the definition of community.
4
Invite students to write the word community in the top left section of their graphic organizers. Then read aloud the following definition of community from the Key Vocabulary & Definitions section of this lesson mini:
community (noun): a group of people who live in the same area and work together
Have students copy the definition into the same section of the graphic organizer.
5
Point out that communities can be schools, neighborhoods, sports teams, or something else! Share with students that they will work with a partner to explore different kinds of communities.
6
Invite students to write the word city in the next section of their graphic organizers. Using the read-aloud tool, play the City article for students, reminding them to listen carefully for what a city is and what cities are like. Then have students draw pictures and words that represent “city” on their graphic organizers.
7
Invite students to write the words neighborhood and school in the last two sections of their graphic organizers. Define each word for students. Have students work with a partner to draw pictures and write words that represent each term.
8
Circulate and visit students as they work. To promote critical thinking, you might ask these guiding questions:
What makes a neighborhood different from a city?
How are a school community and a neighborhood community the same? How are they different?
Do all of these words describe communities? How do you know?
9
After students have finished, review the words on the graphic organizer and their definitions. Ask for volunteers to share and discuss what they drew and why. Ask this question:
Why are communities important?
10
Listen to and affirm students’ responses. Summarize that communities are important for many reasons! We can learn from people in our communities. We can make friends, which helps us feel happy. We can work together to take care of our homes and neighborhoods. We can help each other stay safe and healthy. We can ask other people in our community for help, and we can help them when they need it.
11
Congratulate students on their drawings, and invite them to hang their artwork in the classroom to reference as they continue to learn about communities.
Complete in Home Language: Encourage students to use their home language to complete the organizer. Adding cognates or words and phrases in their home language helps students make connections between the word and familiar concepts. Studies show that using their first language can improve their understanding and aid in learning new words.
Visual Vocabulary One-Pager: Follow the same steps above, but ask students to use only visual elements to represent each word’s meaning.
Connected Words One-Pager: Students complete the One-Pager, placing related words next to each other and noting their connections, which helps them understand and reinforce the relationships between vocabulary terms.
Collaborative Vocabulary One-Pager: Organize students into groups of three, and assign each group one vocabulary word. Provide a large sheet of paper for them to create a visual representation of their word using symbols, drawings, and other relevant words. Display the finished work on the classroom wall to create a shared visual glossary for the class to reference.
One Teaching, One Assisting: For collaborative teaching and learning environments, this learning activity is well suited to a One Teaching, One Assisting strategy. In this model, one teacher leads the activity while the other circulates, assisting individual students as needed. This ensures that when students encounter difficulties, they receive immediate help in the form of personalized support and answers to their questions. By addressing students’ unique needs and keeping them on track, this approach enhances individual learning experiences and fosters a supportive classroom environment. Studies indicate that immediate feedback and individualized attention can significantly enhance student understanding and retention of material.
Introduction to Communities: Teacher A introduces the pictures of communities and asks students to describe them. Teacher B listens, circulates to answer student questions, and models possible answers if needed.
Vocabulary One-Pager: Teacher A guides the class to add the first two vocabulary words to their graphic organizers and then releases them to work on the last two in pairs. Teacher B circulates, assisting individual students with their artwork as needed.
Activity Debrief: Teacher A reviews and defines each word, while teacher B circulates to support individual students.
Conclusion: Teacher A leads a discussion about why communities are important and summarizes how communities benefit individuals. Teacher B listens, circulates to answer student questions, and models possible answers if needed.
What Is a Community?

Activity

2:

School Community Mural

By the end of this activity, students will be able to create artwork representing their school community.

30-40

Minutes

Materials

Butcher paper or poster paper roll
Craft supplies (e.g., construction paper, scissors, glue, pipe cleaners, markers, paint, pom-poms)
Whiteboard and display

Resources

1
Preparation: Tape a long piece of butcher paper to the wall of your classroom and label it “Our School Community” Then set up four stations around the classroom, each with paper and plenty of craft supplies. Label the stations with the following labels:
Places at Our School
People at Our School
Fun at Our School
Helping at Our School
2
Display the Harriet Tubman Mural image. Ask these questions:
What do you see?
What was the artwork painted on?
3
Share with students that this image shows a mural, or wall artwork, by an artist named Michael Rosato. To provide context, share that this mural is painted on a building in Cambridge, Maryland, and shows a person named Harriet Tubman. Harriet Tubman helped many people, and Michael Rosato wanted to help his community remember her. People often paint murals to show people and things that are important to them.
4
Show students the long paper taped to the wall of your classroom. Tell them that today they’ll be creating a mural about their school community on that paper. If needed, remind students that a community is a group of people living in the same area and working together. First, students will learn about school communities. Then, they’ll use craft supplies to create a mural celebrating their own school community.
5
Read aloud or have volunteers read aloud the School article. Consider asking the following guiding questions:
What are some different kinds of schools? Which kind is our school?
How do you get to school?
Who are some people who work at our school?
Who are some people who learn at our school?
What are some places at our school?
What is your favorite thing to do at school?
How do we help each other at school?
6
Tell students that they will visit different stations to make small artworks about their school. When they’re done, they’ll glue their artworks to the big paper to make a mural celebrating their school community.
7
Describe what students will be doing at each station:
Places at Our School: At this station, students should create artworks showing places at school (e.g., cafeteria, gym, classroom, playground, hallways, offices).
People at Our School: At this station, students should create artworks showing people they know at school (e.g., cafeteria workers, students, teachers, administrators, janitors).
Fun at Our School: At this station, students should create artworks showing ways they have fun at school (e.g., science experiments, games, circle time, outdoor time, field trips).
Helping at Our School: At this station, students should create artworks showing ways they and others help each other at school (e.g., the school nurse putting a bandage on a student, students working in the school garden, a student helping another student who fell down).
8
Separate students into four groups. Assign each group to a station and have them begin making their artworks. After five minutes or so, have students write their names on their artworks and move them to a communal area to dry. Then have students rotate to a new station. As students work, hang any dried artworks on the mural. Repeat until all students have visited all stations and all artworks are hung on the mural.
9
Invite students to gather around the mural to admire their collaborative creation and discuss their thinking. To guide the discussion, you might do the following:
Ask about specific interesting artworks you see.
Ask volunteers to share their favorite artworks.
Note any patterns you see, or ask students whether they see any patterns among the artworks.
Praise individual students’ work.
10
Congratulate students on their work. Wrap up the activity by summarizing that their school community has special places and people, fun traditions, and ways of helping that make it unique. Leave the mural hanging in your classroom, or move it to the hallway so that other classes can view it.
Helping at School: To build foundational understanding, begin with a discussion of the importance of helping in a community. Then guide students to create individual artworks illustrating the “Helping at School” theme. This approach allows students to explore a key aspect of community involvement while developing their artistic skills.
Co-creating with the Community: Before students create the mural, consider inviting them to poll members of the school community about their experiences. Encourage students to integrate these answers into their artworks. This approach enriches student learning by connecting their artistic expression to real community perspectives and experiences. Students might ask these questions:
What are your favorite places at our school?
Who are some people you see every day at school?
What is one time you had a lot of fun at school?
How do you like to help at school? How do you observe others helping?
My Community: Guide students to design personal “murals” on individual sheets, depicting a community that holds special meaning for them. Encourage them to incorporate key elements: significant places, important people, joyful moments, and acts of kindness within their chosen communities. This approach allows students to apply concepts from the activity to an environment they find positive and relatable, which is particularly beneficial if your school is working to cultivate a more supportive atmosphere.
Team Teaching: For collaborative teaching and learning environments, this learning activity is well suited to a Team Teaching strategy. In this model, both teachers deliver instruction together, often alternating or integrating their teaching styles seamlessly, sometimes referred to as “tag team teaching.” This collaborative approach provides students with multiple perspectives and teaching styles, enriching their learning experience. By modeling effective teamwork and communication, this approach demonstrates how different viewpoints can enhance understanding and create a dynamic and interactive classroom environment. Evidence indicates that team teaching can enhance student engagement and provide a richer, more diverse educational experience.
Harriet Tubman Mural Discussion: Teacher A displays the Harriet Tubman Mural image and initiates the discussion by asking, “What do you see?” Teacher B follows up with “What was the artwork painted on?” Both teachers then take turns asking additional questions to encourage student observations. Teacher A provides context about the mural’s location and subject, while Teacher B explains the concept of murals and their importance in community representation.
School Article and Discussion: Teacher A introduces the concept of community and explains that students will be creating a mural about their school community. Teacher B reads the School article aloud, pausing at key points for emphasis. Both teachers alternate asking the debrief questions, with Teacher A focusing on the physical aspects of school (types of schools, transportation) and Teacher B addressing the social aspects (people at school, favorite activities).
Mural Stations: Teacher A explains the four mural stations (Places, People, Fun, and Helping at Our School) and what students will do at each. Teacher B demonstrates how to create an artwork and attach it to the mural. Teacher A oversees the Places and People stations, while Teacher B manages the Fun and Helping stations. Both teachers circulate, offering encouragement and assistance, periodically hanging dried artworks on the mural.
Mural Debrief: Teachers A and B stand on either side of the completed mural. Teacher A initiates the discussion by asking about specific artworks, while Teacher B encourages volunteers to share their favorite pieces. Teacher A points out patterns in the artworks, and Teacher B asks students whether they notice any additional patterns. Both teachers take turns praising individual students’ work and highlighting how the mural represents their unique school community.
What Is a Community?

Activity

3:

Community Research

By the end of the activity, students will be able to investigate and summarize their peers’ experiences being part of a community.

30-40

Minutes

Materials

Copy paper (one per group)
Pencils (one per student)
Whiteboard or display

Resources

1
Preparation: Set up a visual anchor for the activity.
a)
Write “Communities” in large letters at the top of the whiteboard.
b)
Underneath, list the following phrases: My school / My neighborhood / My friends / My family / My city
c)
Add simple illustrations next to each phrase to reinforce visual understanding.
2
Display pictures of communities from ImageQuest, Britannica Library, or another royalty-free source. Include images with examples of a school community, a neighborhood, friends and family spending time together, a city, a club, or a team. Tell students that these are all images of communities. Ask this question:
What do you think a community is?
3
Listen to and affirm students’ answers. Emphasize that a community is a group of people living in the same area and working together. Ask these questions:
What communities are you part of?
Why is that community important to you?
4
Explain that communities hold varying levels of importance for different people, each for unique reasons.
5
Tell students that today they will explore and discover which communities matter most to their classmates and why these communities are significant to them.
6
Introduce the activity to students: We’re going to play a special question game. You’ll take turns asking a partner about groups they belong to, like their family, class, or neighborhood. When you ask questions to learn about someone, it’s called an interview. Today you’ll interview each other to find out which groups are important to your partner and why.
7
Distribute an Interview handout, a clipboard, and a pencil to each student. Point out the questions on the handout. Tell students that they’ll ask these questions to their partners and write or draw what they say. Read each of the interview questions aloud.
8
Tell students that when it’s their turn to answer the questions, they can choose what community they want to talk about. Read each of the example communities listed on the board. Tell students to quietly pick one community they want to talk about.
9
Arrange the class into two concentric circles.
a)
Ask half the students to form a large circle, facing inward.
b)
Direct the other half to create a smaller inner circle, facing the outer circle.
c)
Each student in the inner circle should stand opposite a student in the outer circle, forming pairs.
The result is a double-ring formation with each student facing a partner.
10
Explain that students in the outer circle will ask questions first, while students in the inner circle answer. Askers should record responses on their handouts by writing or drawing. Students will then switch roles. After completing both rounds, the class will share their findings as a group.
11
Have askers write their names in the “Interviewer” space and their partners’ names in the “Answerer” space. Answerers shouldn’t write anything yet. Have students begin asking their questions. Visit students as they work. To help students stay on track, you might do the following:
Read the question aloud for students and then release students to ask the question and record answers in writing or with drawings.
Remind students periodically how much time is left before they switch roles.
Tell students when they should be moving on to the next question.
12
When the answerers have finished answering their questions, have the outside circle group move one student to the left.
13
Tell the inside group that it’s their turn to ask the questions. Now they can write their names in the “Interviewer” space and their partners’ names in the “Answerer” space. Remind them to write or draw what their partners say. Visit and support students as they work, using the strategies in step 11 as needed.
14
When students have finished, ask a few volunteers to share their experiences, using questions such as these:
What community did your partner talk about?
What does your partner do when they’re with that community?
Why is that community important to your partner?
If needed, model possible answers and share what you heard students talking about.
15
Point out any patterns you hear in students’ answers. For example, I hear a few of you saying that your school community is important to you. I’ve heard two people say that their friends are important to them because they have fun together.
16
Summarize that everybody is part of a few different communities! Communities are important to people because they help people live and work together and feel happy.
Design Your Own: Consider forgoing the provided handout and collaborating with students to design the interview questions. Have students copy down the questions they agree on and use their copies to interview each other.
Time Management: To help students manage their time, consider having students ask and answer the first question on the handout. After a minute or two, gather students’ attention and tell them it’s time to move on to the next question. Repeat until all students have answered all questions.
Ask the Community: Consider giving students the opportunity to interview other people around the school. If you do this, have students write down whether the interviewee is a teacher, staff member, student, or parent. Highlight how each of these groups might have different experiences in the community.
Make an Infographic: Consider analyzing students’ interview notes and creating an infographic of your findings. Present your infographic to the class, highlighting how interviews can help you see patterns in how people feel and what they do.
Team Teaching: For collaborative teaching and learning environments, this learning activity is well suited to a Team Teaching strategy. In this model, both teachers deliver instruction together, often alternating or integrating their teaching styles seamlessly, sometimes referred to as “tag team teaching.” This collaborative approach provides students with multiple perspectives and teaching styles, enriching their learning experience. By modeling effective teamwork and communication, this approach demonstrates how different viewpoints can enhance understanding and create a dynamic and interactive classroom environment. Evidence indicates that team teaching can enhance student engagement and provide a richer, more diverse educational experience.
Interview Activity Instructions: Teacher A introduces the interview concept and distributes the Interview handouts, clipboards, and pencils. Teacher B reads the interview questions aloud and explains how students should record responses. Teacher A clarifies that students can choose which community to discuss, while Teacher B reviews the example communities listed on the board.
Concentric Circles Setup: Teacher A explains the concentric circle formation, while Teacher B demonstrates the arrangement. Teacher A guides half the class to form the outer circle, and Teacher B directs the other half to create the inner circle. Both teachers ensure students are correctly positioned and paired up.
Interview Process: Teacher A explains the roles for the first round (outer circle asks, inner circle answers), while Teacher B sets a timer and prepares to give time reminders. Both teachers circulate during the interviews, offering support and encouragement. Teacher A manages the rotation when it’s time to switch roles, while Teacher B ensures all students have a new partner and are ready for the second round.
Debrief and Conclusion: Teacher A initiates the debrief by asking students about their partners’ responses. Teacher B listens and notes patterns in the answers. Teacher A encourages students to share why certain communities are important to their partners, while Teacher B points out similarities and differences among responses. Teacher A summarizes the key points about communities, and Teacher B reinforces how communities help people live and work together and feel happy.
© Encyclopædia Britannica, Inc. All rights reserved.