Lesson MINI

Britannica School logo in navy blue and green text

LESSON MINI

Discovering How Earth Changes

Grade:

K-2

Topic:

Science

Unit:

Earth
Eye icon in white on red background

Overview

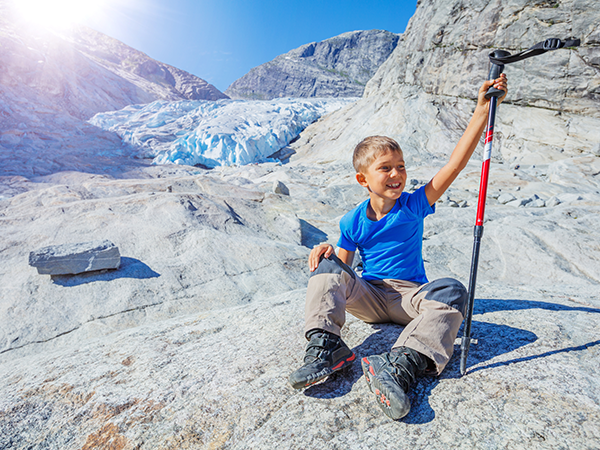
Young boy sitting on rocky terrain near glacier, holding hiking pole.
© Max Topchii/stock.adobe.com

In this lesson mini, students explore how Earth changes over time. They learn about different ways Earth can change quickly (as by earthquakes) and slowly (as by glaciation). Through hands-on models and demonstrations, students investigate how tectonic plates cause earthquakes and how glaciers shape land over long periods of time. They make connections between Earth science vocabulary and concepts through art, discussion, and experimentation.

Ideas for Implementation
Science
Literacy
Library media
Learning centers
Intervention or enrichment
Interdisciplinary collaboration
Key Vocabulary & Definitions
canyon (noun): a very deep valley in the ground
earthquake (noun): a shaking or trembling of the earth
fault (noun): a crack or split in Earth’s crust where tectonic plates meet
glacier (noun): a huge slowly moving sheet of ice
magma (noun): very hot melted rock under the ground
tectonic plate (noun): giant piece of land that floats on Earth’s surface, like a puzzle piece that can move
volcano (noun): a mountain that can erupt hot melted rock from deep inside Earth
Authentic Learning Extensions
Authentic learning opportunities for studying how Earth changes over time involve real-world experiences and practical applications that help students understand geology concepts meaningfully. Here are some examples:
Local Nature Walk: Take students on a short walk around the school grounds or nearby park. Have them collect natural items such as rocks and leaves. Create a simple “nature museum” in the classroom where students can sort their findings and observe how these items might change over days or weeks (leaves drying out, etc.).
Then and Now Pictures: Show students old photographs of familiar places in their community (their school building, a local park, main street) alongside current photos of the same locations. Create a simple class book in which students draw pictures showing what they notice is different between “then” and “now.”
Weather Watchers: Start a class weather journal in which students make daily observations about the weather and how it affects the schoolyard (puddles after rain, fallen leaves after wind, etc.). After collecting observations for several weeks, help students notice patterns and changes over time through simple drawings and discussions.

Choose Activity

3
Discovering How Earth Changes

Activity

1:

Word Sketch Connections

By the end of the activity, students will be able to define, represent, and outline connections between key Earth science vocabulary words and categorize Earth changes as happening quickly or slowly.

30-40

Minutes

Materials

Devices (e.g., Chromebook, tablet, other approved) (one per student)
Images of Earth’s changes over time
Scissors
Unlined paper (one sheet per student)
Whiteboard and display
Writing utensils
Yarn or string (one ball)

Resources

1
Tell students that today they will learn about how Earth changes over time. Explain that some changes happen quickly and others happen slowly.
2
Show students pictures of how Earth changes from ImageQuest Jr., Britannica Library, or another royalty-free resource. For example, you might show a flood, the four seasons, a farmer using a bulldozer, a person planting a tree, or a volcano erupting. Ask the following questions:
What are some ways that Earth changes over time?
Does that change happen slowly or quickly?
3
Share with students that today they will research different events that change Earth in big ways over time. Then they’ll talk about how these events are similar and different.
4
Separate students into groups of two or three. Assign each group one vocabulary word and the accompanying Britannica School article, listed below:
canyon: Canyon article
earthquake: Earthquake article
glacier: Glacier article
tectonic plate: Earthquake article
volcano: Volcano article
Not every word needs to be assigned. If students finish early or need an extra challenge, you can give them more than one word.
5
Explain to students how to access the Britannica School articles. Show them an example of how to navigate the website if necessary.
6
Invite groups to read or listen to their assigned articles, paying special attention to their vocabulary words.
7
Explain and demonstrate the Word Sketch instructional strategy. Show them an example of what you expect.
8
Invite students to complete a word sketch individually for their group’s assigned word. Suggest that they reread their group’s article if needed.
9
Clear a large space on the floor of your classroom. Invite one group to explain their word and show their word sketches to the class. Then ask them to arrange their artwork together in a group on the floor. Ask:
Does anybody have a word that is like this word or belongs with this word?
If needed, guide students to name a connection. For example, fault is connected to earthquake because faults can cause earthquakes.
10
Invite the group that answers to explain their word and how it is connected to the previous word and to show their artwork to the class. Then ask them to arrange their artwork in a group on the floor. Cut a long piece of yarn and lay it on the floor, connecting the two groups of pictures. Ask:
Does anybody have a word that is like one of these words or belongs with one of these words?
11
Repeat the activity until all words have been added. Consider asking students to find and describe more connections between the words already on the ground, and connect them with yarn.
12
When all words have been added, point out two connected words at random. Ask:
How are these words connected?
13
Call on volunteers to answer and explain, and celebrate their ideas.
14
To wrap up the activity, lead a brief class discussion summarizing what students learned about how Earth changes over time. Reinforce the concepts of quick changes and slow changes.
Definition and Example Starter: Provide each group with a concise definition and example sentence for their assigned vocabulary word, distributed on cards or digitally. This approach ensures foundational understanding, guides creative tasks, and illustrates practical usage, encouraging students to integrate these elements into their visual displays for enhanced retention and application.
Depth of Knowledge Questions: Before students begin their creative exploration of the vocabulary words, present each group with a set of depth of knowledge (DOK) questions tailored to their assigned word. These questions should encourage students to think beyond the surface level. For example:
What do you think causes a volcano to form? To explode?
What do you think a house might look like after a big earthquake? Why?
If someone had never heard of a tectonic plate before, what might they think it is?
Resource-Based Collage Creation: Encourage students to use a curated set of resources—either digital elements, like images and video clips, or physical materials, like magazines and newspapers—to create a visual representation of their assigned words. Ask groups to assemble their collages on a digital platform, a whiteboard, or traditional poster boards, incorporating diverse elements that depict the meaning and context of the vocabulary. Invite students to present their work, explaining the significance of each component. You might ask: “Can you think of any historical or current events where this word plays a significant role?”
Parallel Teaching: For collaborative teaching and learning environments, this learning activity is well suited to a Parallel Teaching strategy. In this model, the class is divided into two groups, and each teacher delivers the same activity simultaneously to their group. This reduces the student-teacher ratio, allowing for more interaction and individualized attention. With smaller groups, students are more likely to participate actively and receive immediate feedback, which fosters a deeper understanding of the content and promotes a more engaging learning experience. Evidence suggests that small-group instruction leads to increased student engagement and improved academic outcomes.
Discovering How Earth Changes

Activity

2:

Graham Cracker Tectonic Plates

By the end of the activity, students will be able to model how the movement of tectonic plates changes Earth’s surface.

30-40

Minutes

Materials

Frosting (one container per two groups*)
Graham cracker squares (four per group*)
Napkins (one per group*)
Paper plates (one per group*)
Red food dye
Water (one cup per group*)
Whiteboard and display
Writing utensil
*Plus one for teacher demonstration

Resources

Prepare for the Activity:
a)
Mix the frosting with red food dye to create “magma.”
b)
Spread a thick layer of red frosting on one paper plate for each group.
c)
Gather materials: graham crackers, napkins, cups of water, and the Fault image.
1
Draw or display a See-Think-Wonder graphic organizer on the board, and show students the Fault image. Complete the graphic organizer as a class. You might ask:
See: What do you see? What do you notice about the land?
Think: What is happening to the land? What do the squiggly black lines show? How might it feel to be in one of those houses?
Wonder: What questions do you have about this picture?
2
Explain that to answer students’ “Wonder” questionss they will read an article and then conduct an experiment.
3
Display the Earthquake article, and invite volunteers to read the “Introduction” and “Causes” sections aloud. Check for understanding by asking students these questions:
What is an earthquake?
What causes earthquakes?
4
Summarize that earthquakes are sudden shakings of the ground. They happen because of tectonic plates. Tectonic plates are giant pieces of rock that make up Earth’s crust, or surface. When those plates move, they cause an earthquake. Point out how the tectonic plates in the Fault image are shifting, causing the surrounding land to shake.
5
Explain that today students will explore how tectonic plates move, shake, and shape Earth with an experiment.
6
Divide the class into groups of two to four students. Give each group the following materials:
A plate of red frosting (representing magma)
Eight graham cracker squares (representing tectonic plates)
A napkin
A cup of water
7
Demonstrate and discuss each step of the Graham Cracker Activity Instructions using your own set of materials. Invite students to follow along with their materials.
8
Show students the Fault image again. Read aloud the questions they suggested for the “Wonder” section of the See-Think-Wonder graphic organizer, and invite them to try to answer those questions. Guide students to describe what is happening in the picture and connect it to their graham cracker experiment.
Cause of Earthquakes: Instead of guiding students to slide the graham crackers past each other, invite groups to use what they learned in the Fault image and the “Causes” section of the Earthquake article to model how tectonic plates cause earthquakes. This invites deeper learning by encouraging students to internalize, apply, and model what they learned.
Fault Diagrams: Following the graham cracker activity, invite students to draw diagrams of transform faults, divergent faults, convergent faults, and subduction faults. This allows students to plan and create a model of each concept, deepening their learning.
Whole-Class Demonstration: Consider conducting your experiments as a whole class, using extra-large pieces of graham cracker. To help students remember what the experiment symbolizes, stick small house or tree figurines to the graham crackers. Conducting a whole-class experiment can allow you to observe students, guide discussion, and offer immediate support as needed. Adding props to the graham crackers will remind students why they are doing the experiment and what the different elements symbolize.
Classroom Materials: Consider using classroom materials like cardboard and thickened tempera paint instead of graham crackers and frosting for your model. To thicken tempera paint, mix in one teaspoon of baking soda or cornstarch at a time until the paint is the consistency of frosting. For this variation, have students soak the cardboard in water for 15 seconds rather than three seconds before modeling a convergent fault.
Station Teaching: For collaborative teaching and learning environments, this learning activity is well suited to a Station Teaching strategy. In this model, students rotate among different stations, each managed by a teacher who teaches a specific part of the content. This keeps students engaged through varied activities and teaching methods. It also allows teachers to focus on their strengths and teach content in a more in-depth and specialized manner. This approach ensures that students receive a comprehensive and dynamic education by catering to different learning styles. Research supports that multifaceted teaching strategies cater to diverse learning styles, enhancing students’ comprehension and retention.
Activity Introduction and See-Think-Wonder Activity: Teachers collaborate to introduce the Faults image and facilitate the See-Think-Wonder activity. This can be done as a whole-class activity before beginning the experiments at two separate stations.
Experiments: Teachers divide students into groups and assign each group to a different station, each with a different model. At Station 1, one teacher guides groups to model and discuss transform and divergent faults. At Station 2, the other teacher guides groups to model and discuss convergent and subduction faults. Then groups switch stations and repeat the activity with the other model.
Activity Wrap-Up: Teachers bring the class together to review all models collectively. Teachers alternate reviewing how the tectonic plates moved and caused changes in each model. Students review their “Wonder” questions from the See-Think-Wonder activity and discuss them based on what they’ve learned. Encourage students to share insights from each station and make connections between the different types of faults.
Discovering How Earth Changes

Activity

3:

Glaciers

By the end of the activity, students will be able to explain how glaciers change the land as they move across it.

20-30

Minutes

Materials

Devices (e.g., Chromebook, tablet, other approved) (one per student)
Cup
Drawing paper (one sheet per student)
Flour
Freezer
Natural materials (e.g., twigs, leaves, dirt)
Tray or baking sheet
Water
Whiteboard and display
Writing utensils

Resources

Prepare for the Activity: Refer to the Glacier Activity Preparation Instructions.
1
Lead students in a Guided Image Observation instructional strategy about the Valley Glacier image. You might ask the following questions:
What do you see in this picture?
How do you think that ice got there?
Is the ice clean, or is it dirty?
Do you think the ice is moving, or is it staying still?
What do you think this scene will look like in a thousand years?
2
Explain that this is a picture of a glacier. Define a glacier as a huge, slowly moving sheet of ice, like a frozen river that moves very, very slowly.
3
Tell students that today they will read an article to learn more about glaciers. Display the Glacier article. Show students each section heading in turn. Ask questions such as these:
What do you think this section will be about?
Where do you think glaciers are found?
How do you think glaciers form?
How do you think glaciers change over time?
How do you think glaciers change Earth over time?
4
Separate students into pairs. Invite them to read the article, paying close attention to how glaciers form and how they change the land over time.
5
Show the Valley Glacier image again. Ask:
How did this glacier get there?
What do you think this scene might look like in a thousand years? Why?
6
Summarize that over many years, snow fell, packed in, melted, and refroze in the same place. This process formed the ice that makes up the glacier. Over the next thousand years, this glacier might melt away, adding more water to the oceans. It could also move and change the land around it.
7
Tell students that today they’ll observe an experiment that shows how glaciers change the land as they move.
8
Show students the tray with the snowscape you prepared. Explain that the flour represents land with snow on top. Ask:
What else do you see in the snow?
Explain that, just as with real snow, there are twigs, leaves, and dirt mixed in.
9
Show students the miniature glacier you prepared. Consider asking the following questions:
What do you notice about this glacier?
Why do you think this glacier has twigs, leaves, and dirt in it?
Confirm that the glacier picked up twigs, leaves, and dirt from the ground as it moved.
10
Put the glacier on one end of the tray and push it down so that it touches the bottom. Invite students to observe what happens when the glacier moves across the land. As they watch, invite them to think about the following questions:
How is the glacier changing the land?
How is the land changing the glacier?
11
Direct students’ attention to the flour on the tray. Ask this question:
How did the glacier change the land?
Summarize that the glacier carved a path through the land. It also might have left some water behind. Glaciers can cause big changes to the land as they move. Show students the Kings Canyon image. Explain that a long time ago, a big glacier moved through this land and carved out the canyon.
12
Pick up the glacier and show it to students. Ask the following question:
How did the land change the glacier?
Summarize that the glacier picked up snow and other natural items as it moved through the land. The natural items frozen deep in the glacier are items it picked up many years ago.
13
Give each student a sheet of drawing paper and a pencil. Invite them to draw a line down the center of their paper. Ask them to draw a nature scene on each side of the line. One drawing should show the scene before a glacier moves through it. The other drawing should show the scene after the glacier came through.
14
Encourage students to turn to a partner and explain their drawings. Ask:
What did the scene look like before the glacier came through?
How did it change after the glacier?
Did it change slowly or quickly?
15
To wrap up, invite a few volunteers to share their drawings with the class and explain what they drew.
Pair Work: Separate students into pairs, and give each pair their own experiment materials. Talk students through conducting the experiment with their partners, pausing often to ask about their observations and experiences. This method offers students more agency and encourages them to build their science skills.
Snow and Ice Investigation: If students in your class are less familiar with ice and snow, spend some time researching and discussing these topics. Consider having students read the Britannica Library Snow article and observe snow and ice pictures from ImageQuest Jr., Britannica Library, or another royalty-free resource. If possible, set up a sensory bin with ice cubes and investigation supplies such as tongs, magnifying glasses, and paintbrushes. This gives students the opportunity to become familiar with relevant topics before learning about glaciers.
Alternative Materials: If needed, you can use alternative materials to create the “land” in your experiment, such as sand, breadcrumbs, or potting soil. Make sure to choose a solid material that has fine particles so that the glacier picks it up as it moves. Point out that many glaciers, like the glacier in the Valley Glacier image, move across rock and dirt instead of snow.
Parallel Teaching: For collaborative teaching and learning environments, this learning activity is well suited to a Parallel Teaching strategy. In this model, the class is divided into two groups, and each teacher delivers the same activity simultaneously to their group. This reduces the student-teacher ratio, allowing for more interaction and individualized attention. With smaller groups, students are more likely to participate actively and receive immediate feedback, which fosters a deeper understanding of the content and promotes a more engaging learning experience. Evidence suggests that small-group instruction leads to increased student engagement and improved academic outcomes.
Discovering How Earth Changes

Activity

4:

Minutes

Materials

copy text here
copy text here

Resources

Prepare for the Activity:
1
copy text here
2
copy text here
3
copy text here
a)
copy text here
TEXT BLOCK: Lorem ipsum dolor sit amet, consectetur adipiscing elit, sed do eiusmod tempor incididunt ut labore et dolore magna aliqua. Ut enim ad minim veniam,
Lorem ipsum dolor sit amet, consectetur adipiscing elit, sed do eiusmod tempor incididunt ut labore et dolore magna aliqua. Ut enim ad minim veniam, quis nostrud exercitation ullamco laboris nisi ut aliquip ex ea commodo consequat. Duis aute irure dolor in reprehenderit in voluptate velit esse cillum .
copy text here
copy text here
copy text here
Discovering How Earth Changes

Activity

5:

Minutes

Materials

copy text here
copy text here

Resources

Prepare for the Activity:
1
copy text here
2
copy text here
3
copy text here
a)
copy text here
TEXT BLOCK: Lorem ipsum dolor sit amet, consectetur adipiscing elit, sed do eiusmod tempor incididunt ut labore et dolore magna aliqua. Ut enim ad minim veniam,
Lorem ipsum dolor sit amet, consectetur adipiscing elit, sed do eiusmod tempor incididunt ut labore et dolore magna aliqua. Ut enim ad minim veniam, quis nostrud exercitation ullamco laboris nisi ut aliquip ex ea commodo consequat. Duis aute irure dolor in reprehenderit in voluptate velit esse cillum .
copy text here
copy text here
Lorem ipsum dolor sit amet, consectetur adipiscing elit, sed do eiusmod tempor incididunt ut labore et dolore magna aliqua. Ut enim ad minim veniam, quis nostrud exercitation ullamco laboris nisi ut aliquip ex ea commodo consequat. Duis aute irure dolor in reprehenderit in voluptate velit esse cillum .
copy text here
copy text here
copy text here
© Encyclopædia Britannica, Inc. All rights reserved.