Lesson MINI

Britannica School logo in navy blue and green text

LESSON MINI

Crawling and Slithering Reptiles

Grade:

K-2

Topic:

Animals

Unit:

Animal Traits
Eye icon in white on red background

Overview

Colorful chameleon with vibrant blue, purple, and orange scales perched on plant stems.
© bayshev—iStock/Getty Images

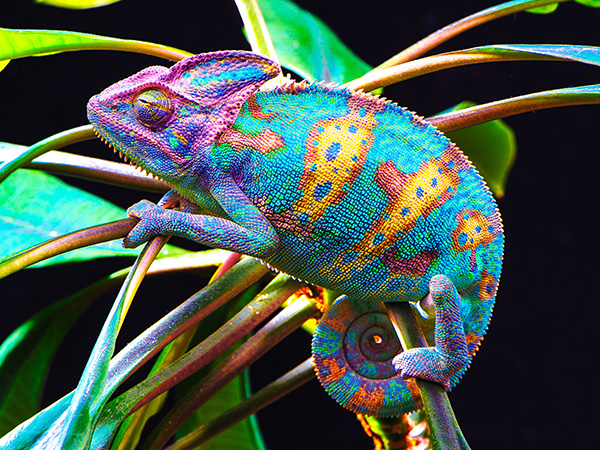
In this lesson mini, students explore reptiles and their unique traits. Through interactive activities, students learn to identify and describe reptile characteristics, comparing different species like turtles, snakes, lizards, and crocodiles. This mini encourages observational and analytical skills as students examine reptile diversity, body parts, behaviors, and habitats. Students build scientific vocabulary and understand how reptiles’ traits aid their survival.

Ideas for Implementation
Science
Literacy
Library media
Learning centers
Intervention or enrichment
Interdisciplinary collaboration
Key Vocabulary & Definitions
bask (verb): to lie in the sun to keep warm, as animals such as lizards and turtles often do
cold-blooded (adjective): having a body temperature that changes with the surrounding temperature
egg (noun): the first stage of most reptiles’ lives, from which baby reptiles hatch
prey (noun): an animal that is hunted by another animal for food
reptile (noun): any of a group of animals that are cold-blooded, breathe air, have backbones and scales or bony plates, and usually lay eggs
scales (noun): the small, flat parts that cover the body of animals such as fish and reptiles
shell (noun): the hard outer covering of some animals, such as turtles
tail (noun): the part of an animal’s body that is attached to its back end
trait (noun): a quality or characteristic that makes something special, like its body parts, color, shape, behavior, or size
venom (noun): a poisonous liquid that some animals, such as rattlesnakes, can inject into prey or an enemy
Authentic Learning Extensions
Authentic learning opportunities for studying reptiles involve real-world experiences and practical applications that help students understand biological concepts meaningfully. Here are some examples:
Collage: Ask students to make a collage using elements from nature that represent the habitats of different reptiles covered in the lesson, such as turtles, lizards, alligators, and crocodiles. With their guardians, students can collect different-colored leaves, rocks, and sticks from home. This activity fosters a home-to-school connection.
Library Visit: Invite students to visit their local libraries and find fiction and non-fiction books about different reptiles. Encourage students to read the books at home and at school.
Reptile Movements: Encourage students to observe how reptiles move, and practice these movements at school and in class: for example, snakes slither, turtles move slowly, lizards run or walk, sea turtles swim. This activity helps students internalize new learnings through movement.
Reptile Observation: Give students a variety of pictures, and encourage them to discuss the different reptile traits they observe. Encourage students to work in small groups to continue building language fluency and interpersonal communication skills.
Reptile Songs: Invite students to listen and dance to popular kids’ songs about reptiles—for example, “Five Little Speckled Frogs,” “I Had a Little Turtle,” and “Reptile Song.” This activity encourages students to make better connections between new learnings and popular songs.
Reptile Treasure Hunt: Use your school’s outdoor space to create a reptile scavenger hunt. Hide different cutouts of reptiles, and ask students to search for them. This game-based activity builds classroom community.

Choose Activity

4
Crawling and Slithering Reptiles

Activity

1:

Turtle Traits

By the end of the activity, students will be able to identify and describe distinct turtle traits, including physical characteristics and behaviors.

>40

Minutes

Materials

Whiteboard and display

Resources

1
Tell students that during today’s activity they will discuss turtle traits and learn new vocabulary through a Vocabulary Cloze strategy.
2
Begin by inviting students to share what they may already know about turtles. As they share, scribe students’ responses on a Bubble Web graphic organizer. Guiding questions to prompt and extend student thinking may include the following:
How fast do you think turtles move?
Can turtles swim?
What do turtles eat?
Where do they live?
3
Display the Turtle article, and read the article aloud to the class, or use the read-aloud feature in each section of the article. Stop at the end of each section to ask guiding comprehension questions such as these:
a)
What are key turtle traits?
b)
What do most turtles have?
c)
What do turtles use their shells for?
d)
Are turtle legs thick or thin?
e)
Do turtles have teeth?
4
As students answer questions, continue to scribe turtle traits on the Bubble Web.
5
Using chart paper or an interactive display, identify and circle key vocabulary words from the Turtle article, and define them as a class. Examples of keywords include tortoise, sea turtle, shell, flippers, claws, eggs, legs, plants, and tail.
6
Engage the whole class in a Vocabulary Cloze activity to support vocabulary acquisition, focusing on five or six suggested vocabulary terms above. Follow the specific procedures outlined for the Vocabulary Cloze instructional strategy.
Example Cloze Sentences
1.
Some turtles that live on land are called (tortoises).
2.
Some turtles can hide in their (shells).
3.
Most turtles have thick (legs). They use them to move around.
4.
Female turtles lay (eggs) on land.
5.
Some turtles eat only (plants). Others eat jellyfish and bugs.
7
To wrap up, ask students to turn and talk with a partner and share at least three things they learned about turtles. Afterward, ask groups to share with the whole class. Add to the Bubble Web as additional details are shared.
Visual Aids: Provide images or simple illustrations that depict the word’s meaning. This visual support helps students better understand and remember the vocabulary by connecting the word to a concrete image, which can significantly aid comprehension and retention. Additionally, visuals can help bridge language barriers by providing context clues directly related to the word, making it easier for students to participate actively and confidently in the cloze activity.
Varied Context Clues: Create cloze sentences with varying context clues, from direct to abstract. Direct clues can make it easier for younger audiences to grasp the word’s meaning. For a greater challenge, use sentences with minimal or complex clues, like synonyms or antonyms, that require deeper inferential thinking. This method deepens students’ engagement with the text by demanding they use their broader linguistic and cultural knowledge. It also improves their vocabulary comprehension and critical thinking skills.
Interactive Story Cloze: Instead of individual sentences, write a short narrative or story that incorporates multiple new vocabulary words within its context. Each vocabulary word appears as a blank within the story.
Team Teaching: For collaborative teaching and learning environments, this learning activity is well suited to a Team Teaching strategy. In this model, both teachers deliver instruction together, often alternating or integrating their teaching styles seamlessly, sometimes referred to as “tag team teaching.” This collaborative approach provides students with multiple perspectives and teaching styles, enriching their learning experience. By modeling effective teamwork and communication, this approach demonstrates how different viewpoints can enhance understanding and create a dynamic and interactive classroom environment. Evidence indicates that team teaching can enhance student engagement and provide a richer, more diverse educational experience.
Initial Discussion and Bubble Web Diagram: Both teachers lead the class discussion, with one asking guiding questions and the other scribing student responses on a Bubble Web graphic organizer.
Reading the Britannica School Article: Teacher A reads the Turtle article aloud, while Teacher B pauses for comprehension checks and assists students with understanding the content.
Identifying and Defining Vocabulary Words: Teacher A identifies and circles key vocabulary words on an interactive display, and Teacher B facilitates the discussion to help define and understand these words.
Vocabulary Cloze Strategy: Teacher A guides the class through a Vocabulary Cloze strategy, and Teacher B provides additional support to students who need help.
Wrap-Up and Sharing: Both teachers facilitate a turn-and-talk activity followed by a whole-class discussion, encouraging students to share their learnings and adding new information to the Bubble Web graphic organizer.
Crawling and Slithering Reptiles

Activity

2:

Reptile Traits

By the end of the activity, students will be able to identify and present unique traits of their assigned reptile and compare these traits with those of other reptiles.

30-40

Minutes

1
Tell students that during today’s activity they will explore reptile traits through discussion, image analysis, article reading, group investigation, and presentations, focusing on specific reptiles.
2
Engage students in a whole-group discussion about reptile traits, emphasizing that traits are qualities that make reptiles unique and that traits are distinguishing features like body parts, color, size, behavior, or shape. Consider asking students questions such as these:
What reptiles do you know?
Do you like reptiles?
Where do reptiles live?
3
Display images of different reptiles of teacher’s choice from ImageQuest Jr., Britannica School or another royalty-free source, and ask students to make oral observations about what traits they see.
4
Guide students to identify the common traits that all reptiles have. As they share, scribe their responses on the whiteboard or digital display. Examples may include that reptiles
lay eggs,
have dry skin,
have scales.
5
Share with students that they are going to learn more about reptiles by reading a Reptile article. Read the article aloud to the class, or use the read-aloud feature in each section of the article. Pause for comprehension checks at the end of each section, asking guiding questions such as these:
What are examples of reptiles?
What does it mean to be cold-blooded?
How do lizards stay warm and cool?
How do different reptiles move?
What do reptiles eat?
How do reptiles protect themselves (e.g., rattlesnakes and turtles)?
6
Organize students into four groups, and assign each group a different reptile: turtle, snake, lizard, or crocodile.
7
Explain to students that they will be “reptile detectives” with the task of identifying the traits of their assigned reptile.
8
Distribute the appropriate set of student Reptile discussion cards, including the observation cards, pictures, and facts cards, to each group. Invite students to work together to identify as many traits for their assigned reptile as they can.
9
Invite students to present their reptile traits to the class.
10
Return to a whole-class discussion, comparing and contrasting the different reptiles presented by each group. Model how to use linking words such as and, while, and but to compare and contrast. As groups share, you may consider scribing student responses on a whiteboard or other visual display.
11
Conclude the activity by asking students what they learned about reptiles, summarizing and emphasizing key details specific to reptile traits.
Visual Cues: Provide abundant visual references focusing on the reptiles included in the learning activity. During the initial whole-group discussion, present a slideshow featuring various reptile pictures. This could be a collection of images of the teacher’s choice from ImageQuest Jr. or another royalty-free source. Continue displaying different reptile images as students work in small groups, allowing them to internalize what they’re learning. Visual support enhances comprehension, retention, and engagement by offering students different representations of their focus of study.
Critical Trait Analysis: Incorporate a higher level of thinking into the group discussions by asking students to evaluate how different traits help reptiles survive in their environments. For example, after students identify traits for their assigned reptile, they could discuss why each trait is important and how it helps the reptile survive in its habitat (e.g., lizards survive by being able to drop their tails as needed to help them escape from predators).
Reptile Traits Posters: Integrate a group activity in which students create a poster that highlights the key traits of their assigned animals. Invite students to write, draw, and/or label their posters depending on their writing levels.
Independent Reptile Trait Activity: Encourage students to draw their assigned reptile and write words or sentences that describe its traits. This practice fosters internalization of the content, as well as critical thinking skills, as students apply what they learned through autonomous practice.
Team Teaching: For collaborative teaching and learning environments, this learning activity is well suited to a Team Teaching strategy. In this model, both teachers deliver instruction together, often alternating or integrating their teaching styles seamlessly, sometimes referred to as “tag team teaching.” This collaborative approach provides students with multiple perspectives and teaching styles, enriching their learning experience. By modeling effective teamwork and communication, this approach demonstrates how different viewpoints can enhance understanding and create a dynamic and interactive classroom environment. Evidence indicates that team teaching can enhance student engagement and provide a richer, more diverse educational experience.
Whole-Group Discussion: Teacher A initiates the discussion about reptile traits, while Teacher B facilitates student responses and manages the display.
Guiding Questions and Picture Display: Teacher A asks guiding questions, and Teacher B displays pictures and supports students in making observations.
Reading and Comprehension Checks: Teacher A reads the article aloud, and Teacher B pauses for comprehension checks and asks guiding questions.
Group Work: Teacher A explains the group activity and assigns reptiles, while Teacher B distributes materials and supports discussions.
Presentations: Teacher A facilitates group presentations, and Teacher B manages the class and provides clarifications.
Whole-Class Discussion and Conclusion: Teacher A leads the final discussion by comparing reptiles, and Teacher B models by linking words and summarizing key details.
Crawling and Slithering Reptiles

Activity

3:

Amazing Lizards

By the end of the activity, students will be able to explain the meaning of lizard-related vocabulary words and use them in original sentences.

30-40

Minutes

1
Tell students that during today’s activity they will learn about lizards through discussion, reading, vocabulary activities, group work, and games
2
Invite students to share what they may already know about lizards. As they share, scribe students’ answers on a Bubble Web graphic organizer. Guiding questions to prompt and extend student thinking might include the following:
Do you think lizards are cold-blooded or warm-blooded?
How do lizards move?
Where do lizards live?
3
Provide each student a copy of the Lizard article, and display the article for the whole class to read. Encourage students to follow along on their paper as they listen to the article read aloud. Stop at the end of each section to check for comprehension. Example guiding comprehension questions include the following:
What is a lizard’s skin like?
Where do lizards live?
What do lizards look like?
What do lizards eat?
How do lizards protect themselves from enemies?
4
After reading, guide students in completing a Word Sketch instructional strategy. Working in pairs or independently, to circle or highlight keywords from the text on their individual copies of the article. Examples of keywords include skinks, Komodo dragons, reptiles, scale, chameleons, and tails.
5
Organize students into groups of three to four, and assign each group one vocabulary word from the list above. Provide a large sheet of paper and markers to each group. Explain to students that their task is to create a visual representation of their word using symbols and drawings.
6
When complete, invite students to share their word, explaining its meaning and how they chose to illustrate it to support its meaning. Consider tossing a soft ball or beanbag to different students as they participate in the share-out. After groups present, invite them to hang their papers around the room as a visual display and future reference.
7
Invite students to make a sentence with different keywords to further internalize the learning.
8
Conclude the activity by asking students to take turns sharing one new exciting fact they learned about lizards.
Definition and Example Starter: Provide each group with a concise definition and example sentence for their assigned vocabulary word, distributed on cards or digitally. This approach ensures foundational understanding, guides creative tasks, and illustrates practical usage, encouraging students to integrate these elements into their visual displays for enhanced retention and application.
Depth of Knowledge Questions: Before students begin their creative exploration of the vocabulary words, present each group with a set of Depth of Knowledge (DOK) questions tailored to their assigned word. These questions should encourage students to think beyond the surface level. For example:
What are the potential impacts of this concept in real-life situations?
How might this word be misunderstood or misused, and why?
Can you think of any historical or current events where this word plays a significant role?
Resource-Based Collage Creation: Encourage students to use a curated set of resources—either digital elements, like images and video clips, or physical materials, like magazines and newspapers—to create a visual representation of assigned words. Ask groups to assemble their collages on either digital platforms or traditional poster boards, incorporating diverse elements that depict the meaning and context of the vocabulary. Invite students to present their work, explaining the significance of each component.
Station Teaching: For collaborative teaching and learning environments, this learning activity is well suited to a Station Teaching strategy. In this model, students rotate among different stations, each managed by a teacher who teaches a specific part of the content. This keeps students engaged through varied activities and teaching methods. It also allows teachers to focus on their strengths and teach content in a more in-depth and specialized manner. This approach ensures that students receive a comprehensive and dynamic education by catering to different learning styles. Research supports that multifaceted teaching strategies cater to diverse learning styles, enhancing students’ comprehension and retention.
Initial Discussion and Bubble Web Diagram: Teacher A leads the class discussion and scribes, while Teacher B observes and notes student participation.
Guiding Questions and Comprehension Checks: Teacher A prompts student ideas with guiding questions, and Teacher B supports students needing help with responses.
Reading the Britannica School Article: Teacher A reads the Lizard article aloud and checks comprehension, while Teacher B assists struggling students.
Highlighting Keywords: Teacher A demonstrates keyword identification, and Teacher B helps students understand the keywords’ significance.
Word Sketch Strategy: Teacher A organizes the Word Sketch strategy, and Teacher B supports groups in creating visual representations.
Sharing and Displaying Vocabulary Words: Teacher A facilitates the share-out session, while Teacher B encourages participation and provides positive reinforcement.
Sentence Creation and Interactive Participation: Teacher A leads the sentence creation activity with a ball toss, and Teacher B assists students who need help.
Concluding Discussion: Teacher A facilitates the discussion on interesting lizard facts, and Teacher B encourages quieter students to share and summarize key points.
Crawling and Slithering Reptiles

Activity

4:

Different Reptiles

By the end of the activity, students will be able to identify and compare traits of different reptiles, with a focus on distinguishing between alligators and crocodiles.

30-40

Minutes

1
Tell students that during today’s activity they will learn about reptiles through discussion, video analysis, image comparison, and drawing, focusing on traits and differences between species.
2
Begin by asking students to share everything they know about reptiles. As they share, scribe their responses on a Bubble Web graphic organizer.
3
Play the Different Kinds of Reptiles video. Remind students that traits are qualities that make reptiles unique and that traits are distinguishing features like body parts, color, size, behavior, or shape. Before viewing the video, cue students to pay close attention to reptile traits.
4
Following the video, invite students to think about what they learned. Consider asking the following guiding questions:
What are the main traits of reptiles?
What are the four reptile groups?
What are turtles known for?
What kinds of turtles are there?
How do shells help turtles?
What are some alligator traits?
What are some differences between alligators and crocodiles?
What are tuataras? What are they known for? What do they eat?
What are some of the best-known snakes? What are rattlesnakes known for?
What are cobras known for? Where do cobras live?
What are boa constrictors? What are some of their known traits?
What is the largest lizard in the world called? Are Komodo dragons fast?
5
Tell students that they will now become video explorers and that they will use the information from the video to find answers to the questions.
6
Play the video a second time. As students watch the video, pause to discuss different answers. As students identify answers to the questions, scribe the correct answers on the board or other display. Optionally, students can also write the answers on their own copies of the question sheet.
7
Display pictures of alligators and crocodiles from ImageQuest Jr., Britannica School or another royalty-free source. Ask students to point out the differences and similarities and ask them to guess which pictures show alligators and which show crocodiles.
8
Draw or display a large Venn Diagram graphic organizer on the whiteboard, and ask students to compare and contrast alligators and crocodiles. As students compare and contrast, scribe their responses in the appropriate areas on the Venn diagram.
9
Distribute a Reptile Drawing handout to each student and invite students to draw their favorite reptile. As students draw, show a images of different reptiles for support. Consider displaying their artwork around the room.
10
Conclude the activity by asking students to share two new details about reptiles that they learned and one question they still have about reptile traits.
Flipped Classroom Model: Use the flipped-classroom learning model, asking students to watch the Different Kinds of Reptiles video before class. Be ready to use the activities outlined in the activity plan to support students’ learning and help them internalize the main ideas. The flipped learning model allows students to go at their own pace and watch the video as many times as needed. This approach also fosters deeper classroom discussions because students come to class with more prior knowledge on the presented subject.
Team Teaching: For collaborative teaching and learning environments, this learning activity is well suited to a Team Teaching strategy. In this model, both teachers deliver instruction together, often alternating or integrating their teaching styles seamlessly, sometimes referred to as “tag team teaching.” This collaborative approach provides students with multiple perspectives and teaching styles, enriching their learning experience. By modeling effective teamwork and communication, this approach demonstrates how different viewpoints can enhance understanding and create a dynamic and interactive classroom environment. Evidence indicates that team teaching can enhance student engagement and provide a richer, more diverse educational experience.
Introduction and Discussion: Teacher A leads the discussion by asking students to share everything they know about reptiles and scribing their responses in a Bubble Web graphic organizer, while Teacher B facilitates student engagement and provides additional prompts to elicit more responses.
Video Presentation: Teacher A introduces the Different Kinds of Reptiles video and sets the purpose for watching, while Teacher B monitors student focus and ensures that students are paying attention to reptile traits.
Video Comprehension: After the video, Teacher A asks supporting comprehension questions following the video while Teacher B helps students understand and prepare for the second viewing.
Interactive Viewing: During the second viewing of the video, both teachers pause and discuss different answers, with one teacher leading the discussion and the other supporting and adding depth to students’ observations.
Comparison Activity: When showing pictures of alligators and crocodiles, Teacher A guides the discussion on differences and similarities, while Teacher B draws a large Venn Diagram graphic organizer on the whiteboard and records student observations.
Drawing Activity: As students draw their favorite reptile on the Reptile Drawing worksheet, Teacher A circulates and provides feedback, while Teacher B shows images various reptiles and offers support.
Conclusion: To conclude the activity, both teachers facilitate a sharing session where students share what they learned about reptiles, ensuring all students have an opportunity to participate and reflect on the activity.
© Encyclopædia Britannica, Inc. All rights reserved.