Lesson MINI

Britannica School logo in navy blue and green text

LESSON MINI

Animal Homes in the Forest

Grade:

K-2

Topic:

Animals

Unit:

Animal Habitats
Eye icon in white on red background

Overview

Fox kits huddled together at entrance of their den.
© geoffkuchera/stock.adobe.com

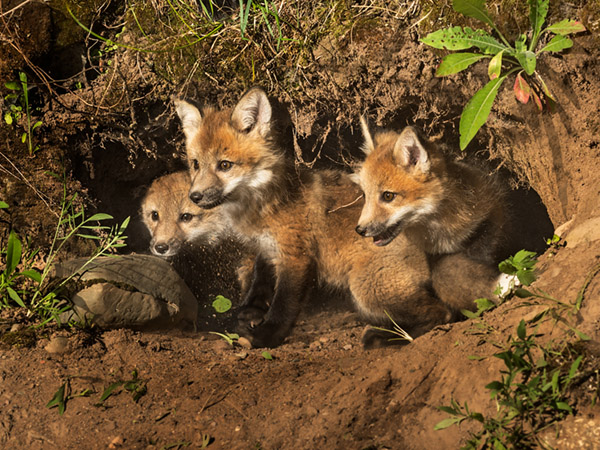
In this lesson mini, students learn about various animal habitats and the needs of animals within these habitats, with a focus on forest habitats. They understand how the forest environment provides the necessary resources for animals to survive. This lesson mini engages students by exploring and identifying unique characteristics and behaviors that help animals thrive in the forest. The lesson encourages the development of vocabulary and observational skills as students compare and contrast different habitats and the animals that live in them.

Ideas for Implementation
Science
Literacy
Library media
Learning centers
Intervention or enrichment
Interdisciplinary collaboration
Key Vocabulary & Definitions
chick (noun): a baby bird
den/burrow (noun): a hole in the ground where an animal lives
forest (noun): a large area of land covered with many trees
fox (noun): a furry animal that is related to dogs and lives in dens
habitat (noun): the place or type of place where a plant or an animal naturally or normally lives or grows
leaf litter (noun): the layer of fallen leaves on the forest floor
nest (noun): a home that an animal builds for its young
omnivore (noun): an animal that eats many different kinds of food
Authentic Learning Extensions
Authentic learning opportunities for studying forest habitats involve real-world experiences and practical applications that help students understand survival concepts meaningfully. Here are some examples:
Forest Clean-Up: Remind students that forests are home to many animals. Animals need a clean place to live, just like we do, and garbage can be dangerous to animals if they eat it. Give each student a pair of gloves. Walk around a wooded area near your school and pick up and throw away any trash that you find. Congratulate students on helping to keep animal homes safe and clean.
Tree Exploration: Have students read the Britannica Library Tree article. Then set up a tree sensory bin in your classroom. Include natural forest items such as pine cones, green leaves, dried leaves, twigs, pine needles, roots, bark, and moss; exploratory materials such as magnifying glasses, shovels, and tweezers; and paper and pencils for writing down discoveries. Encourage students to visit the sensory bin and explore the materials. Have them write down something they found in the bin, or draw it and describe it to you. Ask students how forest animals such as bugs, birds, and squirrels might use the items in the bin. Encourage them to use key words from the article, such as trunk, branches, bark, leaves, roots, needles, and wood.
Visit a Nature Center: Take students on a field trip to a nature center or other forested area. Encourage them to look for animals, animal homes, and evidence that animals are around. Together, make a list of all of the kinds of animals and animal evidence you see.
Zoom In: Set up a microscope station in your classroom. Provide natural forest items such as soil, pine cones, leaf litter, bark, and moss, as well as petri dishes. Help students put items under the microscope and adjust the microscope so that they can look closely at the items. You can ask questions such as these: “What does the moss look like under the microscope?” “What do you see that you can’t see without the microscope?” and “Do you see any little animals in the soil? What kinds of animals are they?”

Choose Activity

3
Animal Homes in the Forest

Activity

1:

Forest Animals Seek and Find

By the end of this activity, students will be able to describe where and how animals survive in forest habitats.

20-30

Minutes

Materials

Whiteboard and display
Writing utensils

Resources

1
Tell students that today they’ll learn about forest habitats. To activate their thinking, ask the following questions:
What is a habitat?
What is a forest?
2
Listen to and affirm students’ answers. Then provide the following definitions:
A habitat is a place or type of place where a plant or an animal naturally or normally lives or grows.
A forest is a large area of land covered with many trees.
3
Allow students to make personal connections by asking these questions:
Have you ever been to a forest?
Are there forests in our community?
What animals live in forests? Have you seen those animals?
Where do they live in the forest?
4
Read, or invite a volunteer to read, the first paragraph of the “Life in the Forest” section of the Forest article. Instruct students to listen for the names of types of animals that live in forests.
5
After reading, revisit the last two questions from step 3, encouraging students to incorporate information from the article.
6
Prepare students for the Forest Animals Seek and Find activity. Explain that while animals may not be immediately visible in a forest, closer observation reveals many hidden creatures.
7
Put students in pairs or small groups, and distribute copies of the Forest Animals Seek and Find handout to each student. Tell students that they will work in their pair, or with their group, to find hidden animals in the forest picture. When they find a hidden animal, they should circle it and trace its name at the bottom of the handout.
8
Gather students together once the activity is complete. Ask these questions:
How many animals did you find?
What animals did you find?
Where did you find that animal?
Why do you think the snake is in the pile of leaves?
What kinds of food do you think the squirrel finds in the tree?
9
Explain to students that holes in the ground are called burrows. Then ask, “What kinds of animals are hiding in burrows?”
10
Affirm that many animals live in forests. Describe students’ findings using key terms: burrow, nest, forest, and leaf litter. Define each term as you use it, referencing the seek-and-find picture. Encourage students to use these terms as they discuss animal homes in the forest.
11
Wrap up by summarizing that forest animals make homes in various places such as in nests or burrows, and under rocks and leaves. Emphasize that homes can be small like an ant hill or large like a bear’s den. Add that animals might live high in trees, on the forest floor, or underground.
Making Predictions: Before engaging with the activity, ask students, “Where can you find animals in a forest habitat?” Encourage students to think about animals that live in the trees, on the ground, and underground. Then have students complete the Forest Animals Seek and Find handout to check their guesses. This method encourages student engagement and surfaces both students’ prior knowledge and their misconceptions about forest habitats.
Add Animals: Encourage students to think of other animals that live in forests. Ask, “Where do you think you’d find that animal in the forest?” and “What kind of home do they make?” Then have students draw the animal, cut it out, and glue it onto their handout where it belongs. For example, they might put a salamander near a pond.
Word Sketch: As an alternative, incorporate the Word Sketch instructional strategy to demonstrate additional ways that students can personalize their vocabulary. Consider separating students into groups. Give each group art supplies and a piece of poster paper with one of the following words written on it: burrow, nest, leaf litter, den, or forest. Share with each group a concise definition and example sentence for their assigned vocabulary word and have students complete a word sketch for their assigned term.
Parallel Teaching: For collaborative teaching and learning environments, this learning activity is well suited to a Parallel Teaching strategy. In this model, the class is divided into two groups, and each teacher delivers the same activity simultaneously to their group. This reduces the student-teacher ratio, allowing for more interaction and individualized attention. With smaller groups, students are more likely to participate actively and receive immediate feedback, which fosters a deeper understanding of the content and promotes a more engaging learning experience. Evidence suggests that small-group instruction leads to increased student engagement and improved academic outcomes.
Animal Homes in the Forest

Activity

2:

Build a Nest

By the end of this activity, students will be able to explain how, why, and where birds make nests in a forest habitat.

30-40

Minutes

Materials

Card stock to print Nest Cards (see Resources)
Glue
Natural materials (e.g., raffia, sticks, dried leaves, straw, pine straw, pine cones)
Paper bowls (one per student)
Popsicle sticks (one per student)
Trays (enough to hold all materials, one per student)
Whiteboard and display
Writing utensils

Resources

Prepare for the Activity: Print an assortment of Nest Cards on card stock (enough so that each student can select one card). Place trays full of mixed nesting materials around the room. Set up other supplies (Nest Cards, glue, paper bowls, popsicle sticks, and trays) so that students can gather these materials (see step 10).
1
Tell students that today they will learn about forest animals and their homes. Remind students of the following:
A forest is a large area of land covered with many trees.
Forests are homes to many animals.
Animals in forests make homes to protect themselves and keep themselves safe from predators and other dangers.
2
Explain to students that this activity will focus on one kind of animal home or habitat. Students will play a guessing game first to try to figure out the kind of home you’re talking about. Give as many clues as are needed for students to guess “bird nest”:
Animals that live here can be found almost anywhere on Earth.
These homes are made of various materials (leaves, mud, sticks, grass).
These homes are often located high up in trees or on the ground.
Animals lay eggs here, which hatch into chicks.
Animals that live here make sounds like “tweet tweet,” “caw caw,” and “chirp chirp.”
3
Affirm that students will be learning about bird nests today, and define nest.
A nest is a home that an animal builds for its young.
4
Ask students the following questions:
Have you ever seen a bird’s nest?
What are bird’s nests made of?
Why do birds build nests?
5
Tell students that they will read about bird nests before making their own. Encourage students to look for information about nest locations and materials. Have students read the “Introduction” and “Bird Nests” sections of the Nest article, or have student volunteers read the sections aloud.
6
Engage in a whole-class discussion by asking the following questions:
What are some things that birds make their nests out of?
How do you think birds find things to make their nests?
7
Explain that many birds live in forests and make nests in trees. Ask, “Why do you think some birds make their nests up in the trees?” (Answer: Birds build nests high in trees to protect chicks from predators and floods.)
8
Show and name the birds on the Nest Cards one by one. Emphasize that all of these birds build their nests in trees.
9
Tell students that for this activity they will pretend to be one of these birds and will build a nest. These are the steps they will follow:
a)
They will “fly” (walk) around the room looking for nesting materials.
b)
They will collect the materials they need and bring them back to their workspace.
c)
They will glue the materials to their bowl to make a nest.
d)
Later, they will put their nests up high to keep them safe.
10
Have each student select a nest card of their choice, an empty tray, a paper bowl, a popsicle stick, and glue. Tell students to think about what they need to build their nest and then list those materials in the box on their card.
11
Tell students that, first, they’ll describe their nests to a partner. Display the Nest Sentence Frame. Read the sentence frame and the suggested words aloud. Explain that these are a few ways that students can describe their nests.
12
Have students turn to a partner and describe the nest on their card, encouraging them to use the sentence frame while their partner listens carefully to their description.
13
Invite groups of students to “fly” around the room looking for the materials they need to build their nests. Students will then return to their seats to glue materials to their bowls. Students can “fly” out to gather more materials as needed.
14
When finished, have students set down their nests to dry. While their nests are drying, have them cut out the bird, eggs, and label on their nest card. Invite students to put the eggs in their nest, glue the bird to a popsicle stick and stick it into their nest, and glue the label to the front of their nest.
15
Have students choose a place up high in your classroom to display their nests. Remind students that many birds build their nests high in the trees to keep their chicks safe from predators and other dangers.
16
To wrap up, “Go birding” around your classroom, inviting students to call out the birds and nests they see. You might say:
That nest is really high! How can building a nest up high keep chicks safe? Are there any bad things about building a nest so high?
I see a nest hidden in the bookshelf! Did you know that some birds hide their nests in tree holes? Why do you think some birds hide their nests?
Nest Descriptions: To support students in describing the nest, consider having them write their sentence on the back of their nest card using a modeled sentence frame. This support helps students who struggle with verbal expression by providing a written reference they can rely on during partner interactions, reducing anxiety and increasing participation while maintaining the activity’s interactive nature.
Work Together: Consider having all students work on the same kind of bird’s nest or grouping students who are working on the same kind of nest. This will allow students to brainstorm materials and discuss design ideas together.
More Options: Invite students to use a computer or library books to research more birds that nest in trees. Have each student select one kind of nest from their research and build it. Students can draw pictures of the birds and eggs and make a label for their nest.
Prepare the Craft: To provide students with additional time to build and describe their nests, precut the handout pieces for them. This also is a beneficial motor support.
Bird Dream Home: Have students design and/or build the ideal bird nest! They can make their nests out of creative materials, such as fabric pieces, pipe cleaners, or construction paper. The nest should be able to keep young birds warm, dry, and safe from predators. Have students present their designs and explain their choices. This variation encourages students’ creative thinking and problem-solving skills.
Parallel Teaching: For collaborative teaching and learning environments, this learning activity is well suited to a Parallel Teaching strategy. In this model, the class is divided into two groups, and each teacher delivers the same activity simultaneously to their group. This reduces the student-teacher ratio, allowing for more interaction and individualized attention. With smaller groups, students are more likely to participate actively and receive immediate feedback, which fosters a deeper understanding of the content and promotes a more engaging learning experience. Evidence suggests that small-group instruction leads to increased student engagement and improved academic outcomes.
Animal Homes in the Forest

Activity

3:

Build a Den

By the end of this activity, students will be able to draw an authentic fox den and explain its features.

20-30

Minutes

Materials

Coloring supplies
Glue (optional)
Natural materials (optional; e.g., grass, leaves, twigs, tree bark, small rocks or pebbles, cotton balls or wool, and seeds or dried berries)
Whiteboard and display
Writing utensils

Resources

Prepare for the Activity: If using, gather the following natural materials before the lesson to enhance students’ fox den designs: small twigs and sticks for the den structure and entrance, dried leaves and grass for bedding in the nesting room, moss for lining the den walls, small rocks or pebbles to represent surrounding soil, pieces of tree bark for structural elements, cotton balls or wool for soft nesting materials, and seeds or dried berries to represent stored food.
1
Before beginning the activity, play the Fox: Cubs Feeding video. Pause the first frame so that the hole is visible, but not the fox.
2
Show students the video frame. Tell students that this is a picture of a forest floor. Point out that there is a hole in the ground. Ask:
What do you think made that hole?
Why did it make the hole?
3
Tell students that some animals live in holes in the ground. Those holes are called burrows or dens. Ask: “What kind of animal do you think lives in this den?”
4
Play the video and ask the following questions. Listen to and affirm students’ ideas.
What kind of animal lives in this den?
What is a fox?
What do they use their dens for?
5
Tell students that they will read an article to learn more about fox dens. Read or have a volunteer read the Fox article aloud. Encourage students to listen closely for information about fox dens. Ask:
What did you learn about fox dens?
Is there one room in a fox den? Or more?
How do foxes get from room to room?
What do you think they use those rooms for?
6
Distribute a My Fox Den handout and coloring supplies to each student. If using the optional natural materials, distribute them to students, along with glue. Tell students that today they’ll design their own fox dens.
7
Guide students to design their dens, explaining that they will be creating three main parts of a fox den as they learn about each part’s purpose and characteristics. Refer to the My Fox Den teacher instructions, and begin by explaining to students the functions of the three parts of a den:
Entrance
Nesting room
Storage room
8
When the students have completed their dens, congratulate them on their work. Point out that the dens are safe because they are hidden and have an emergency tunnel. Fox cubs will be safe and warm in the nesting room, and the foxes will be ready for winter with all the food in the storage room.
9
Tell students that there’s one more fact about fox dens you want to share: Foxes often connect their dens with other foxes’ dens! Some of these networks have more than 50 openings!
10
To wrap up, invite students to display their dens in a group on the wall. Have students cut paper tunnels and tape them between the dens so that they are all connected.
Visual Vocabulary Support: Create a picture-based word bank showing key terms such as fox, den/burrow (with labeled parts), forest materials, and tunnels. When introducing vocabulary, point to corresponding images on the display. This visual reference helps English language learners to connect unfamiliar terms with concrete concepts, enabling them to better understand instructions, participate in discussions, and complete their fox den designs with greater confidence.
Working in Pairs: Consider having students work in pairs or small groups to make their dens. You can give them step-by-step instructions to follow independently or work through the instructions as a class, pausing after each step so students can complete it. Allowing students to design their dens can encourage a sense of independence and confidence and give them an opportunity to exercise their executive functioning skills.
What Is It For? Create your own teacher model of a den using the activity handout. Display the model for students and introduce the den concept. Point to each part of the model, asking what it’s for, why plants and rocks surround the entrance, why there are two entrances, and how foxes use each room. After volunteers share ideas, explain that rocks and plants hide the den from predators, multiple entrances provide escape routes, the storage room holds winter food, and the nesting room keeps cubs safe and warm with its soft bedding. This observation exercise develops students’ deductive reasoning as they build knowledge about fox habitats.
Station Teaching: For collaborative teaching and learning environments, this learning activity is well suited to a Station Teaching strategy. In this model, students rotate among different stations, each managed by a teacher who teaches a specific part of the content. This keeps students engaged through varied activities and teaching methods. It also allows teachers to focus on their strengths and teach content in a more in-depth and specialized manner. This approach ensures that students receive a comprehensive and dynamic education by catering to different learning styles. Research supports that multifaceted teaching strategies cater to diverse learning styles, enhancing students’ comprehension and retention.
Introduction to Foxes and Dens: Teacher A introduces the concept of dens, using the video frame to engage students in discussion. Teacher B reads or supports a volunteer in reading the Fox article aloud and then explains the activity.
Designing the Den: As a whole class, both teachers engage students in a discussion around den entrances and why they are hidden. Students design and share their den entrances. Teacher A divides the class into two groups, which will rotate through two stations. At Station 1, Teacher A introduces the nesting room and supports students in designing their nesting rooms. At Station 2, Teacher B introduces the storage room and supports students in designing their storage rooms.
Activity Wrap-Up: After students rotate through the stations, Teacher A brings the two groups together to review their dens as a whole class. Teacher A highlights how each room keeps the foxes safe and warm. Teacher B explains that dens are often connected and have many entrances. Both teachers facilitate students’ displaying and connecting of their dens.
Animal Homes in the Forest

Activity

4:

Minutes

Materials

copy text here
copy text here

Resources

Prepare for the Activity:
1
copy text here
2
copy text here
3
copy text here
a)
copy text here
TEXT BLOCK: Lorem ipsum dolor sit amet, consectetur adipiscing elit, sed do eiusmod tempor incididunt ut labore et dolore magna aliqua. Ut enim ad minim veniam,
Lorem ipsum dolor sit amet, consectetur adipiscing elit, sed do eiusmod tempor incididunt ut labore et dolore magna aliqua. Ut enim ad minim veniam, quis nostrud exercitation ullamco laboris nisi ut aliquip ex ea commodo consequat. Duis aute irure dolor in reprehenderit in voluptate velit esse cillum .
copy text here
copy text here
copy text here
Animal Homes in the Forest

Activity

5:

Minutes

Materials

copy text here
copy text here

Resources

Prepare for the Activity:
1
copy text here
2
copy text here
3
copy text here
a)
copy text here
TEXT BLOCK: Lorem ipsum dolor sit amet, consectetur adipiscing elit, sed do eiusmod tempor incididunt ut labore et dolore magna aliqua. Ut enim ad minim veniam,
Lorem ipsum dolor sit amet, consectetur adipiscing elit, sed do eiusmod tempor incididunt ut labore et dolore magna aliqua. Ut enim ad minim veniam, quis nostrud exercitation ullamco laboris nisi ut aliquip ex ea commodo consequat. Duis aute irure dolor in reprehenderit in voluptate velit esse cillum .
copy text here
copy text here
Lorem ipsum dolor sit amet, consectetur adipiscing elit, sed do eiusmod tempor incididunt ut labore et dolore magna aliqua. Ut enim ad minim veniam, quis nostrud exercitation ullamco laboris nisi ut aliquip ex ea commodo consequat. Duis aute irure dolor in reprehenderit in voluptate velit esse cillum .
copy text here
copy text here
copy text here
© Encyclopædia Britannica, Inc. All rights reserved.