Lesson MINI

Britannica School logo in navy blue and green text

LESSON MINI

Creating a New Nation

Grade:

3-5

Topic:

Social Studies

Unit:

American History
Eye icon in white on red background

Overview

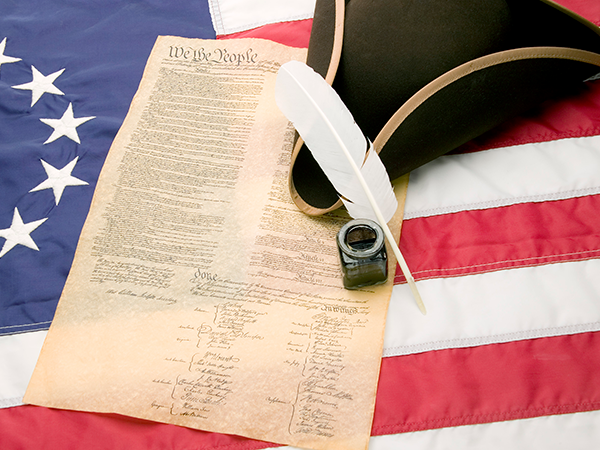
US Constitution with quill pen on American flag background.
© Jupiter Images/Getty Images

In this lesson mini, students are introduced to civics by exploring the concept of citizenship, analyzing how citizenship is obtained and which groups historically have been excluded. Students also evaluate the rights and responsibilities of citizenships and participate in collaborative projects, guided reading activities, and enriching class debates.

Ideas for Implementation
Social Studies
Literacy
Library media
Learning centers
Intervention or enrichment
Interdisciplinary collaboration
Key Vocabulary & Definitions
colony (noun): an area controlled by one country but located somewhere else
declaration (noun): an important announcement or statement that is made official
delegation (noun): a group of people who represent a larger group
freedom (noun): the right to make your own choices without being controlled by others
independence (noun): the quality or state of being independent; freedom from outside control or support
rights (noun): freedoms we have from birth that are protected by law—such as being able to say what you think, choose your own religion, or read the books you like
pamphlet (noun): a small booklet or paper that gives information about something
proclaim (verb): to publicly declare
Authentic Learning Extensions
Authentic learning opportunities for studying the creation of a new nation involve real-world experiences and practical applications that help students understand the founding documents, such as the Declaration of Independence, U.S. Constitution, and Bill of Rights, in a meaningful way. Here are some examples:
Digital Discovery: Use approved virtual tools to explore historical places and events. Consider having students create digital “Day in the Life” stories imagining life during colonial times. This helps students visualize and understand history through the use of age-appropriate technology.
Document Exploration: Create classroom “archives” where students examine copies of historical documents with magnifying glasses, work in teams to decode old-fashioned handwriting, and connect important phrases in the documents to their own lives. This allows students to act as history detectives while making meaningful connections.
Living History: Hold a classroom Continental Congress in which students debate current school issues, create rules, and vote on solutions. This allows students to experience how and why important decisions are made while they solve relevant problems.
National Archives: Organize a virtual field trip to explore documents in the National Archives, such as the Declaration of Independence and U.S. Constitution. This gives students the opportunity to engage with primary resources.

Choose Activity

5
Creating a New Nation

Activity

1:

Exploring the Declaration of Independence

By the end of the activity, students will be able to describe the main ideas drafted in the Declaration of Independence.

>40

Minutes

Materials

Devices such as Chromebooks or tablets (one per student)
Large note cards (one per student)
Large poster board (one for the whole class)
Masking tape
Whiteboard and display
Writing utensils

Resources

1
Begin the activity by defining the word declaration on the whiteboard. Share that a declaration is defined as an important statement that can be made official in a document. Show students examples of important classroom documents and agreements that could be turned into declarations (e.g., classroom community agreements).
2
Tell students that during today’s activity they will learn about the Declaration of Independence, an important document that declared the American colonies free from Britain. Ask students to discuss the following question with a partner: “Why do you think the Declaration of Independence is such an important document?” After a few minutes, prompt students to share their ideas with the whole class.
3
Distribute a copy of the Declaration of Independence article to each student. Read the Declaration of Independence article aloud using teacher read-aloud, student volunteers, or text-to-speech technology. Pause throughout to check for comprehension. Consider asking the following questions:
What events led to the writing and signing of the Declaration of Independence?
Why did the colonists write the Declaration of Independence?
Who were some of the people involved in spreading the message that colonists were mistreated by the British king?
4
Ask student pairs to complete the Declaration of Independence Questions handout.
a)
Invite students to use a digital device to find definitions for key vocabulary words from the article. Suggest that they use an online dictionary for kids, such as Merriam-Webster Student Dictionary for Kids.
b)
Tell students to answer the discussion questions that summarize the main events discussed in the article.
c)
After some time, gather the class and review students’ answers.
5
Display the Declaration of Independence image. Ask the following questions to guide discussion:
What do you notice about the text?
What type of paper and pen did people use during this time period?
Where can you find the original copy of the Declaration of Independence? Why do you think it’s important to keep this document in a safe place?
To prompt discussion, consider using ImageQuest Jr., Britannica School, or another royalty-free resource to display additional images of the founders writing the Declaration of Independence.
6
Provide each student with a large note card and a piece of masking tape (they will use the tape in step 8). Tell them to write or draw on the card what the Declaration of Independence means to Americans. Display the Teacher Model of the Meaning of the Declaration of Independence to guide expectations.
7
Ask students to sit in a circle and share their work with the rest of the class. Encourage students to be respectful, supportive, and kind during the group discussion.
8
Place a large poster board in the middle of the circle, and ask students to tape their note cards to the poster board as you dismiss them in groups to return to their seats. Assist students with the taping as needed. The poster board will represent the class’s interpretation of the Declaration of Independence.
9
When all students are back at their seats, facilitate a discussion to review the main ideas presented in the Declaration of Independence. Consider asking the following questions:
What did the founders proclaim?
What important words were used to represent their ideas?
When was the Declaration of Independence adopted, and what did it state?
Why did the colonists want to separate from Britain?
What was the pamphlet Common Sense, and what did it say? (Tell students that Thomas Paine was a famous political writer, and share that a pamphlet is a small unbound booklet that provides information. Consider showing students an example of a pamphlet using digital images or realia.)
Who wrote the first draft of the Declaration of Independence?
Where was the Declaration first published?
10
Invite students to review the events discussed and share something they learned about the Declaration of Independence.
Declaration of Independence Vocabulary: Guide students to read the article, highlight or circle any vocabulary words they are unfamiliar with, and then define them together using a child-friendly dictionary. This gives students the opportunity to engage with new vocabulary in a guided way and benefits their learning by helping them build vocabulary and increase their comprehension of the Declaration of Independence article.
Classroom Declarations: Invite students to work in pairs to write their own declarations. Guide them to think about their classroom community and the ways it can be improved to ensure that everyone feels respected and comfortable. Then ask students to come up with a declaration that outlines the rights of students and teachers. This benefits students’ learning because it allows them to make self-to-text connections.
Pamphlet: Invite students to write their own versions of the Common Sense pamphlet in small groups. This gives students the opportunity to explore firsthand how American revolutionists, such as Thomas Paine, spread their messages. It also prompts students to analyze different types of media and practice expressing their ideas.
Parallel Teaching: For collaborative teaching and learning environments, this learning activity is well suited to a Parallel Teaching strategy. In this model, the class is divided into two groups, and each teacher delivers the same activity simultaneously to their group. This reduces the student-teacher ratio, allowing for more interaction and individualized attention. With smaller groups, students are more likely to participate actively and receive immediate feedback, which fosters a deeper understanding of the content and promotes a more engaging learning experience. Evidence suggests that small-group instruction leads to increased student engagement and improved academic outcomes.
Creating a New Nation

Activity

2:

The Committee of Five

By the end of the activity, students will be able to talk about the Committee of Five and discuss its key accomplishments and legacies and how it shaped the Declaration of Independence.

≥40

Minutes

1
Tell students that during today’s activity they will learn about the main authors of the Declaration of Independence. Display an image of the Committee of Five from ImageQuest Jr., Britannica School, or another royalty-free resource, and ask students whether they recognize anyone. Scribe their ideas on the whiteboard.
2
Begin the activity by distributing the Declaration of Independence article to each student. Tell students to take a few minutes to read the article to find out what events led to the American colonists’ writing the Declaration of Independence to break free from British rule. Ask students to think about the following guiding questions:
Who wrote the first draft of the Declaration of Independence?
Why do you think Thomas Jefferson was chosen to be the main writer?
Who were the members of the Committee of Five, and why do you think they were chosen?
3
Emphasize that Thomas Jefferson wrote the first draft of the Declaration of Independence and that the Committee of Five were five delegates chosen to draft the Declaration and represent the American colonies. Refer back to the image from step 1.
4
Divide the class into five groups, assigning each group to one of the delegates responsible for crafting the Declaration of Independence: Thomas Jefferson, John Adams, Benjamin Franklin, Roger Sherman, and Robert R. Livingston.
5
Distribute a digital device to each student to research their assigned delegates within their groups, and provide one Biography Note-Catcher graphic organizer per group to guide discussion. Display the graphic organizer and model how to use it with Thomas Paine. Consider suggesting the following Britannica School articles to guide the research: Thomas Jefferson, John Adams, Benjamin Franklin, Roger Sherman.
6
After providing students time to research approved sites, reassemble the class and have each group share its key findings on its assigned delegate. As students present, scribe key ideas on the whiteboard. Prompt students to think about why it’s important to know who the writers of the Declaration of Independence were to understand it better.
7
Provide each group with a Declaration of Independence Analysis handout with famous excerpts from the Declaration of Independence. Instruct each group to paraphrase each line in their own words and then discuss the meaning of the lines.
8
Gather the class, and review each excerpt and its intended meaning, calling on student volunteers to share what they discussed in their groups.
9
Wrap up the activity by providing each student with a large note card and asking them to answer the following question: ”How did the Committee of Five influence the writing of the Declaration of Independence and American history?”
Guided Class Discussion: Display different quotes written by the Committee of Five in the Declaration of Independence, and facilitate a guided discussion supported by visual aids. Ensure that all students have a chance to speak. This approach benefits students’ learning because it offers a more structured opportunity to reflect on the Declaration of Independence’s message.
Declaration of Independence: Ask students to research and analyze famous quotes by the Committee of Five members. This benefits students’ learning because it allows them to explore the legacies and beliefs of the founders.
Mini Plays: Invite student groups to create a mini play that represents the life of their assigned delegate. This variation offers students the opportunity to present the information they gathered in their research in a more creative way. This benefits students’ learning because it fosters teamwork and critical thinking skills.
One Teaching, One Assisting: For collaborative teaching and learning environments, this learning activity is well suited to a One Teaching, One Assisting strategy. In this model, one teacher leads the activity while the other circulates, assisting individual students as needed. This ensures that when students encounter difficulties, they receive immediate help in the form of personalized support and answers to their questions. By addressing students’ unique needs and keeping them on track, this approach enhances individual learning experiences and fosters a supportive classroom environment. Studies indicate that immediate feedback and individualized attention can significantly enhance student understanding and retention of material.
Activity Introduction: Teacher A begins the activity and reviews the Declaration of Independence. Teacher B circulates the room to ensure students receive immediate help in comprehending the article and task.
Group Work: Teacher A divides the class into five groups. Teacher B distributes digital devices to each student and a Biography Note Catcher to each group to guide discussion. After some time, Teacher A reassembles the class and prompts students to present their work while Teacher B records their main findings on the whiteboard.
Declaration of Independence Analysis: Teacher A provides each group with a Declaration of Independence Analysis handout. Teacher B gathers the class together when the groups are done and goes over each excerpt and its intended meaning.
Activity Wrap-Up: Teacher A distributes note cards, while Teacher B asks students to write a response to the wrap-up question.
Creating a New Nation

Activity

3:

The History of the U.S. Constitution

By the end of the activity, students will be able to discuss the history of the U.S. Constitution and analyze its historical importance and its importance today.

>40

Minutes

Prepare for the Activity: Print the U.S. Constitution Match-Up Game cards on card stock, cut out each set, and mix up the cards to create a set for each group.
1
Tell students that during today’s activity they will learn about the U.S. Constitution through an article reading and question set, a vocabulary exercise, and a review game.
2
Begin the activity by displaying images found in the United States Constitution article, and lead a focused discussion using questions such as the following:
What does the First Amendment say? Why is it important?
What changed when women got the right to vote? Why was this important?
What was the Constitutional Convention? Why was it an important meeting?
Looking at these historical images, what’s different about how people lived back then compared to today?
3
Distribute the United States Constitution article and a United States Constitution Questions handout to each student. Instruct them to read the article with a partner and work together to answer the questions.
4
Reassemble the class and guide a structured class discussion of each section: “Introduction,” “History,” “Preamble,” “Federal System,” “Separation of Powers,” “Checks and Balances,” and “Amendments.” Scribe students’ ideas on the whiteboard. Consider creating an anchor chart of main ideas as they are discussed.
5
Distribute the Collaborative Vocabulary Exploration graphic organizer, and ask students to identify three or four new terms from the article that they find important or intriguing. Model how to select and analyze important terms such as checks and balances, amendments, and the U.S. Constitution.
6
Provide students time to complete their graphic organizers independently, share their work with a partner, and then create a poster.
7
Gather the class and encourage students to share their posters and give each other feedback.
8
Divide the class into groups of three to five students, and distribute a set of U.S. Constitution Match-Up Game Cards to each group. Instruct the groups to play the game to review key vocabulary from the article. The object is to match each vocabulary word to its meaning.
9
Gather the class and ask student volunteers to share the correct answers.
10
Wrap up by asking students to reflect on how the U.S. Constitution was relevant in the 1700s and how it is still relevant in the 2020s:
Why is it important for a country to have rules?
Why do you think the ideas written in the Constitution were important to American colonists a long time ago?
How are these rules still important today?
Pre-Teach Vocabulary: Introduce key vocabulary words from the article at the beginning of the activity to help students better understand the main ideas as they read the article in pairs. This benefits students’ learning by providing scaffolded support to help them successfully complete the handouts in this activity.
Timeline: Challenge students to consolidate and synthesize the article’s key ideas by creating a timeline of events that led to the creation of the U.S. Constitution. Guide students to focus specifically on the dates of the events mentioned in the article to get started. This benefits students’ learning by providing an opportunity to practice chronological thinking.
One Teaching, One Observing: For collaborative teaching and learning environments, this learning activity is well suited to a One Teaching, One Observing strategy. In this model, one teacher provides direct instruction to the entire class while the other observes student behavior and engagement to gather evidence of learning. This approach allows for detailed observation and assessment, helping identify students who need additional support or intervention. By focusing on student responses and participation, the observing teacher can ensure that the learning needs of all students are addressed and met in the activity. Research shows that targeted observation can lead to more effective intervention strategies, improving student performance.
Activity Introduction: One teacher begins the activity by displaying images found in the United States Constitution article and guiding a class discussion while the observing teacher identifies students who might need additional support.
Article Reading and Extension: One teacher distributes the United States Constitution article and the United States Constitution Questions handout. The same teacher instructs students to read the article and answer the questions with a partner. The observing teacher circulates the room focusing on gathering information about how each pair interacts and completes the assigned task.
Collaborative Vocabulary Exploration: One teacher distributes the Collaborative Vocabulary Exploration graphic organizer while the observing teacher observes student behavior and engagement with the task.
Match-Up Review Game: One teacher divides the class into small groups to play the U.S. Constitution Match-Up Game while the observing teacher circulates and identifies students who need additional support or intervention.
Activity Wrap-Up: One teacher concludes by asking students a now-and-then reflection question while the observing teacher provides targeted observation.
Creating a New Nation

Activity

4:

The Preamble to the U.S. Constitution

By the end of the activity, students will be able to explain the key messages of the Preamble to the U.S. Constitution.

>40

Minutes

1
Begin the activity by defining the word constitution as the basic ideas and laws of a nation, state, or group. Just like classroom rules guide our behavior, the U.S. Constitution guides our country.
2
Tell students that during today’s activity they will learn about the first section of the U.S. Constitution.
3
Display a Bubble Web graphic organizer, and in the center write “The U.S. Constitution.” Call on students to share key words or ideas that represent how the United States was built. Consider writing words such as equality, freedom, and justice to activate students’ thinking. Ask students the following questions:
What rights do you have as an American?
What makes our country special?
What rules help keep people safe and fair?
4
Share with students that the U.S. Constitution starts with a section called the Preamble, which explains the purpose of the Constitution. Distribute a Preamble Video Reflection handout to each student.
5
Display the Preamble to the United States Constitution video, and encourage students to take notes in the Reflection Question section of the handout as they watch. After watching the video, guide a class discussion by asking the following questions:
What are some important messages written in the Preamble?
How do these ideas show up in our community today?
6
Divide the class into four groups, and assign each group to represent one of the big ideas outlined in the video through a collaborative digital presentation:
a)
Model how to represent “We the people.”
b)
Assign group 1 “In order to form a more perfect Union, establish Justice”; group 2 “insure domestic Tranquility, provide for the common defense”; group 3 “promote the general Welfare, and secure the Blessings of Liberty”; and group 4 “to ourselves and our Posterity, do ordain and establish this Constitution for the United States of America.”
c)
Distribute a digital device to each group, and instruct them to use a design tool such as Google Slides or Canva to create their presentations.
d)
Encourage students to write down their assigned messages, put them into simpler terms (they can use the handout for support), and then find visuals (pictures, clip art, and symbols) and key words to represent the ideas in the messages using modern-day examples.
7
Reassemble the class and give each group time to present their work in the order that each message appears in the Preamble.
8
Display the United States Constitution article, and read aloud the “Preamble” section, encouraging the whole class to read together the italicized text.
9
Ask students how the ideas from the Preamble were important when it was written and now. Draw a T-chart on the whiteboard to compare and contrast what freedom meant to American colonists and what it means to Americans today. To help guide the discussion, ask the following questions:
What problems did colonists face?
How does the Preamble solve similar problems today?
9
Wrap up the activity by distributing a large note card to each student and asking them to write an answer to the question “What is the most important message of the Preamble to you, and why?”
Preamble Groups: Consider dividing the class into groups of four or five students and giving them the complete text of the Preamble to represent using digital tools. This benefits students’ learning by giving them the opportunity to engage with the entire message and main idea.
Further Research: Instruct students to research the key messages of other nations’ constitutions, and compare and contrast the messages of constitutions across the globe. This benefits students’ learning because it broadens their perspectives and allows them to make self-to-world and text-to-text connections.
Collages: Instead of having students make digital presentations, invite small groups to make collages that represent the key phrases from the Preamble. Provide students with poster boards, magazines, scissors, glue, and writing and coloring utensils. This benefits students’ learning because it offers students an opportunity to engage with the extension activity in a more hands-on way.
Team Teaching: For collaborative teaching and learning environments, this learning activity is well suited to a Team Teaching strategy. In this model, sometimes referred to as “tag team teaching,” both teachers deliver instruction together, often alternating or integrating their teaching styles seamlessly. This collaborative approach provides students with multiple perspectives and teaching styles, enriching their learning experience. By modeling effective teamwork and communication, this approach demonstrates how different viewpoints can enhance understanding and create a dynamic and interactive classroom environment. Evidence indicates that team teaching can enhance student engagement and provide a richer, more diverse educational experience.
Activity Introduction: Teacher A begins the activity by defining the word constitution and then works with students to complete the Bubble Web graphic organizer.
Preamble Video: Teacher B distributes the Preamble Video Reflection handout to each student, displays the video, and encourages students to take notes as they watch. After the video, Teacher B guides a discussion on the ideas presented in the video.
Group Work: Teacher A divides the class into four groups and assigns each group to represent the key messages outlined in the video through a collaborative digital presentation. Both teachers circulate and support the groups as needed.
Presentations: Teacher A reassembles the class, gives each group time to present their work in the order that each phrase appears in the Preamble, and encourages students to give each other feedback.
Article Reading: Teacher B displays the United States Constitution article and reads aloud the “Preamble” section.
Activity Wrap-Up: Teacher A asks students how the ideas from the Preamble were important back then and now, filling out a T-chart as students respond. Teacher B wraps up by distributing note cards on which students will answer the final discussion question.
Creating a New Nation

Activity

5:

The Bill of Rights

By the end of the activity, students will be able to describe the purpose of the Bill of Rights and list and describe the first 10 amendments to the U.S. Constitution.

>40

Minutes

Materials

Coloring utensils
Devices such as Chromebooks or tablets (one per student)
Images that represent each amendment
Poster board (one per group)
Whiteboard and display
Writing utensils

Resources

1
Tell students that during today’s activity they will learn about the Bill of Rights.
2
Begin by asking, “What rules protect you at school? At home? In our country?” Then define rights as freedoms we have from birth that are protected by law—like being able to say what you think, choose your own religion, or read the books you like.
3
Distribute a Bubble Web graphic organizer to each student. Then draw a bubble web on the whiteboard, and write the word right in the middle. Prompt students to reflect on their own rights, such as the right to feel safe, to get an education, to play, and to have access to clean water. Guide discussion with relevant prompts:
What rights help you learn?
What rights keep you safe?
What rights let you be yourself?
4
Explain to students that a bill is defined as an idea citizens have about what should become a law. For a bill to become a law, it needs to be approved by the government.
5
Share that the Bill of Rights is a written list of 10 important laws found at the beginning of the U.S. Constitution that protects the rights of American citizens.
6
Distribute a digital device to each student, and direct them to the Bill of Rights article. Display the article, read it aloud, and pause at the end of each section to check for comprehension by asking the following questions:
Introduction: What is the Bill of Rights?
History: How do you think people felt about kings having so much power? What was the Magna Carta, and what did it guarantee? How did England and France try to take power away from the king?
United States Bill of Rights: Why was the Bill of Rights added to the U.S. Constitution? What does the First Amendment say? What are examples of other amendments?
Other Documents: What are examples of other documents that protect human rights?
7
Divide the class into 10 groups, and assign each group a different amendment to research and present to the class visually. Consider going over each amendment and having students represent the First Amendment (student connection: sharing opinions and choosing beliefs), Fourth Amendment (student connection: having personal space and keeping belongings private), and Fifth Amendment (student connection: practicing taking turns and being fair). If needed, allow groups to repeat the amendment they want to represent.
a)
Ask students to refer to the “Bill of Rights Explained” table in the “United States Bill of Rights” section of the article and show them how to navigate the table. Then guide students to do the same on their digital devices.
b)
Display a Teacher Model of Amendment Representation to set clear expectations for the activity.
c)
Distribute one Amendment Discussion Guide per group; then ask students to review the Bill of Rights article, conduct additional research, and discuss their assigned amendment.
d)
Distribute materials (poster board, writing and coloring utensils) for students to create a poster board that explains their amendment.
8
Reassemble the class and ask each group to present its poster in numerical order. Encourage students to ask each other questions.
9
Display images that represent each amendment using ImageQuest Jr., Britannica School, or another royalty-free resource. Facilitate a class discussion on the importance of each amendment at the time the Bill of Rights was written and now.
10
Wrap up the activity by asking students to think about and share their responses to the question “What amendment would you add to the Bill of Rights, and why?”
Amendments Explained: During the article read-aloud, take some time to read the “Bill of Rights Explained” table to ensure that the whole class has an initial understanding of the 10 amendments before the presentations. This guided approach benefits students’ learning because it provides the teacher an opportunity to facilitate an initial discussion of the Bill of Rights, ask questions, and check for comprehension. If needed, teachers can also use this time to group students strategically.
Personal Bill of Rights: Guide students to reflect on their own value systems and encourage them to write their own bill of rights that represents what is most important to them. This promotes students’ learning because it challenges them to make text-to-self connections.
Presentations: Offer students the opportunity to choose how to represent their amendments through a role-play, collage, and/or digital presentation. This gives students more opportunity to be creative and promotes variety within each presentation.
One Teaching, One Assisting: For collaborative teaching and learning environments, this learning activity is well suited to a One Teaching, One Assisting strategy. In this model, one teacher leads the activity while the other circulates, assisting individual students as needed. This ensures that when students encounter difficulties, they receive immediate help in the form of personalized support and answers to their questions. By addressing students’ unique needs and keeping them on track, this approach enhances individual learning experiences and fosters a supportive classroom environment. Studies indicate that immediate feedback and individualized attention can significantly enhance student understanding and retention of material.
Activity Introduction: Teacher A begins by defining and leading a class discussion on human rights while Teacher B distributes a Bubble Web graphic organizer to each student.
Article Reading and Discussion: Teacher A introduces students to the Bill of Rights while Teacher B distributes a digital device to each student and directs them to the Bill of Rights article on their digital devices. Then Teacher A displays it, reads it aloud, and pauses at the end of each section to check for comprehension while Teacher B circulates the room and offers support as needed.
Bill of Rights Explained: Teacher A divides the class into 10 groups and assigns each group a different amendment to research and present to the class visually while Teacher B distributes the materials needed for this task. Both teachers circulate the room and offer support as needed.
Presentations: Teacher A reassembles the class and guides students to present their work in numerical order while Teacher B ensures that student groups receive immediate support as needed.
Activity Reflection and Wrap-Up: Teacher B displays images that represent each amendment and facilitates a class discussion on the importance of each amendment when it was written and now. Teacher A concludes the activity by asking students, “What amendment would you add to the Bill of Rights, and why?”
© Encyclopædia Britannica, Inc. All rights reserved.