Lesson MINI

Britannica School logo in navy blue and green text

LESSON MINI

Weather Watchers

Grade:

K-2

Topic:

Science

Unit:

Weather
Eye icon in white on red background

Overview

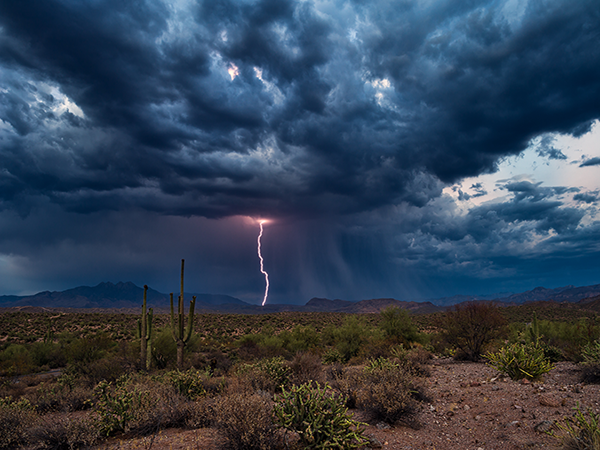
Lightning strike in desert landscape with cacti under a stormy sky.
© JSirlin/stock.adobe.com

In this lesson mini, students learn about weather patterns and their effects on daily life. They observe and record local weather conditions, exploring how these change over time. Students investigate the importance of weather forecasting, especially for preparing for severe weather events.

Ideas for Implementation
Science
Literacy
Library media
Learning centers
Intervention or enrichment
Interdisciplinary collaboration
Key Vocabulary & Definitions
autumn/fall (noun): the season when days get shorter, the weather gets cooler, and leaves may change color and fall from trees
North Pole (noun): the very top of Earth
Northern Hemisphere (noun): the top half of Earth
Southern Hemisphere (noun): the bottom half of Earth
South Pole (noun): the very bottom of Earth
spring (noun): the season when the weather warms up and days get longer
summer (noun): the warmest season of the year, in which the days are the longest
weather (noun): the outside temperature and conditions at a given time and place
winter (noun): the coldest season of the year, in which the days are the shortest
Authentic Learning Extensions
Authentic learning opportunities for studying the weather involve real-world experiences and practical applications that help students understand how weather patterns affect their daily lives. Here are some examples:
Build with Snow: If possible, take students outside to play and build things with snow. This fosters a connection between the activity and the outside world, helping students internalize and experience concepts firsthand. For an indoor sensory experience, consider making fake snow with conditioner and baking soda in a sensory bin.
Calendar Time: Keep track of the weather on a calendar to analyze patterns and make predictions. This allows students to forecast the weather based on trends they identify.
Guided Nature Walks: Go on nature walks, and ask students to observe and sketch elements that represent the weather and seasons at different times of the year (e.g., the sky, clouds, and trees). Provide simple observation sheets with categories to check off or circle (e.g., sunny, cloudy, windy) rather than asking students to sketch.
The Seasons Collage: Depending on your location, invite students to collect elements from nature that represent different seasons throughout the year and complete a collage in the winter, spring, summer, and fall. This gives students the opportunity to explore and observe how the weather and the environment change throughout the year.
Weather Book Corner: Encourage students to explore weather-related books. This helps students build text-to-text connections by creating a dedicated “weather book corner” in the classroom with a rotating selection of fiction and nonfiction books about weather, making them easily accessible for young learners.
Weather Journals: Invite students to document the weather using weather journals tailored for early elementary. This gives students the opportunity to use their observation skills to document the weather on a daily basis.

Choose Activity

5
Weather Watchers

Activity

1:

The Four Seasons

By the end of the activity, students will be able to explain why seasons change and the characteristics of winter, spring, summer, and fall.

>40

Minutes

Materials

Art supplies (e.g., crayons, colored pencils, markers)
Images of winter, spring, summer, and fall
Whiteboard and display
Writing utensils

Resources

1
Start by telling students that today they are weather watchers and they have to describe the weather outside. If possible, invite students to look outside and answer the following questions:
Is it sunny or cloudy?
Is it windy or calm?
Is it snowing or raining?
What are people wearing today?
Can you see any animals or plants? What are they doing?
2
Ask students to think about the clothing they wear in different types of weather. Ask the following guiding questions:
What might you wear if it’s raining?
What about if it’s cold or hot?
Guide students to share that they might wear rain jackets and boots if it rains; hats, gloves, and scarves if it is cold; and shorts, T-shirts, and sandals if it is hot.
3
Display the Season article, and show students pictures of the different seasons as well as the Changing Seasons video of the changing seasons. Then read the article together. Invite students to describe what they see. Read the article aloud as students follow along. During or after reading, ask the following questions to check for comprehension:
Why are there seasons?
What are the Northern and Southern Hemispheres?
Why is it warmer in the spring and summer and colder in the fall and winter?
What are the North and South poles? Do seasons change there?
What happens in the winter, spring, summer, and fall?
4
Show students more pictures of winter, spring, summer, and fall from ImageQuest Jr., Britannica Library, or another royalty-free resource, and ask them to describe what they see.
5
Use the Linked Words instructional strategy and ask students to associate the words winter, spring, summer, and fall with familiar words and concepts. For example: Winter can be associated with hot chocolate, snow, cold, gingerbread cookies, and holidays.
6
Accept all reasonable answers, remembering that different students may have had different experiences with the seasons. Encourage students to share personal experiences or stories related to different seasons.
7
Provide each student with a Four Seasons handout, and ask them to draw and label images that represent each of the seasons. Consider offering a variety of art supplies (e.g., crayons, colored pencils, markers) for students to choose from.
8
Invite student volunteers to share their artwork with the rest of the class. Consider displaying the handout on a “Seasons Wall” in the classroom.
9
Conclude the activity by asking students:
What did you learn about the seasons?
What do you like to do in each season?
What is your favorite season?
How do the seasons affect the way we live?
Visual Support: Provide students with visual cues to understand new vocabulary words. These visual cues help emerging readers internalize new vocabulary words and make appropriate connections.
Independent Reading: Consider asking students to read the article independently, if it matches their reading level. This gives students the opportunity to develop their independent reading skills prior to working on the Linked Word activity.
Antonyms Challenge: When possible, invite students to consider words with opposite meanings and reflect on whether these words can also be associated. This encourages students to examine ideas from different perspectives.
All About the Seasons: Instead of the Linked Words instructional strategy, consider using the Word Categories instructional strategy.
Parallel Teaching: For collaborative teaching and learning environments, this learning activity is well suited to a Parallel Teaching strategy. In this model, the class is divided into two groups, and each teacher delivers the same activity simultaneously to their group. This reduces the student-teacher ratio, allowing for more interaction and individualized attention. With smaller groups, students are more likely to participate actively and receive immediate feedback, which fosters a deeper understanding of the content and promotes a more engaging learning experience. Evidence suggests that small-group instruction leads to increased student engagement and improved academic outcomes.
Activity Introduction: Both teachers introduce the activity topic, explaining that students will be weather watchers today. They invite students to observe and describe the current weather conditions.
Weather and Seasons Exploration: The class is divided into two groups. Each teacher leads their group through the clothing discussion, seasons bubble web, and guided reading of the Season article, including image and video exploration.
Vocabulary and Creative Activities: Each teacher supports their group in completing the Linked Words graphic organizer for seasonal vocabulary. They then guide students through the Four Seasons handout.
Activity Conclusion: Both student groups come together to share their seasonal drawings, reflect on their learnings about weather and seasons, and discuss their favorite seasonal activities. Teachers collaboratively review key concepts and facilitate the final discussion questions.
Weather Watchers

Activity

2:

Storm Types

By the end of the activity, students will be able to identify different storm types, explain their characteristics, and demonstrate how to stay safe in severe weather.

>40

Minutes

1
Tell students that today they will listen to audio clips of different types of storms. Invite students to close their eyes while you play different storm sounds, such as thunder, rainfall, hail, and stormy winds. (Note: Consider choosing audio clips from ImageQuest Jr., Britannica Library, or another royalty-free resource.) Ask students the following questions:
Can you describe what you hear?
How does it make you feel?
2
Invite students to brainstorm different types of storms and encourage them to draw on their personal experiences. Record their ideas on the whiteboard.
3
Display the Storm article and show students the pictures that appear in the article. Invite them to describe what they see. Read the article aloud as students follow along. During or after reading, ask the following questions to check for comprehension:
What are storms?
What happens during thunderstorms?
What should you do during thunderstorms?
What are snowstorms and blizzards?
What is hail? What should you do during a hailstorm?
What is sleet? Why can it be dangerous?
What are tornadoes? Why are they dangerous?
What are hurricanes? How do they start?
4
Show images of different types of storms from ImageQuest Jr., Britannica Library, or another royalty-free resource, and ask students to guess what kind of storm each image depicts.
5
Invite students to close their eyes again, and play audio clips of the different types of storms presented in the article. As the clips are played, ask students to guess which storms they represent.
6
Lead a class discussion about what weather safety means and what people should do to stay safe during different kinds of storms. Record students’ ideas on the board. For example:
If there is a thunderstorm, people should go inside.
If there is a snowstorm, people should wear warm clothing if they go outside.
If there is a blizzard, people should avoid driving because it’s hard to see!
If there is a hailstorm, people should keep their vehicles in a covered place because hail can dent cars!
If there is a tornado, people should go to the basement and avoid windows.
If there is a hurricane, people should board up their windows due to the strong winds and rain.
7
Assign students to work in small groups or pairs. Use the Word Categories instructional strategy, and provide each student with a copy of the graphic organizer. Explain and model how to use the graphic organizer before students begin working.
8
Model an example of a category based on a storm type:
Category 1: Hailstorms / Categorized Words: ice, balls, dent, sky
9
Encourage students to share their categories and the words they picked. Allow time for each group to present their work to the class.
10
To recap, provide each student with a Storm Types handout. Invite students to share their work with their peers.
11
Conclude by asking students what they learned about storms and reviewing how to stay safe during each type of storm.
Guided Practice: For the Word Categories instructional strategy, provide students with preselected categories and a word bank with words or images to offer more guidance and support for early readers. This offers students the opportunity to practice sorting without having to generate the categories themselves.
Independent Reading: Invite students to read the article independently and circle new vocabulary words as they read.
Storm Types Handout: Ask students to complete the Storm Types handout in small groups. Instead of providing copies of the handout, provide each group with a large piece of construction paper to depict the different types of storms introduced in the article.
One Teaching, One Assisting: For collaborative teaching and learning environments, this learning activity is well suited to a One Teaching, One Assisting strategy. In this model, one teacher leads the activity while the other circulates, assisting individual students as needed. This ensures that when students encounter difficulties, they receive immediate help in the form of personalized support and answers to their questions. By addressing students’ unique needs and keeping them on track, this approach enhances individual learning experiences and fosters a supportive classroom environment. Studies indicate that immediate feedback and individualized attention can significantly enhance student understanding and retention of material.
Activity Introduction: One teacher leads the warm-up discussion on storms by playing audio clips and showing images, while the assisting teacher supports students as needed. The assisting teacher can help manage the audio equipment and ensure all students are engaged in the listening activity.
Whole-Class Activities: One teacher reads the article aloud, guides discussion, and shows students different images of storms, while the assisting teacher walks around the room and ensures students understand the key concepts presented. The assisting teacher can also help record student responses on the whiteboard during the brainstorming session.
Word Categories: One teacher explains the word categories activity and groups students, while the assisting teacher provides each student with a copy of the graphic organizer. Both teachers circulate to help students complete their work as needed. The assisting teacher can also support the modeling of the activity and provide additional examples if necessary.
Activity Wrap-Up: To recap, one teacher reviews key concepts with students and explains the review handout, while the other provides each student with a copy. Both teachers conclude by asking students what they learned about storms and reviewing how to stay safe during each type of storm.
Weather Watchers

Activity

3:

Snowy Day

By the end of the activity, students will be able to explain how snow forms and use key vocabulary words to describe a snowy day.

>40

Minutes

Materials

Cotton balls (a few per student)
Crayons and markers (a few per student)
Glue and scissors
Images of snow scenes
Light blue construction paper (one per student)
Video clip of falling snow or a snowy landscape
White paper (one per student)

Resources

1
Begin by showing students a short video clip of snow falling or a snowy landscape from ImageQuest Jr., Britannica Library, or another royalty-free resource to spark interest. Then tell students that today they will learn about snow, and ask the following questions to guide discussion:
Have you ever seen snow? What does snow look and feel like?
What are some sports and activities that you can do in the snow?
What do people wear when it snows?
What do people enjoy doing when it snows?
How does snow melt?
Do you like snow? Why or why not?
2
Display the Snow article, and show students the pictures that appear in the article and invite them to describe what they see. Use a Think-Pair-Share instructional strategy to encourage peer discussion before sharing with the class. Read the article aloud as students follow along. During or after reading, ask the following questions to check for comprehension:
What is snow, and how does it form?
How are snowflakes formed, and what do they look like?
How many points do snowflakes usually have?
When and why does it snow?
What are examples of winter games and sports?
3
Show students more pictures of snow from ImageQuest Jr., Britannica Library, or another royalty-free resource, and ask them to describe what they see.
4
Write the word snow on a Bubble Web graphic organizer on the board, and ask students to think of words that start with snow, using the text as a reference and encouraging them to come up with their own words. Scribe their ideas on the bubble web.
Examples: snowball, snowbank, snowflake, snowstorm, snowshoe, snowboard, snowplow, and snowman.
Consider adding a movement component by having students act out each snow-related word as it’s added to the map.
5
Call on students to choose one of these words and use them in a sentence. Consider tossing a winter-themed bean bag to drive engagement. Extend this activity by challenging students to create alliterative sentences (e.g., “Silly Sam saw six snowflakes”).
6
Ask students to create a snowy day craft:
a)
Provide students with light blue construction paper, cotton balls, crayons, markers, and glue to make their craft. Also offer white paper and scissors for students to cut out their own unique snowflakes.
b)
Ask students to create an image that represents a snowy day, using the cotton to represent the snow.
c)
Encourage students to label their drawings, and if needed use the bubble web for reference, or provide a list of possible words they can label such as snow, clouds, snowflake, snowstorm, blizzard, snowman, snowball fights, sled, and ski.
d)
When they finish, ask them to share their pictures with an assigned partner. Prompt students to use descriptive language when sharing their creations.
e)
Consider displaying their work around the classroom.
7
Invite students to reflect on what they learned from the activity and to share everything they learned about snow. To check for comprehension, consider asking students to share, write, or draw one new fact they learned about snow.
8
Conclude by playing a game of “freeze, dance” with snow-themed songs. Incorporate simple “snow” movements into the dance (e.g., pretending to catch snowflakes or make snow angels) to reinforce vocabulary and concepts learned.
Visual Cues: Provide visual support by drawing words that start with snow to help emergent readers understand key vocabulary words from the text and brainstorming exercise.
Sensory Exploration: For children who are unfamiliar with snow, consider offering opportunities for sensory exploration to help them internalize what snow looks and feels like. This allows students to make stronger text-to-self connections.
Writing Extension: Ask students to write simple sentences to describe their snowy day drawings. This activity fosters independent writing skills.
Classroom Snowperson: Instead of the independent craft, lead a collaborative activity to create a classroom snowperson.
a)
Draw a large outline of a big snowperson on a poster board.
b)
Ask each member to add something to the snowperson (eyes, carrot nose, tree branch arms, a hat, colored buttons, a scarf, etc.).
c)
Give the snowperson a name.
d)
Describe what your snowperson likes to do on a snowy day.
One Teaching, One Assisting: For collaborative teaching and learning environments, this learning activity is well suited to a One Teaching, One Assisting strategy. In this model, one teacher leads the activity while the other circulates, assisting individual students as needed. This ensures that when students encounter difficulties, they receive immediate help in the form of personalized support and answers to their questions. By addressing students’ unique needs and keeping them on track, this approach enhances individual learning experiences and fosters a supportive classroom environment. Studies indicate that immediate feedback and individualized attention can significantly enhance student understanding and retention of material.
Activity Introduction: One teacher leads the warm-up discussion on snow and introduces the video clip, while the assisting teacher scribes students’ ideas on the board.
Whole-Class Activities: One teacher reads the article aloud, guides discussion, and shows students different images of snow scenes, while the assisting teacher walks around the room and ensures students understand the key concepts presented. The assisting teacher can also facilitate the think-pair-share activity, ensuring all students are actively participating.
Independent Craft Activity: One teacher explains the craft activity while the assisting teacher preps and provides the material needed to complete the craft. Both teachers circulate to help students complete their work as needed.
Activity Wrap-Up: One teacher leads the concluding discussion while the other teacher scribes students’ thoughts on the board. Both teachers support students in the reflection and “freeze, dance” game. The assisting teacher can help demonstrate the “snow” movements for the dance activity.
Weather Watchers

Activity

4:

Blurry Blizzards

By the end of the activity, students will be able to explain what blizzards are using key phrases from an informational text.

≥40

Minutes

1
Begin by asking students what they know about blizzards. Use prompting questions such as these:
What are blizzards?
What happens during blizzards?
Have you ever experienced a blizzard? How did you feel?
2
Show students images of blizzards from ImageQuest Jr., Britannica Library, or another royalty-free resource, and ask them to describe what they see.
3
Tell students that during today’s activity they will learn about blizzards through a paired reading activity, vocabulary exercise, and trivia game for review.
4
Provide each student with a copy of the Blizzard article, and as a class, read the headings and subheadings to predict what the article will be about.
5
Discuss the article’s general ideas together. Then instruct students to read the Blizzard article with an assigned partner. Consider pairing students with the person sitting next to them.
6
Summarize the main ideas from the article on the board, and write a list of new vocabulary words and phrases from the text.
7
Explain the Draw It, Write It instructional strategy, and provide each student with a graphic organizer and assigned words or phrases from the text to draw.
For example: blizzard, snowstorm, whiteout, snowdrifts, ground blizzards
8
Ask students to share their drawings and reflect on different images and sentences that each student came up with, or consider conducting a gallery walk where students display their drawings. Encourage peers to guess the word or phrase represented in each drawing before the artist reveals it.
9
Display and play Blizzard Trivia to review key concepts covered in the text. Use an interactive digital platform if available, or create a physical game board. Divide the class into small teams to promote collaboration.
10
Conclude by asking students to share what they learned about blizzards, and discuss how to stay safe in a blizzard.
Blizzard Safety Tips: Have students create a blizzard safety tips poster or mini book as a take-home activity to reinforce learnings and share with their families. This hands-on project enhances retention of safety information and promotes family engagement in emergency preparedness.
Guided Reading: Instead of reading in pairs, read as a whole group or in small guided reading groups. This approach allows for more focused instruction, enabling teachers to address diverse reading levels and provide immediate feedback, thus improving comprehension and fluency.
Blizzard Story: Ask students to write a creative story about a blizzard, including characters, setting, and a plot with a conflict and resolution. This creative writing exercise strengthens students’ narrative skills, encourages imagination, and helps them apply their knowledge about blizzards in an engaging, memorable way.
Parallel Teaching: For collaborative teaching and learning environments, this learning activity is well suited to a Parallel Teaching strategy. In this model, the class is divided into two groups, and each teacher delivers the same activity simultaneously to their group. This reduces the student-teacher ratio, allowing for more interaction and individualized attention. With smaller groups, students are more likely to participate actively and receive immediate feedback, which fosters a deeper understanding of the content and promotes a more engaging learning experience. Evidence suggests that small-group instruction leads to increased student engagement and improved academic outcomes.
Activity Introduction: One teacher introduces the activity topic and invites students to think about severe weather events such as blizzards through guided discussion and image exploration. The other teacher provides each student with a copy of the article. Both teachers guide students to skim the article for general ideas. Both groups then come together briefly to share initial thoughts before splitting again.
Guided Reading: The class is divided into two groups, and each teacher pairs their students and supports them in the reading as needed. Teachers can differentiate instruction based on reading levels within their groups, providing additional support or challenges as appropriate.
Draw It, Write It Strategy: Each teacher explains and supports their group of students in completing the Draw It, Write It graphic organizer. Teachers can circulate within their groups, offering individualized guidance and encouragement. They might also consider having students pair up to discuss their drawings before sharing with the larger group.
Activity Conclusion: Both student groups come together to play a trivia game, share their work, reflect on their learnings, and review key objectives with both teachers.
Weather Watchers

Activity

5:

Hurricanes and Tornadoes

By the end of the activity, students will be able to identify the similarities and differences between hurricanes and tornadoes.

≥40

Minutes

1
Begin the activity by drawing a large two-circle Venn diagram on a poster board. Explain to students that Venn diagrams help them compare the differences and similarities between two concepts.
2
Share that today they will be comparing and contrasting two types of windy storms: hurricanes and tornadoes. Ask students to share any prior knowledge they have about these storms.
3
Provide each student with a copy of the 2-Circle Venn Diagram graphic organizer, and ask them to write “hurricanes” in one circle and “tornadoes” in the other.
4
Prompt students to share what they know about each type of storm, and record their ideas on the Venn diagram on the poster board. Model how the diagram works, and instruct students to copy from the board.
5
Display images and videos of hurricanes and tornadoes from ImageQuest Jr., Britannica Library, or another royalty-free resource. Ask students to describe what they see, and record their ideas on the Venn diagram poster. Instruct students to write in their own diagrams as well.
6
Divide the class into two groups: the “Hurricanes” and the “Tornadoes.” Give each group a copy of their assigned article: the Hurricane article or the Tornado article.
7
Ask students to read their respective articles in small subgroups of three students. Display the following questions on the board:
What are hurricanes and tornadoes like?
How do hurricanes and tornadoes form?
How do people stay safe in a tornado or hurricane?
8
Encourage students to take notes and answer the guiding questions in their notebooks or on a piece of paper.
9
Lead the class in a knowledge exchange, and have each group present to the other group information that they learned from the article they read.
10
Record students’ ideas on the Venn diagram poster, and ask them to copy this information in their notebooks or on the piece of paper where they took notes in their subgroup.
11
As a class, reflect on the similarities that hurricanes and tornadoes share. For example, they are both windy, large, and powerful storms; they are destructive; they typically occur in the summer; and they are dangerous. Consider using pictures or symbols alongside words to reinforce concepts.
12
Conclude the activity by asking students to orally compare and contrast hurricanes and tornadoes using linking words such as both, similarly, but, and however.
Listening Comprehension: Ask students to listen to the Hurricane and Tornado articles instead of reading them in their groups. The option of listening to the text supports nonreaders and provides a different input for the information. This approach improves auditory processing skills and helps students with diverse learning styles, particularly benefiting those who struggle with reading or have visual impairments.
Hurricane Video: Ask students to watch the video found in the Hurricane article and write a few simple sentences about what they learned from the video. This video offers students the opportunity to engage with complex vocabulary and concepts and write independently about them. By combining visual learning with written expression, this activity enhances content retention and helps students develop crucial summarization skills.
Digital Devices: Instead of using paper copies of the articles, provide each student the opportunity to use digital devices and the articles’ interactive features. This fosters and builds digital literacy from an early age.
Parallel Teaching: For collaborative teaching and learning environments, this learning activity is well suited to a Parallel Teaching strategy. In this model, the class is divided into two groups, and each teacher delivers the same activity simultaneously to their group. This reduces the student-teacher ratio, allowing for more interaction and individualized attention. With smaller groups, students are more likely to participate actively and receive immediate feedback, which fosters a deeper understanding of the content and promotes a more engaging learning experience. Evidence suggests that small-group instruction leads to increased student engagement and improved academic outcomes.
Activity Introduction: One teacher leads the activity introduction by drawing a large two-circle Venn diagram on a poster board and helps students brainstorm the similarities and differences between hurricanes and tornadoes. The other teacher provides each student with a copy of the 2-Circle Venn Diagram graphic organizer and asks them to write “hurricanes” and “tornadoes” in their respective circles.
Exploration Phase: Both teachers display age-appropriate images and videos of hurricanes and tornadoes. They guide their groups in describing what they see, scribing ideas on their groups’ Venn diagrams.
Guided Reading: The class is divided into two groups, “Hurricanes” and “Tornadoes,” and each teacher asks students to read their respective articles in small subgroups of three students and complete their Venn diagrams. Each teacher supports their student groups.
Venn Diagram Completion: Each teacher supports their student group in completing their side of the Venn diagram. Teachers provide scaffolding appropriate to their students’ needs, such as sentence starters or picture cues.
Knowledge Exchange: The whole class comes together, and each teacher leads their students in presenting the information about their storm type.
Activity Conclusion: As a class, both teachers guide students to reflect on the similarities that hurricanes and tornadoes share. Both teachers conclude the activity by asking students to orally compare and contrast hurricanes and tornadoes using linking words.
© Encyclopædia Britannica, Inc. All rights reserved.