Lesson MINI

Britannica School logo in navy blue and green text

LESSON MINI

Animal Homes in the Ocean

Grade:

K-2

Topic:

Animals

Unit:

Animal Habitats
Eye icon in white on red background

Overview

A speckled moray eel peers out from coral reef underwater.
© Joana Villar—500px/Getty Images

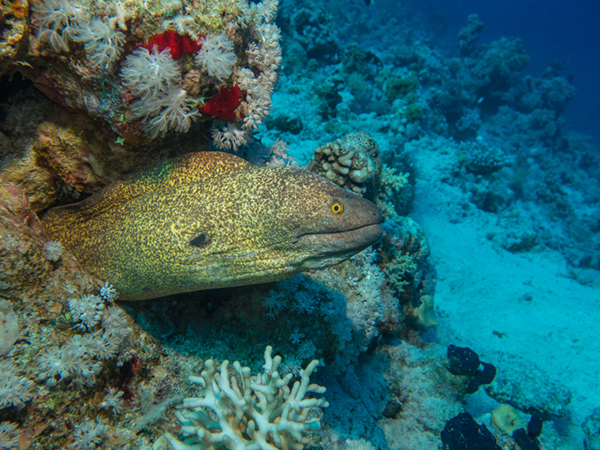
In this lesson mini, students learn about ocean habitats and some of the animals that live in them, focusing on the specific traits that help these animals survive. Students also develop their vocabulary and observational skills as they read articles, examine images, and engage in discussions and hands-on activities related to the study of ocean habitats and animals.

Ideas for Implementation
Science
Literacy
Library media
Learning centers
Intervention or enrichment
Interdisciplinary collaboration
Key Vocabulary & Definitions
anemone (noun): a kind of invertebrate ocean animal that has tentacles and looks like a flower
anglerfish (noun): a kind of deep-sea fish with a lure hanging over its head to attract food
coast (noun): the land where the sea meets the shore
deep sea (noun): a cold, dark habitat in the deepest parts of the ocean
habitat (noun): the place or type of place where a plant or an animal naturally or normally lives or grows
sea star (noun): a kind of ocean animal that has five or more arms spread evenly around its flat body and suckers that can help it stick to things
snail (noun): a kind of mollusk with a soft body and a hard shell
tide (noun): the regular daily rise and fall of Earth’s water
tide pool (noun): a small pool of water that is left when the ocean tide goes out
Authentic Learning Extensions
Authentic learning opportunities for studying ocean habitats involve real-world experiences and practical applications that help students understand ecological concepts meaningfully. Here are some examples:
Field Trips: Organize visits to local aquariums or beaches where students can see and interact with animals up close. These trips can help students observe animal traits and habitats in a real-world setting.
Plastic Bag Experiment: For this experiment, you’ll need a clear bucket, an aquarium, or another container filled with water, and a plastic grocery bag. Have students read the first paragraph of the section titled “The Life of Sea Turtles” in the Britannica School Sea Turtle article. Then have them read the “Sea Turtles and People” section. Highlight that sea turtles might eat and get sick from plastic bags. Have students guess why a sea turtle would eat a plastic bag. Listen to and affirm their answers. Show students the bucket of water, and put the plastic bag in it. Drag the plastic bag around the water, and let it go so that it floats and moves around. Remind students that leatherback sea turtles eat mostly jellyfish. They might think that a plastic bag is a jellyfish, eat it, and then get sick. After the activity, start a plastic bag collection campaign with your class, and make the bags you collect into art. Tell students that even trash that’s far away from the ocean can make its way there. Collecting plastic bags ensures that the bags don’t end up in a sea turtle’s habitat or belly.
Visit from a Marine Scientist: Invite a marine scientist, a marine veterinarian, or an aquarist to the classroom to interact directly with students. This offers students insights into animal care and research from a professional perspective and reinforces the importance of understanding ocean habitats in a real-world setting or in a career setting.

Choose Activity

3
Animal Homes in the Ocean

Activity

1:

Ocean Habitats

By the end of the activity, students will be able to match ocean animals to their habitats based on an informational text.

20-30

Minutes

Materials

Devices such as Chromebooks or tablets (one per student)
Markers or crayons (enough for students to share)
Whiteboard and display
Writing utensils

Resources

1
Tell students that during today’s activity they will read about where ocean animals live and then draw them into their respective habitats.
2
Introduce a habitat as the place or type of place where a plant or an animal naturally or normally lives or grows. To prompt thinking and activate prior knowledge, ask these or similar questions. Allow a moment for responses, and engage in a brief discussion of students’ ideas.
What are some animal habitats you can think of?
What is one habitat you’ve visited? What was it like? What animals did you see there?
3
Display the Comparing Ocean Habitats handout, and distribute a copy of the handout to each student. Tell students that the pictures show animal habitats.
4
Give students a moment to look at each image quietly. Then ask students to share what they notice about the images. Encourage students to consider the following:
How are these habitats the same?
How are they different?
5
Ask for volunteers to share their thoughts. As students share, affirm that these habitats are all ocean habitats, or places where animals usually live in or near the ocean. They are in different parts of the ocean, however, and different animals live in each one. Label each habitat on the displayed handout, and encourage students to label the habitats on their handouts as well.
6
Give each student an Ocean Habitats handout, and display one for the class. Tell students that this diagram shows a few ocean habitats and where you can find them in the ocean. Point to and name each ocean habitat. As you name a habitat, ask students to describe it:
What do you think might live in a tide pool? Why?
What do you notice about the coral reef?
Do you think it’s dark or light in the deep ocean? Warm or cold? Why?
Where do you think most ocean plants live? Why?
7
Separate students into pairs. Invite pairs to read and look at the following Britannica School resources:
Coast article, subsection titled “Coastal Animals”
Ocean article, section titled “Deep-Ocean Animals”
8
As students learn about animals in each habitat, have them draw the animals in the corresponding habitat on their handout. Tell students that if they don’t know what an animal looks like, they can search for it on Britannica School, ImageQuest Jr., or another approved royalty-free resource, or they can ask you for help finding a reference image.
9
When students have finished drawing, have them hold up their drawings. Invite a few volunteers to share the animals they added. Possible answers include the following:
Tide pool: sea anemones, snails, sea stars
Coast: crabs, clams, seabirds (sandpipers, puffins, gulls, pelicans), seals, sea lions, sea turtles laying eggs
Coral reef: sea turtles, fish, coral
Deep ocean: big shrimp, crabs, sea urchins, giant squid, anglerfish
10
To help students connect what they’ve learned to their own experiences and prior knowledge, consider asking the following questions:
Have you ever seen any of these animals in the wild? Where?
What are some other ocean animals you know of? Where do you think they live?
11
Summarize that there are many different habitats in the ocean. The animals that live in each habitat have special bodies and behaviors that help them live there.
Predict First: Before engaging with the activity, have students predict what animals might live in each habitat and justify their predictions. Then, as the activity is completed, students can think about whether or not their predictions proved correct. This method can encourage student engagement and bring to the surface students’ prior knowledge, enabling affirmation of accurate information or correction of any misconceptions about ocean habitats.
Compare and Contrast: Have students work in pairs or small groups to compare and contrast two animals living in the same habitat and two living in very different habitats. Encourage students to think about how these similarities and differences might be related to where the animals live. This method engages students in collaborative learning, fosters critical thinking, and helps students consider traits that enable animals to survive in their habitats.
Finish the Picture: Provide students with a cutout picture of an ocean animal. Show students pictures of the animal in its habitat or have them read about it. Then have students use art supplies to create a habitat for the animal, or use the Ocean Habitats handout, and then glue the animal onto its habitat. Display students’ artwork in your classroom.
Team Teaching: For collaborative teaching and learning environments, this learning activity is well suited to a Team Teaching strategy. In this model, sometimes referred to as “tag team teaching,” both teachers deliver instruction together, often alternating or integrating their teaching styles seamlessly. This collaborative approach provides students with multiple perspectives and teaching styles, enriching their learning experience. By modeling effective teamwork and communication, this approach demonstrates how different viewpoints can enhance understanding and create a dynamic and interactive classroom environment. Evidence indicates that team teaching can enhance student engagement and provide a richer, more diverse educational experience.
Activity Introduction to Ocean Habitats: One teacher introduces habitats and engages students in discussing ocean habitats. The other teacher listens, affirms ideas, and summarizes that there are many different ocean habitats. Some animals live in only one habitat, while other animals can live in a few different habitats.
Drawing Activity: Both teachers walk around and support students as they read, observe, and draw, helping students find additional images as needed.
Activity Wrap-Up: One teacher asks the wrap-up questions. The other teacher models answers to the questions if needed and summarizes that there are many different habitats in the ocean. The animals that live in each habitat have special bodies and behaviors that help them live there.
Animal Homes in the Ocean

Activity

2:

Tide Pool Test

By the end of the activity, students will be able to explain how tide pool animals adapt to the changing tide.

20-30

Minutes

Materials

Images of tide pools and tide pool animals (e.g., crabs, snails, anemones, sea stars, small fish, seaweed)
Plastic bin (one, 10–15 quarts)
Plastic figurines of plants and sea animals, or figurines that could represent crabs, anemones, snails, and sea stars
Rocks (about 10, various sizes)
Sand (enough to cover the bottom of the bin)
Water in a pitcher (enough to cover the plastic animals placed in the bin, representing high tide)
Whiteboard and display

Resources

1
Tell students that during today’s activity they will conduct an experiment to demonstrate how rising tides affect tide pools and the animals that live there.
2
Show students a few images of tide pools from Britannica School, ImageQuest Jr., or another classroom resource. Ask students the following or similar questions:
What do you think a tide pool is?
Where can you find tide pools?
Are tide pools underwater or above water? Are they always underwater?
What kinds of animals might live in tide pools?
3
Tell students that tide pools are small pools of water that are left when the ocean tide goes out. Tides are rising and falling water along the coast, where the ocean and the land meet. When the water is highest, it is high tide. More of the land is covered by water. When the water is lowest, it is low tide. Less of the land is covered by water, but some small pools of water may be left behind. These are tide pools. They’re kind of like ocean puddles. Ask the following questions to get students thinking about tide pools as animal habitats:
What do you think happens to animals in tide pools when the tide changes?
Do you think it would be easy or difficult to live in a tide pool? Why?
4
Invite students to learn more about tides by reading the “Introduction” and “High Tide and Low Tide” sections of the Tide article. While reading the article, pause to highlight relevant information about tides and define any challenging vocabulary. Point out how the information students are reading is reflected in the images in the article.
5
Play the Rising Tide video for the whole class. Point out how the water is rising up over the land. Ask students to answer this question based on what they read: “What do you think we would see if the video kept going?” Listen to and affirm students’ answers. Confirm that the tide will go back out for low tide. This cycle of tides going in and out happens over and over again.
6
Rewind the video to the beginning. Point out that at low tide there is water trapped in low areas away from the ocean. Those are tide pools, and animals and plants live there.
7
Tell students that now they’ll read about the animals that live in areas affected by tides, including in tide pools. When they hear an animal’s name, they should stand up. Then the class will listen carefully to how the animal responds to the changing tide.
a)
Have a volunteer read the “Animals and the Tides” section of the Tide article, or play it using the Read Aloud feature.
b)
When students stand up, ask them which animal name they heard. Then read the sentence describing that animal’s adaptation to the tides.
c)
For the last two animals mentioned (anemones, snails), ask students to think about how these animals might be able to live in tide pools (e.g., anemones attach themselves to rocks so they don’t get washed away; snails have hard shells to hide in for protection).
8
Tell students that, as a class, they will work together to make their own tide pool model to see how the changing tides affect the animals. Invite students to sit around a display table that contains the contents needed for the steps below:
a)
Invite students to pour sand and arrange rocks at the bottom of the bin. Encourage students to make some areas taller than others. This will form the bottom of the tide pool.
b)
Invite students to arrange the plant and animal figurines around the tide pool. Encourage them to think about where the article said crabs and sea stars like to live. Be sure that some animals are placed in higher spots than others.
c)
Have a student volunteer pour enough water into the bin to model low tide, the lowest level the water falls back to each day. A few of the animal figurines should be at least partially covered with water, but others should be completely out of the water.
d)
After the water reaches the desired low-tide level, tell students that next they will pour water into the bin to model the rising tide. Ask students to guess what will happen to the animals when they pour the water into the bin: “Which animals will get wet first when the water comes in?” “Which animals will stay dry longest?” “How do you know?”
e)
Have a student volunteer slowly pour water into the bin, noting which animals get wet first and which ones stay dry the longest. Summarize that while most animals were dry at low tide, some of the tide pool animals were still partially underwater. As the tide came in, however, more animals were covered with water.
f)
Invite students to pour in another pitcher of water, modeling the continuation of the rising tide. Continue to discuss as more water is poured until most or all animals are underwater. Summarize that most or all animals are underwater at high tide.
9
Remind students of which animals they thought would get wet first. If students guessed correctly, congratulate them on their guess. If students guessed incorrectly, celebrate learning something new.
10
If you have extra time, have students remove water from the tide pool one cup at a time to simulate the tide going back out again. Note how the animals that were the first to get wet are the last to get dry. Emphasize that this cycle usually happens twice a day. All over the world right now, some tides are going in and some tides are going out.
11
To gauge student learning and reinforce key concepts, ask students these questions about tide pools:
What is a tide pool?
How do tide pools change throughout the day?
What kinds of animals live in tide pools?
What do animals do to stay safe and wet when the tide changes?
12
To wrap up, summarize what students learned during the activity, sharing that tide pools are ocean habitats on the coast. The water goes in and out with the tide, so sometimes tide pools are above water, and sometimes they’re underwater. When the tide goes out, some crabs burrow under the sand to stay wet. Sea stars attach themselves to rocks so they don’t get swept out to sea.
Guided Reading Groups: When students are ready to read the article, arrange them into small groups by reading level. If possible, assign a teacher to each group to observe readers, discuss the text, and work through any challenging words with their group. Then bring the class back together to debrief. This technique allows you to offer individualized support for each student.
Gradual Release of Responsibility: Consider allowing students to create their own tide pools and conduct their experiments in small groups. You can work through the instructions as a class, pausing to give students time to complete each step, or print simple instructions for students to follow independently. This gives students ownership over their experiments and the opportunity to grow their executive functioning and interpersonal skills.
Tide Pool Diagram: Draw a picture of a tide pool, including sand, rocks, plants, and animals, as if you are looking at it directly from the side. Make enough copies of your drawing for each student to have a copy. Have students simulate the tide coming in by drawing a thick blue line across the bottom of the tide pool using a blue marker or highlighter. Discuss which animals are underwater and record them on the handout. Draw another thick blue line above the original line, and pause to discuss which animals are underwater. Continue adding lines, discussing, and recording which animals are underwater.
Tide Pool Acting: Read the Tide article, and watch the Rising Tide video. Tell students that changing tides can be dangerous for animals that could dry up when the tide goes out or be swept away by the changing water. Invite students to act out the different ways that animals survive the changing tides. Once students have practiced all of these positions, tell them that it’s time for a game. You’ll call out one of the animals listed below. Students should quickly do what that animal does to survive before the tide changes. If they take too long, they could dry out or be swept away by the tide! Play as long as time allows. This activity supports kinesthetic learners by making the learning process interactive and memorable.
Crab: Some crabs burrow in the sand to avoid drying out during low tide. Invite students to pretend to dig in the ground and then crouch down as if they’re burrowed into the sand.
Snail: Some snails hide in their shells to avoid drying out during low tide. Invite students to crouch down and pull in their limbs, as if they’re hiding in a shell.
Anemone: Anemones attach themselves to rocks with a single sticky foot, so they don’t get swept away by the water. They sometimes slide over the rocks to hide in rock crevices to avoid drying out in the sun during low tide. Invite students to slide to hide under or around something in the classroom.
Sea star: Sea stars attach themselves to rocks and other surfaces using suction cups on the bottom of their arms to avoid being swept away by water as it comes and goes. Have students attach themselves to something in the room with their arms and legs out.
Parallel Teaching: For collaborative teaching and learning environments, this learning activity is well suited to a Parallel Teaching strategy. In this model, the class is divided into two groups, and each teacher delivers the same activity simultaneously to their group. This reduces the student-teacher ratio, allowing for more interaction and individualized attention. With smaller groups, students are more likely to participate actively and receive immediate feedback, which fosters a deeper understanding of the content and promotes a more engaging learning experience. Evidence suggests that small-group instruction leads to increased student engagement and improved academic outcomes.
Animal Homes in the Ocean

Activity

3:

Anglerfish Art

By the end of the activity, students will be able to demonstrate how anglerfish catch prey in their deep-ocean habitat.

30-40

Minutes

Materials

Construction paper, markers, and crayons
Copy paper (one half sheet per student)
Glue
Paper plates (one per student), with an outline of a pie slice shape making up about one-fifth of the circle
Picture or drawing of a small fish, cut out (one per student and one for teacher display)
Pipe cleaners (one per student)
Pom-poms (small, one per student)
Scissors
Whiteboard and display

Resources

Prepare for the Activity: Create a model of the anglerfish craft by following the Anglerfish Craft Instructions.
1
Tell students that during today’s activity they will read about how anglerfish survive in the deep ocean and then create a working model of an anglerfish.
2
Show students a few pictures of deep-ocean anglerfish with glowing lures from Britannica School, ImageQuest Jr., or another classroom resource. Ask students the following questions about the pictures:
Where do you think these anglerfish live in the ocean? Why do you think that?
What makes anglerfish special?
Why do you think anglerfish in the deep ocean have lights?
3
Tell students they will look for the answers to these questions in a short article about anglerfish. Encourage students to listen carefully for information in the article about how anglerfish use their light. Read, or have a volunteer read, the “Deep-Ocean Animals” section of the Ocean article aloud, or play it using the Read Aloud feature.
4
Revisit the above questions, asking students to update their responses after reading the passage. Listen to and affirm students’ responses. Summarize that most anglerfish live in the deep ocean, also called the deep sea. It’s very dark there, so deep-sea anglerfish make their own light. They have a glowing lure on their heads that helps them attract fish to eat.
5
Tell students that today they will make their own deep-sea anglerfish. Then they’ll use their artwork to show how anglerfish eat.
6
Display the pictures of anglerfish again. Display the Anglerfish Craft Instructions, and give students the craft materials. Guide them through the steps to make their anglerfish.
7
Have students cut out and decorate smaller fish using the leftover craft supplies, or give each student a small cutout fish picture.
8
Tell students it’s time to show how anglerfish eat. Describe how anglerfish eat as you demonstrate with your own anglerfish.
9
Next, narrate, but do not demonstrate, how the anglerfish eats. Have students move their fish according to your description. You might also have students turn to a partner and practice together.
10
Discuss anglerfish with students, perhaps asking the following questions to deepen their thinking:
Do you think it would be easy or hard to live in the deep sea? Why?
There isn’t a lot of food or light in the deep sea. How do anglerfish catch food?
11
Summarize the activity by pointing out that the deep sea can be a challenging place to live. It’s dark and cold there, and there isn’t a lot of food. Animals that live in the deep sea, such as anglerfish, have special bodies and behaviors that help them survive there.
Critical Analysis: Remind students that living in the deep ocean isn’t easy. It’s cold and dark, and there isn’t a lot of food. Invite students to discuss how other animals might survive in the deep ocean by observing the Cock-Eyed Squid video and the Vampire Squid video. After each video, discuss how the animal might survive in its habitat. You can ask questions such as the ones in the examples below. Play the videos again if needed. This activity fosters research skills, critical thinking, and a deeper understanding of biology and ecology.
How does the vampire squid move underwater?
How do you think the vampire squid eats the food it catches?
Why do you think the cock-eyed squid has such big eyes?
Stop-Motion Anglerfish: Invite students to make a stop-motion movie about anglerfish using their anglerfish crafts. Have students arrange and take a picture of their anglerfish in each of the positions described in the activity. If desired, they can take additional pictures as the small fish gets closer to the anglerfish’s mouth. Then they can put each picture on a slide. Moving through the slides quickly will make a short video of the anglerfish eating its prey.
Article in the Dark: Tell students that they are going to listen to some information about the deep ocean. Because the deep ocean is dark, turn off the lights so that students can imagine it. Ensure that all students feel comfortable with the lights off in your classroom.
Close the blinds and turn off the lights so that your classroom is as dark as possible.
Use the Read Aloud feature to play the first paragraph of the “Deep-Ocean Animals” section of the Ocean article. Tell students to listen for what kinds of animals live in the deep ocean.
After the first paragraph, give each student a flashlight. Tell students that now they’ll learn about one deep-ocean animal that makes its own light. Have students turn on their lights, and instruct them to point their lights only at the ground.
Use the Read Aloud feature to play the second paragraph. As students continue to experiment with their lights, ask the following questions: “How do anglerfish make their own light?” “Why do other fish swim into the anglerfish’s mouth?” “Some kinds of anglerfish who live closer to the surface don’t make their own light. Why do you think that is?”
Parallel Teaching: For collaborative teaching and learning environments, this learning activity is well suited to a Parallel Teaching strategy. In this model, the class is divided into two groups, and each teacher delivers the same activity simultaneously to their group. This reduces the student-teacher ratio, allowing for more interaction and individualized attention. With smaller groups, students are more likely to participate actively and receive immediate feedback, which fosters a deeper understanding of the content and promotes a more engaging learning experience. Evidence suggests that small-group instruction leads to increased student engagement and improved academic outcomes.
Animal Homes in the Ocean

Activity

4:

Minutes

Materials

copy text here
copy text here
copy text here

Resources

Prepare for the Activity:
1
copy text here
2
copy text here
3
copy text here
a)
copy text here
TEXT BLOCK: Lorem ipsum dolor sit amet, consectetur adipiscing elit, sed do eiusmod tempor incididunt ut labore et dolore magna aliqua. Ut enim ad minim veniam,
Lorem ipsum dolor sit amet, consectetur adipiscing elit, sed do eiusmod tempor incididunt ut labore et dolore magna aliqua. Ut enim ad minim veniam, quis nostrud exercitation ullamco laboris nisi ut aliquip ex ea commodo consequat. Duis aute irure dolor in reprehenderit in voluptate velit esse cillum .
copy text here
copy text here
copy text here
Animal Homes in the Ocean

Activity

5:

Minutes

Materials

copy text here
copy text here

Resources

Prepare for the Activity:
1
copy text here
2
copy text here
3
copy text here
a)
copy text here
TEXT BLOCK: Lorem ipsum dolor sit amet, consectetur adipiscing elit, sed do eiusmod tempor incididunt ut labore et dolore magna aliqua. Ut enim ad minim veniam,
Lorem ipsum dolor sit amet, consectetur adipiscing elit, sed do eiusmod tempor incididunt ut labore et dolore magna aliqua. Ut enim ad minim veniam, quis nostrud exercitation ullamco laboris nisi ut aliquip ex ea commodo consequat. Duis aute irure dolor in reprehenderit in voluptate velit esse cillum .
copy text here
copy text here
Lorem ipsum dolor sit amet, consectetur adipiscing elit, sed do eiusmod tempor incididunt ut labore et dolore magna aliqua. Ut enim ad minim veniam, quis nostrud exercitation ullamco laboris nisi ut aliquip ex ea commodo consequat. Duis aute irure dolor in reprehenderit in voluptate velit esse cillum .
copy text here
copy text here
copy text here
© Encyclopædia Britannica, Inc. All rights reserved.